Butterfinger Rice Krispie Treat with Chocolate
- Time:15 minutes active + 15 minutes setting = Total 30 minutes
- Flavor/Texture Hook: Salty sweet shatter with a chewy center
- Perfect for: Birthday parties, bake sales, or late night cravings
- Butterfinger Rice Krispie Treat with Chocolate
- Why the Textures Work
- The Component Analysis
- Gathering Your Essentials
- Necessary Kitchen Tools
- Step by Step Process
- Fixing Common Texture Issues
- Troubleshooting Common Issues
- Alternative Ingredient Options
- Adjusting the Batch Size
- Common Sweet Treat Myths
- Storage and Waste Tips
- Serving and Pairing Ideas
- Recipe FAQs
- 📝 Recipe Card
Butterfinger Rice Krispie Treat with Chocolate
That scent of melting butter and toasted sugar always takes me back to my grandma's kitchen during the holidays. Back then, Rice Krispie treats were the undisputed king of the American potluck, a symbol of childhood nostalgia and simple, sugary joy.
They represent a specific kind of comfort, the kind you find in a plastic container at a school fair or a family reunion.
But let's be real, the standard version can sometimes feel a bit one dimensional. I wanted something with more bite and a deeper flavor profile. By adding the salty, jagged shards of Butterfinger candy and a rich chocolate layer, we turn a childhood snack into a bakery worthy dessert bar.
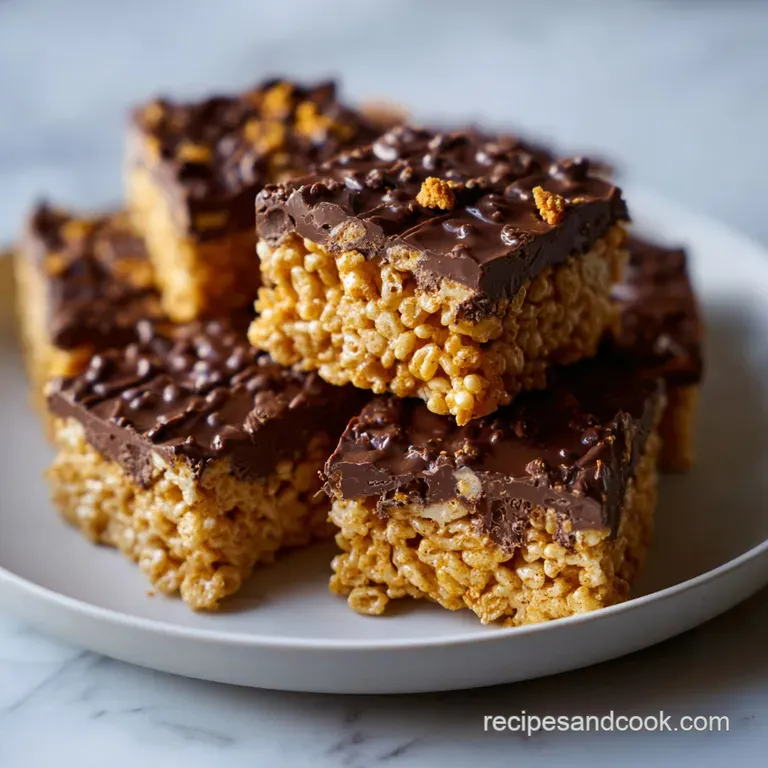
This Butterfinger Rice Krispie Treat with Chocolate is all about the contrast. You get the light, airy snap of the cereal, the sticky pull of the marshmallows, and that sudden, sharp crunch of peanut butter candy. It's a textural playground that keeps you coming back for another square.
Why the Textures Work
- The Sugar Glue: Marshmallows are essentially stabilized sugar and gelatin. When melted, they form a tacky syrup that coats the cereal without soaking into it, keeping the cereal crisp.
- Fat Interference: Butter prevents the sugar from forming a hard, candy like shell, ensuring the treat stays chewy rather than rock hard.
- The Gloss Factor: Coconut oil lowers the melting point of the chocolate. This means the topping doesn't crack aggressively but instead gives way with a smooth, velvety glide.
- Airy Structure: The puffed rice provides structural gaps, which stop the dense candy pieces from making the bars too heavy.
| Method | Prep Time | Texture | Best For |
|---|---|---|---|
| Fresh Melted | 15 minutes | Chewy & Airy | Parties & Gifts |
| Pre made Bars | 2 minutes | Dense & Stale | Quick Cravings |
| Oven Baked | 30 minutes | Toasted & Firm | Texture Lovers |
The Component Analysis
| Ingredient | Science Role | Pro Secret |
|---|---|---|
| Unsalted Butter | Moisture & Plasticity | Use a non stick pot to prevent sugar burning |
| Mini Marshmallows | Structural Binder | Don't overheat or they'll turn into bricks |
| Rice Krispies | Aeration & Crunch | Add them last and stir quickly |
| Coconut Oil | Chocolate Fluidity | Prevents the chocolate from seizing |
Gathering Your Essentials
For this recipe, quality matters, especially with the chocolate. I prefer semi sweet chips because they cut through the intense sweetness of the marshmallows. If you use milk chocolate, it might feel a bit too sugary.
- 4 tbsp (57g) unsalted butter Why this? Provides the fat needed for a chewy texture
- 10 oz (283g) mini marshmallows Why this? Melts faster and more evenly than large ones
- 6 cups (540g) Rice Krispies cereal Why this? Classic puffed rice for maximum airiness
- 2 Butterfinger bars (100g), coarsely chopped Why this? Adds the signature salty peanut crunch
- 1 cup (170g) semi sweet chocolate chips Why this? Balances the sugar with a hint of bitterness
- 1 tbsp (14g) coconut oil Why this? Keeps the glaze smooth and glossy
- 1/4 cup (30g) chopped Butterfinger Why this? Used for the final color accent on top
If you're looking for other crunchy snacks, you might like my cinnamon sugar mix for a different kind of treat.
Necessary Kitchen Tools
You don't need a fancy setup, but a few specific tools make this foolproof. A large non stick pot is non negotiable; otherwise, you'll spend twenty minutes scrubbing burnt marshmallow off the bottom.
I also recommend a silicone spatula. It's flexible enough to scrape every last bit of chocolate from the bowl and gentle enough to fold in the cereal without crushing the puffs. Finally, parchment paper is your best friend here.
Greasing a pan is fine, but parchment allows you to lift the entire block out for clean, professional cuts.
Step by step Process
- Line a 9x9 inch baking pan with parchment paper, leaving an inch of overhang on the sides. Note: This makes removal effortless.
- Place the butter in a large non stick pot over low heat until completely melted.
- Add the marshmallows, stirring constantly until smooth and velvety.
- Remove from heat and quickly stir in the Rice Krispies cereal until coated.
- Gently fold in the chopped Butterfinger bars. Note: Don't overmix or the candy will break down.
- Press the mixture into the prepared pan using a lightly greased spatula; press gently to avoid compacting.
- Combine chocolate chips and coconut oil in a microwave safe glass bowl.
- Microwave in 30 second intervals, stirring in between, until glossy and smooth. Note: Follow Serious Eats guides for melting chocolate without burning it.
- Spoon the chocolate over the treats, spreading evenly to the edges.
- Sprinkle with the remaining Butterfinger bits and let set for 10 minutes.
Chef's Tip: To get the best color balance, focus on the "Golden Trio": the deep mahogany of the chocolate, the pale ivory of the marshmallow swirls, and the bright gold of the Butterfinger shards on top.
Fixing Common Texture Issues

One of the biggest complaints with homemade cereal treats is that they end up too hard. This usually happens because the sugar in the marshmallows has been overheated, turning it into a hard candy. Keep your heat low and move fast.
Another issue is "the squeeze." If you press the mixture into the pan too firmly, you lose all those lovely air pockets, and the treats become dense and rubbery. Think of it as filling a bed, not packing a suitcase.
Troubleshooting Common Issues
| Issue | Solution |
|---|---|
| Why Your Treats Are Hard | If the bars feel like bricks, you likely cooked the marshmallows too long. Once they are melted, get them off the heat immediately. |
| Why the Chocolate Cracked | If the chocolate shatters into shards instead of a smooth snap, you probably skipped the coconut oil. The oil provides the necessary flexibility. |
| Why the Bars Are Greasy | Excess butter or oil can leak out. Ensure your butter is melted but not browned, and use exactly 1 tbsp of oil. |
Texture Success Checklist:
- ✓ Butter melted on low heat only.
- ✓ Cereal folded in gently.
- ✓ Mixture pressed lightly into pan.
- ✓ Chocolate melted in 30 second increments.
Alternative Ingredient Options
Sometimes you don't have every item on hand, or you need to tweak the recipe for guests. The goal is to maintain the fat to sugar ratio so the bars stay chewy.
If you're avoiding peanuts, you can swap the Butterfinger for crushed pretzels and a bit of peanut free butter (like almond or soy butter). For a different flavor profile, try swapping the semi sweet chocolate for white chocolate, though you'll want to add a pinch of salt to balance the sweetness.
| Original Ingredient | Substitute | Why It Works |
|---|---|---|
| Butter (4 tbsp) | Coconut Oil (solid) | Similar fat content. Note: Adds a slight coconut hint |
| Semi Sweet Chips | Dark Chocolate (70%) | More bitterness. Note: May require 1 tsp extra oil for flow |
| Rice Krispies | Corn Flakes | Extra crunch. Note: Denser texture than puffed rice |
| Marshmallows | Vegan Marshmallows | Similar bind. Note: May melt slightly slower |
Depending on the mood, you can serve these with a side of homemade whipped cream for a truly decadent platter.
Adjusting the Batch Size
If you're making these for a small group, you can easily halve the recipe. Use a 4x4 or 5x5 inch mini pan. When halving, use 2 tbsp of butter and 5 oz of marshmallows. I recommend beating one egg if you were making a baked version, but for this no bake treat, just weigh your marshmallows.
For a massive party, doubling the recipe is fine, but don't do it in one pot unless you have a professional grade stockpot. It's much easier to work in two batches. If you double it, increase the salt slightly (just a pinch) to keep the flavors popping, and use a 9x13 inch pan.
Common Sweet Treat Myths
Some people believe you need to "toast" the cereal first for a better flavor. While this can add a nutty note, it often makes the cereal more fragile, meaning it collapses when you stir in the marshmallows. Stick to the fresh cereal for that iconic snap.
Another myth is that you should use a high heat to melt marshmallows faster. Trust me, don't do this. High heat scorches the sugar and leads to those "brick" treats I mentioned earlier. Low and slow is the only way to achieve a velvety binder.
Storage and Waste Tips
These treats stay fresh at room temperature for about 3 days if kept in an airtight container. However, I prefer keeping them in the fridge for up to a week; the chocolate stays snappy, and the center gets a bit fudgier.
For long term storage, you can freeze them for up to 2 months. Wrap each bar individually in parchment paper and then place them in a freezer bag. When you're ready to eat, let them thaw at room temperature for 15 minutes.
To avoid waste, don't throw away the little "crumbles" left in the pot. I usually toss them into a bowl of vanilla ice cream for a quick, crunchy topping. If you have leftover chocolate, freeze it in small drops to use as decorations for other desserts.
Serving and Pairing Ideas
Since this is a very sweet dessert, you need something to cut through the richness. A cold glass of whole milk is the classic choice, but a bitter espresso or a strong black tea works wonders. The tannins in the tea help cleanse the palate between bites of peanut butter and chocolate.
If you're putting together a dessert platter, contrast these bars with something tart, like fresh raspberries or sliced Granny Smith apples. You could even serve them alongside some savory nuts or a cinnamon sugar mix to create a variety of textures.
For a showstopping presentation, cut the bars into thin rectangles rather than squares. This exposes the layers of marshmallow and candy, making them look like they came from a professional pastry shop. Arrange them on a slate board and dust the whole platter with a tiny bit of cocoa powder for a moody, elegant look.
Recipe FAQs
Why are my treats too hard?
You likely cooked the marshmallows too long. Remove them from the heat immediately once they are smooth and velvety to maintain a chewy texture.
Is it true the coconut oil is optional for the chocolate topping?
No, this is a common misconception. The oil provides necessary flexibility, preventing the chocolate from shattering into shards when you bite into it.
How long do these treats stay fresh?
Up to one week in the fridge. They also stay fresh at room temperature for about 3 days if stored in an airtight container.
How to press the mixture into the pan?
Use a lightly greased spatula to press gently. Avoid compacting the mixture too firmly to keep the bars light. If you enjoyed mastering texture control here, see how it works in our sweet potato hashbrowns.
Can I use white chocolate instead of semi sweet?
Yes, it works well. Simply add a pinch of salt to the chocolate to balance the extra sweetness of the white chocolate.
How to melt the chocolate topping?
Microwave in 30-second intervals in a glass bowl. Stir between each interval until the chocolate chips and coconut oil are glossy and smooth.
Is it true I should stir the Butterfinger pieces vigorously to distribute them?
No, this is a common misconception. Gently fold in the chopped bars to ensure the candy doesn't break down during the process.
Butterfinger Rice Krispie Treats

