No Knead Sandwich Rolls: Soft and Golden
- Time:20 mins active + 12 hours 20 mins resting = Total 12 hours 40 mins
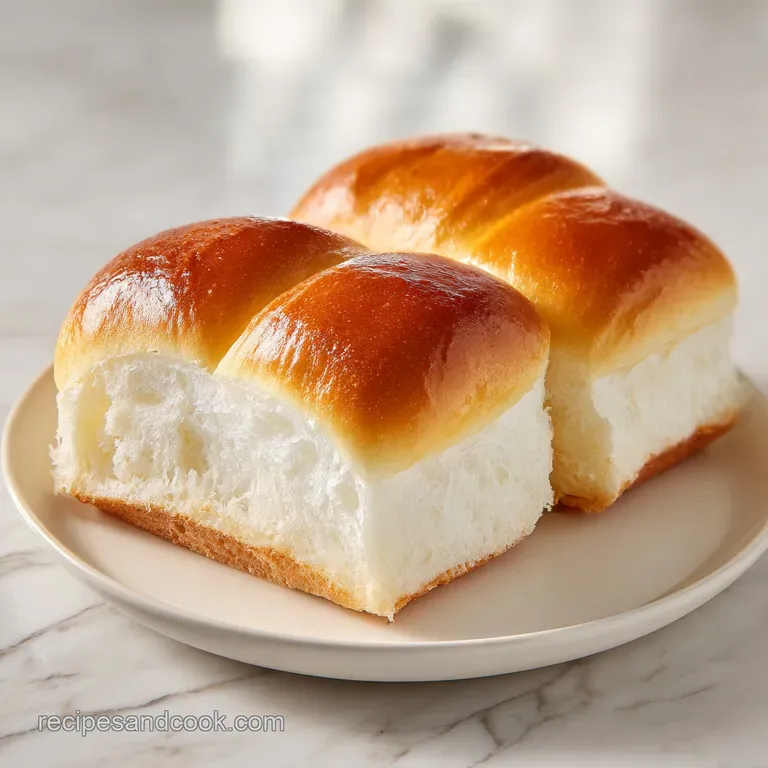
- Flavor/Texture Hook: Mahogany gold crust with a pillowy, airy center
- Perfect for: Weekend meal prep or hosting a crowd with bakery worthy rolls
No Knead Sandwich Rolls: The Easiest Homemade Bread
The smell of fresh bread hitting the air is a total sensory trigger. It's that warm, yeasty aroma that makes your whole house feel like a cozy bakery. I remember the first time I tried a no knead approach.
I was skeptical that skipping the arm workout of traditional kneading would actually work, but when I pulled those rolls out of the oven, the crust had a beautiful shatter and the inside was velvety.
This is the only recipe you need for No Knead Sandwich Rolls: The Easiest Homemade Bread. You don't need a fancy stand mixer or years of experience. We're basically letting time and chemistry do the work for us.
It's an approachable way to get professional results without the stress of wondering if you've "worked the dough enough."
You can expect rolls that are sturdy enough for a loaded sub but soft enough to melt in your mouth. Whether you're prepping for a big game day or just want to stop buying store-bought buns that taste like cardboard, this is your new secret weapon.
Trust me on this, once you see how little effort this takes, you'll never go back to the bakery aisle.
The Power of Time
I used to think that if I wasn't sweating over a counter for twenty minutes, the bread wouldn't be "real." But here is the thing: time is actually a substitute for muscle. When you let dough sit for 12 to 18 hours, the gluten bonds form on their own.
Slow Gluten Development: The water and flour bond slowly over hours, creating a strong network without any kneading.
Flavor Depth: Long fermentation allows the yeast to create complex organic acids, which gives the bread a more nuanced, bakery style taste.
Air Pocket Creation: Because the dough isn't compressed by heavy kneading, the CO2 bubbles stay larger, leading to a lighter, airier crumb.
Easier Digestion: The extended rise time gives enzymes more time to break down starches, making the final bread gentler on the stomach.
| Method | Time | Texture | Best For |
|---|---|---|---|
| Traditional | 3 hours | Dense/Chewy | Artisan loaves |
| No Knead | 12+ hours | Pillowy/Airy | Sandwich rolls |
| Quick Rise | 1 hour | Spongy | Emergency buns |
Quick Project Details
Before we get into the flour, let's look at the numbers. This is a slow burn recipe, so planning is key. If you want rolls for lunch tomorrow, you need to mix your dough tonight.
The total time is 12 hours 40 mins, but the actual "work" is only 40 minutes split between the start and the finish. It's a brilliant way to get high impact results with low impact effort.
Chef's Note: If your kitchen is very cold, the dough might take closer to 18 hours to double. Don't rush it. If you see those little bubbles on the surface, you're in the green zone.
The Essential Pantry List
You don't need exotic ingredients here. We're using basics, but the quality of the flour matters. For these, I highly recommend bread flour over all purpose. According to King Arthur Baking, bread flour has a higher protein content, which is what gives the rolls their structural integrity and that classic chew.
Dough Components
- 3 cups (375g) bread flour Why this? Higher protein for better structure
- 1 1/2 cups (355ml) warm water Why this? Activates yeast and hydrates flour
- 1 tsp (5g) instant yeast Why this? Faster, more reliable than active dry
- 1 1/2 tsp (9g) fine sea salt Why this? Controls yeast and adds flavor
- 1 tsp (4g) honey Why this? Feeds yeast and browns the crust
The Finishing Touch
- 1 tbsp (14g) melted unsalted butter Why this? For a velvety, golden top
- 1 pinch (1g) flaky sea salt Why this? Adds a professional, salty pop
| Original Ingredient | Substitute | Why It Works |
|---|---|---|
| Bread Flour | All Purpose Flour | Works, but the rolls will be softer and less "springy" |
| Honey | Maple Syrup | Similar sugars and moisture; adds a slight woody note |
| Unsalted Butter | Olive Oil | Same fat content. Note: Changes flavor to more savory/Mediterranean |
Essential Baking Tools

You can get away with very little here, which is why I love this recipe. You don't need a professional kitchen to make bakery worthy bread.
First, a large mixing bowl is a must. Make sure it's bigger than you think you need, because the dough will double in size. A plastic wrap or a tight lid is essential to keep the dough from drying out during its long nap.
For the bake, a standard baking sheet and parchment paper are your best friends. The parchment prevents the bottoms from sticking and makes cleanup a breeze. If you have a digital scale, use it.
Measuring flour by weight (375g) is much more foolproof than using cups, which can vary depending on how tightly you pack the flour.
The Baking Method
Let's crack on. This process is split into the "set it and forget it" phase and the final shaping.
Mixing the Dough
- Combine the bread flour, instant yeast, and fine sea salt in a large mixing bowl. Note: Mixing dry ingredients first ensures the salt doesn't touch the yeast directly in high concentrations.
- Stir in the warm water and honey until a shaggy, sticky dough forms and no dry flour pockets remain. until the dough is tacky but combined.
The Long Wait
- Cover the bowl tightly with plastic wrap and leave at room temperature for 12 to 18 hours until the dough has doubled in size and the surface is dotted with bubbles.
Shaping the Rolls
- Gently scrape the dough onto a floured surface and divide into 8 equal portions. Note: Use a bench scraper or knife for clean cuts.
- Fold the edges of each portion toward the center and roll into cylinders approximately 5 inches long. until the surface is smooth and tight.
- Place rolls on a parchment lined baking sheet, leaving 2 inches of space between them, and let rest for 30 minutes.
The Oven Bake
- Preheat the oven to 400°F (200°C).
- Brush the tops of the rolls with melted unsalted butter.
- Bake for 18–22 minutes until the crust is a deep mahogany colored gold and the bottom sounds hollow when tapped.
- Remove from the oven and immediately sprinkle with flaky sea salt.
Fixing Common Dough Issues
Even with a foolproof recipe, sometimes things go sideways. Usually, it's just a matter of temperature or humidity.
Dough Too Sticky
If the dough feels like glue when you try to shape it, you might have high humidity in your kitchen. Don't panic and dump in a cup of flour, or you'll end up with bricks. Instead, flour your hands and the surface generously.
Rolls Not Rising
If the dough didn't double after 18 hours, your yeast might be dead or your water was too hot. Warm water should feel like a baby's bath, not boiling. If it's too hot, it kills the yeast instantly.
Crust Too Hard
A crust that is too tough usually means the oven was too dry or they baked a few minutes too long. Try placing a small pan of water on the bottom rack next to the rolls to create a bit of steam.
| Problem | Root Cause | Solution |
|---|---|---|
| Flat Rolls | Over proofed dough | Reduce first rise by 2 hours |
| Pale Crust | Oven temp too low | Check oven with a thermometer |
| Dense Center | Under baked | Bake 2-3 mins longer; check for hollow sound |
- ✓ Pat your hands with flour before shaping to avoid sticking.
- ✓ Use a thermometer to ensure water is between 105°F and 115°F.
- ✓ Don't overcrowd the pan or the sides won't brown.
- ✓ Let rolls cool for 10 minutes before slicing to set the crumb.
- ✓ Check the "hollow sound" by tapping the bottom of the roll.
Customizing Your Loaves
Once you've mastered the base, you can start playing with flavors. This dough is a blank canvas. For a savory twist, you can fold in some dried rosemary or garlic powder during the initial mix.
If you're feeling adventurous, try adding a handful of shredded mozzarella to the dough. It creates those little pockets of melted cheese that are absolutely brilliant. For those who love other yeast projects, you might enjoy the sweet contrast of Monkey Bread for 8 recipe, which uses a similar approach to dough handling.
You can also swap some of the bread flour for whole wheat. I'd suggest a 75% bread flour and 25% whole wheat split. Any more than that, and the rolls might lose some of that airy, pillowy quality we're after.
Storage and Freshness
Homemade bread doesn't have the preservatives of store-bought buns, so it behaves differently. On the counter, these rolls are best within 2 days. Keep them in a sealed plastic bag or an airtight container to stop them from drying out.
For longer storage, the freezer is your best friend. Let the rolls cool completely, then freeze them in a single layer on a tray before transferring them to a freezer bag. They'll stay fresh for up to 3 months.
To reheat, just pop a frozen roll in the oven at 350°F for about 5-8 minutes. It'll bring back that shatter crisp crust and velvety interior. If you're in a rush, 15 seconds in the microwave works, but you lose the crust's texture.
As for zero waste, if you have a few rolls that went hard, don't toss them. Turn them into croutons by cubing them and tossing them with olive oil and salt, then baking until golden.
The Best Fillings
These rolls are sturdy, which makes them the ideal base for heavy fillings. Because they have a slight honey sweetness, they pair beautifully with salty, acidic components.
My absolute favorite way to use these is for Crispy Fried Cod Sandwiches. The lightness of the no knead bread complements the crunch of the fish without overpowering it.
You can also use them for classic sliders, pulled pork, or even a high end breakfast sandwich with a jammy egg and avocado. The mahogany crust holds up well to sauces and condiments, so don't be afraid to go heavy on the aioli or mustard.
Just remember to toast the inside of the roll with a bit of butter for that extra layer of flavor.
Recipe FAQs
Can I use all-purpose flour instead of bread flour?
No, stick with bread flour. The higher protein content is necessary to support the structure of this high hydration dough. These rolls are the perfect base for breakfast sandwich meal prep.
How to store these rolls to keep them fresh?
Keep them in a sealed plastic bag or airtight container. They remain fresh on the counter for 2 days or in the freezer for up to 3 months.
Is it true that no-knead bread must be baked in a Dutch oven?
No, this is a common misconception. These rolls are designed to bake perfectly on a parchment lined baking sheet at 400°F.
How to reheat frozen rolls?
Pop them in the oven at 350°F for 5-8 minutes. This restores the shatter crisp crust and warms the center.
Why didn't my dough rise after 18 hours?
Verify your water temperature and yeast freshness. Water that is too hot kills the yeast, while water that is too cold significantly slows the fermentation process.
Can I reduce the 12 to 18-hour rise time?
No, the long fermentation is required. This slow process develops the gluten structure and flavor that typically come from manual kneading.
How to achieve a deep golden crust?
Brush the tops with melted unsalted butter. Bake at 400°F for 18-22 minutes until the crust is a mahogany gold and the bottom sounds hollow when tapped.
No Knead Sandwich Rolls

