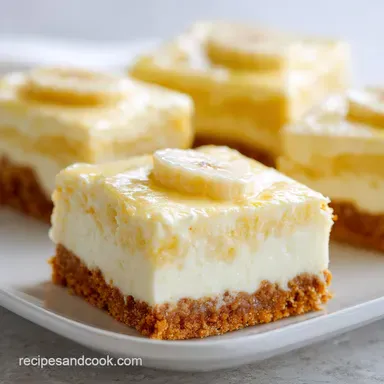
Banana Pudding Dream Bars: Failure-Proof
- Time:20 minutes active + 4 hours 30 mins chilling = Total 4 hours 50 mins
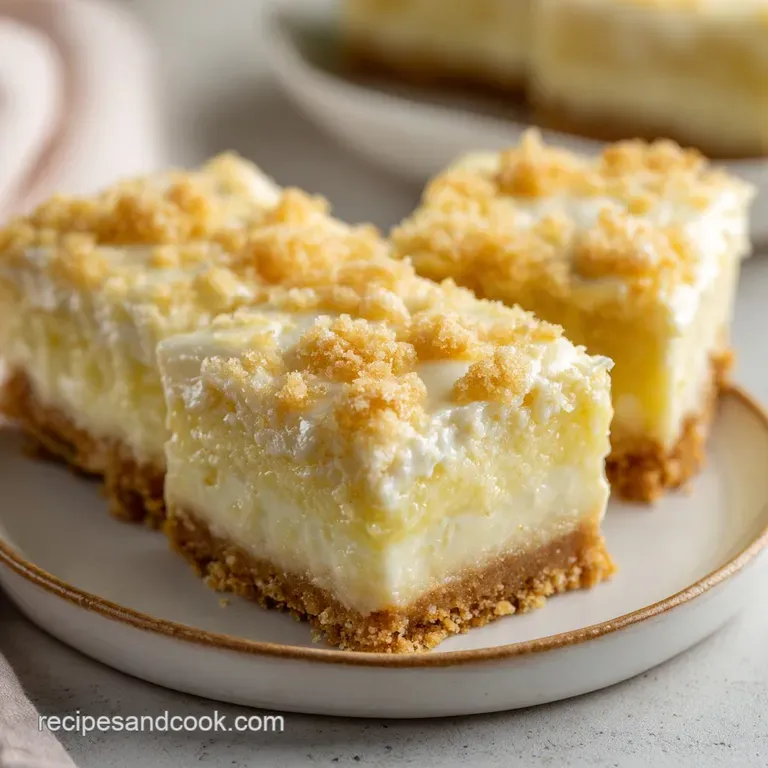
- Flavor/Texture Hook: Buttery crisp base with a velvety, cloud like banana topping
- Perfect for: Baby showers, potlucks, or any occasion where you need a handheld dessert
Making the Best Banana Pudding Bars
The first thing you notice is that distinct snap of a vanilla wafer, followed immediately by a rush of cold, velvety cream and the sweet scent of ripe bananas. I remember the first time I tried to bring a traditional banana pudding to a summer block party.
I had a massive glass bowl, a huge spoon, and a lot of optimism. Within ten minutes, the pudding had slumped into a messy heap, and everyone was fighting for the last wafer while dripping cream down their elbows. It was a disaster.
That's exactly why I moved toward this format. I wanted the same flavor profile but with a structure that actually holds up on a platter. These bars give you that structured, professional look without requiring a degree in pastry arts.
You get the crunch, the cream, and the fruit, but you can actually pick one up with your fingers and walk around the room.
By combining a pre baked graham cracker crust with a stabilized cream filling, these Banana Pudding Bars transform a messy classic into something sophisticated and easy to serve. We're talking about a dessert that looks like it came from a high end bakery but uses a few clever shortcuts to get you there.
Trust me, once you see how clean these slices are, you'll never go back to the bowl.
The Secret to the Set
To get that professional slice, we have to focus on stability. If you just used pudding and whipped cream, the bars would slide apart the moment they hit room temperature.
- Cream Cheese Anchor: The cream cheese acts as a stabilizer for the whipped cream and pudding, preventing the mixture from weeping or sagging.
- Cold Set Activation: Using cold whole milk allows the modified starches in the instant pudding to hydrate quickly and create a firm gel.
- Whipping Aeration: Beating the heavy cream to stiff peaks incorporates air, which lightens the dense cream cheese and pudding base.
- Butter Barrier: Baking the crust creates a toasted seal that stops the moisture from the filling from soaking into the base.
Since we are using heavy cream to get that airy texture, some of you might be making your own heavy whipping cream from scratch. If so, just make sure it's ice cold before you start whipping, or you'll lose that critical lift.
| Method | Prep Time | Texture | Best For |
|---|---|---|---|
| Classic Bowl | 15 minutes | Loose/Sloppy | Family dinners |
| Pudding Bars | 20 minutes | Stable/Slicable | Parties/Events |
| Individual Jars | 30 minutes | Layered | Gift giving |
Right then, let's look at how the specific components interact to create that specific mouthfeel.
The Ingredient Breakdown
| Ingredient | Science Role | Pro Secret |
|---|---|---|
| Cream Cheese | Structure | Room temp is non negotiable for a smooth texture |
| Instant Pudding | Thickeners | Don't over whisk or you'll lose the air |
| Heavy Cream | Volume | Chill the bowl and beaters for 10 mins first |
| Graham Crumbs | Foundation | Add a pinch of salt to cut the sugar |
For the Buttery Crust
- 1.5 cups (150g) graham cracker crumbs Why this? Provides a sturdy, neutral base (Substitute: crushed digestive biscuits)
- 6 tbsp (85g) unsalted butter, melted Why this? Binds crumbs and adds richness (Substitute: coconut oil for dairy-free)
- 2 tbsp (25g) granulated sugar Why this? Helps the crust caramelize (Substitute: brown sugar for deeper flavor)
- 1/4 tsp (1.5g) salt Why this? Balances the sweetness (Substitute: omit if using salted butter)
For the Creamy Banana Filling
- 1 package (3.4oz / 96g) instant banana pudding mix Why this? Quick set and intense flavor (Substitute: vanilla pudding + banana extract)
- 1.5 cups (355ml) cold whole milk Why this? Essential for pudding activation (Substitute: full fat oat milk)
- 8 oz (225g) cream cheese, softened Why this? Prevents the bars from sliding (Substitute: mascarpone for a richer taste)
- 1 cup (240ml) heavy whipping cream, chilled Why this? Adds the "cloud" texture (Substitute: chilled coconut cream)
- 1/2 cup (60g) powdered sugar Why this? Dissolves instantly into cream (Substitute: superfine sugar)
- 1 tsp (5ml) vanilla extract Why this? Enhances the banana notes (Substitute: maple syrup)
For the Fresh Layer & Topping
- 3 large (300g) ripe bananas, sliced Why this? Natural sweetness and moisture (Substitute: plantains for a starchier bite)
- 12-15 (60g) vanilla wafer cookies, crushed or whole Why this? Classic flavor pairing (Substitute: Nilla Wafers)
Essential Kitchen Tools
You don't need a professional studio to make these, but a few tools make the process foolproof.
- 9x9 inch square baking pan: This size is critical for the thickness of the bars.
- Parchment paper: Leave an overhang on two sides so you can lift the whole slab out.
- Electric hand mixer: Necessary for the cream cheese and whipping the cream.
- Rubber spatula: Essential for folding the whipped cream without deflating it.
- Offset spatula: Helps you get that perfectly level, bakery worthy top.
Step by step Assembly
1. The Foundation (Crust)
Preheat your oven to 350°F (180°C). In a medium bowl, stir together the graham cracker crumbs, melted butter, sugar, and salt. Press the mixture firmly into the bottom of your parchment lined pan using the back of a spoon.
Bake for 10 minutes until the edges are mahogany colored and fragrant. Let this cool completely before adding toppings.
2. The Creamy Core (Filling)
Whisk the instant banana pudding mix into the cold whole milk in a small bowl. Let it sit for 5 minutes to set. In a separate larger bowl, beat the softened cream cheese and powdered sugar until smooth. Slowly fold the set pudding into the cream cheese mixture until no streaks remain.
3. The Final Assembly
In a clean bowl, whip the chilled heavy cream and vanilla extract until stiff peaks form. Gently fold the whipped cream into the pudding base using a rubber spatula. Scatter a thin layer of crushed vanilla wafers over the cooled crust, then layer the sliced banana coins evenly.
Pour the creamy mixture over the top and smooth it with an offset spatula. Garnish with the remaining wafers and chill for 4 hours.
Chef's Note: When folding the whipped cream, use a "cut and fold" motion. Cut through the center, scrape the bottom, and flip over. This keeps the banana pudding dream bars light and airy.
Fixing Common Texture Issues

Even the most experienced cooks hit a snag now and then. Usually, it's a temperature issue.
1. "The Pudding Slide"
If your filling feels too soft or doesn't hold a sharp edge when sliced, you likely didn't let it chill long enough. The fats in the cream cheese and the starches in the pudding need those 4 hours to fully crystallize.
2. "The Soggy Bottom"
A mushy crust happens if you add the filling while the crust is still warm. This melts the butter and allows the moisture from the bananas to seep in. Always wait until the crust is cold to the touch.
3. "The Brown Banana Blight"
Bananas oxidize quickly. To keep them bright, you can toss the slices in a tiny bit of lemon juice before layering. This doesn't affect the flavor but keeps the look clean.
| Problem | Root Cause | Solution |
|---|---|---|
| Lumpy Filling | Cold cream cheese | Microwave cheese for 10 seconds |
| Deflated Cream | Over mixing | Fold gently with a spatula |
| Crumbling Crust | Not enough butter | Press crumbs harder into pan |
- ✓ Use a sharp knife dipped in hot water for clean slices.
- ✓ Ensure bananas are ripe but not mushy.
- ✓ Cold milk is mandatory for the pudding mix.
- ✓ Don't skip the parchment paper overhang.
Easy Swaps and Twists
If you want to change things up, these pudding dream bars are surprisingly flexible. You can lean into a more decadent style or keep it light.
For a richer experience, try adding a layer of toasted coconut between the bananas and the cream. If you're feeling adventurous, a drizzle of salted caramel over the top before chilling adds a gorgeous contrast to the banana sweetness.
Dietary adaptations are also easy. For a gluten-free version, simply swap the graham crackers and vanilla wafers for certified GF alternatives. Since the structure comes from the cream cheese and pudding, the bars still hold their shape perfectly.
| Original Ingredient | Substitute | Why It Works |
|---|---|---|
| Whole Milk (1.5 cups) | Full fat Oat Milk | Similar viscosity. Note: Slightly nuttier flavor |
| Graham Crumbs | GF Ginger Snaps | Adds a spicy kick. Note: Stronger flavor profile |
| Cream Cheese | Mascarpone | Higher fat content. Note: Much richer, silkier finish |
If you've got extra overripe bananas that didn't make it into this recipe, my classic banana bread is a lifesaver for using up every bit of fruit.
Scaling the Batch
Changing the size of this recipe is simple, but you have to be mindful of the pan volume.
Scaling Down (Half Batch): Use a 5x7 inch pan or a small loaf pan. Reduce the bake time for the crust by about 2 minutes. For the egg less components, just halve the measurements.
If you use a smaller pan, the chilling time remains the same because the thickness of the bar is what matters.
Scaling Up (Double Batch): Use two 9x9 inch pans rather than one giant pan. If you try to double the depth in one pan, the center will stay soft while the edges set, leading to a structural collapse.
Keep the temperature at 350°F (180°C) and bake the crusts as usual.
For the whipped cream, work in batches if you have a small mixer. Overcrowding the bowl prevents the cream from incorporating enough air, which can result in a denser filling.
Dessert Myths Debunked
There's a lot of chatter about banana desserts that isn't actually true. Let's clear a few things up.
Myth: Fresh pudding is always better than instant. While scratch made pudding is lovely, instant pudding contains modified cornstarch that creates a more stable gel. For bars that need to be sliced, the instant version is actually superior.
Myth: You must use "perfect" bananas. Actually, the most spotted, overripe bananas are the best. They have higher sugar content and a more intense aroma, which carries through the heavy cream and cheese.
Storage and Waste Tips
To keep these fresh, store the bars in an airtight container in the fridge for up to 5 days. If you're not eating them immediately, press a piece of wax paper directly onto the surface of the cream to prevent it from absorbing fridge odors.
Freezing Guidelines: You can freeze these for up to 2 months. Slice them first and freeze them on a tray before transferring them to a freezer bag. Thaw in the fridge overnight. Note: The texture of the vanilla wafers will soften slightly after freezing.
- Banana Peels
- Don't toss them! Use them to make a banana peel tea for your houseplants; they love the potassium.
- Leftover Crumbs
- If you have extra graham cracker crumbs, mix them with a bit of melted butter and sugar to make a quick crumble topping for apples.
- Cream Scraps
- Any leftover whipped cream can be folded into Greek yogurt for a quick breakfast treat.
The Best Serving Pairs
These bars are quite rich, so they pair best with something that cuts through the creaminess. A tart raspberry coulis or a handful of fresh blueberries on the side adds a bright acidity that balances the sugar.
If you're serving these at a party, pair them with a strong, dark roast coffee or a cold glass of sparkling cider. The bitterness of the coffee complements the banana's sweetness beautifully.
For those who prefer a different kind of fruit forward treat, you might also enjoy my shredded apple bread, which offers a similar comforting vibe but with a different textural profile.
Recipe FAQs
Can I use frozen bananas instead of fresh?
No, stick with fresh. Frozen bananas release excess moisture during thawing, which can make the creamy filling runny and unstable.
How to keep the filling fluffy when mixing?
Fold the whipped cream gently with a rubber spatula. Use a slow, lifting motion to combine the layers without deflating the air peaks.
How long can I store these bars in the refrigerator?
Up to 5 days in an airtight container. Pressing wax paper directly onto the cream surface prevents the bars from absorbing odors from the fridge.
Is it true that the crust must be frozen before adding the filling?
No, this is a common misconception. The crust only needs to be cooled completely to room temperature to prevent the pudding layer from melting.
How to freeze banana pudding bars for later?
Slice the bars and freeze them on a tray first. Transfer them to a freezer bag once solid and thaw in the fridge overnight before serving.
Can I swap graham crackers for another base?
Yes, crushed vanilla wafers or oats work great. If you enjoy the heartier texture of oats in banana treats, try the same flavor profile in our banana oatmeal muffins.
Why aren't my bars setting firmly enough to slice?
Chill them for at least 4 hours. The combination of cream cheese and pudding requires this minimum refrigeration time to stabilize for clean cuts.
Creamy Banana Pudding Bars