Chocolate Peanut Butter Bars: No-Bake Dream

- Time:15 minutes active + 4 hours chilling = Total 4 hours 15 mins
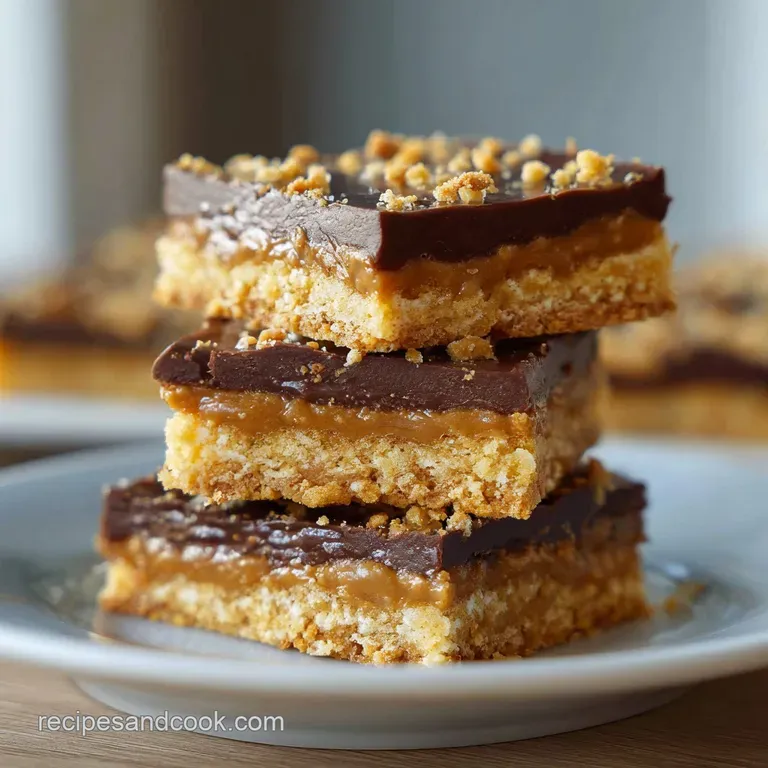
- Flavor/Texture Hook: Velvety peanut butter clouds over a shatter crisp cookie base
- Perfect for: High impact party desserts or advanced meal prep
- Everything About Chocolate Peanut Butter Bars
- The Logic Behind These Layers
- What Each Component Does
- The Full Gear List
- Essential Kitchen Tools
- Step by Step Assembly
- Fixing Common Texture Issues
- Troubleshooting Common Issues
- Adjusting the Batch Size
- Debunking Dessert Myths
- Keeping Them Fresh
- Serving and Plating Ideas
- Recipe FAQs
- 📝 Recipe Card
Imagine that first cold, sharp snap of a chocolate shell giving way to a cloud of salty peanut butter. It is that specific moment where the temperature hit of the fridge meets the richness of the cocoa, and suddenly, you're not just eating a dessert, you're having a sensory experience.
I remember the first time I tried making a layered bar like this, and I completely ignored the chilling time. I tried to slice into it after just an hour, and the whole thing slumped over like a sad pancake. It was a total disaster, but it taught me that patience is actually an ingredient.
But why does the structure of these bars feel so different from a standard fudge? Most peanut butter treats are either too sticky or too crumbly, but these have a distinct, architectural feel to them. You get the crunch, the silk, and the airiness all in one bite.
If you've ever wondered why some homemade bars feel "homemade" (and not in a good way) while others feel bakery worthy, it comes down to how you handle the fats.
We're making Chocolate Peanut Butter Bars that actually hold their shape. No more messy fingers or layers bleeding into each other. Trust me on this, once you see those clean, distinct lines after slicing, you'll never go back to the one bowl mix method. Let's crack on.
Everything About Chocolate Peanut Butter Bars
The magic here is all about the contrast. We aren't just mixing chocolate and peanut butter together; we're building a landscape. The base provides the structural integrity, the pudding provides the fudgy core, and the cream cheese mixture adds a tang that cuts through the sugar. It's a precise balance of textures.
When you first taste this, you'll notice it's not overly sweet. By using a hint of salt in the peanut butter and the slight acidity of the cream cheese, the dessert feels lighter than it actually is. It's that "just one more piece" kind of treat.
Honestly, don't even bother with low-fat cream cheese here, as it won't set properly and you'll end up with a runny mess.
To get that professional look, I always suggest using a sharp knife dipped in hot water between every single cut. It sounds like extra work, but it's the only way to keep the layers from smearing. If you love this kind of layered treat, you might also enjoy my Seven Layer Bars recipe, which uses a similar building block approach.
The Logic Behind These Layers
Starch Stabilization: The instant pudding mix uses modified cornstarch to bind the milk, creating a gel that doesn't leak. This prevents the chocolate layer from soaking into the crust.
Fat Structure: Cream cheese acts as a stabilizer for the peanut butter, ensuring the top layer stays fluffy but firm enough to slice.
Cold Setting: Chilling for 4 hours allows the butter in the crust and the fats in the cream cheese to recrystallize, which is what gives the bars their "snap".
Air Incorporation: Beating the cream cheese until light introduces tiny air bubbles, creating a velvety mouthfeel rather than a dense paste.
| Method | Time | Texture | Best For |
|---|---|---|---|
| No Bake (This one) | 15m active | Velvety/Cool | Summer parties |
| Baked Brownie Base | 45m active | Fudgy/Warm | Winter comfort |
| Frozen Bark | 10m active | Brittle/Hard | Quick snacking |
What Each Component Does
| Ingredient | Science Role | Pro Secret |
|---|---|---|
| Instant Pudding | Gelling Agent | Use cold milk to avoid premature thickening |
| Cream Cheese | Emulsifier | Must be room temp to avoid lumps |
| Cookie Crumbs | Structural Base | Press harder than you think you need to |
| Powdered Sugar | Texture Modifier | Sift it first to avoid "sugar pockets" |
The Full Gear List
- 180g crushed peanut butter sandwich cookies or graham crackers Why this? Adds a salty, pre flavored crunch to the base
- 55g melted unsalted butter Why this? Binds crumbs into a solid, sliceable sheet
- 96g instant chocolate pudding mix Why this? Creates a stable, fudge like center without cooking
- 480ml cold whole milk Why this? High fat content ensures a richer chocolate taste
- 225g softened cream cheese Why this? Provides the necessary structure and a tangy contrast
- 125g creamy peanut butter Why this? Smooth texture integrates better with the cheese
- 100g powdered sugar Why this? Dissolves instantly for a silky finish
- 5ml vanilla extract Why this? Enhances the cocoa and nut aromas
- 240ml whipped topping or stabilized whipped cream Why this? Adds the final airy lift to the top layer
- 40g mini chocolate chips Why this? Small size ensures a bit of chocolate in every bite
If you're making your own topping, I recommend checking out my guide on Homemade Heavy Cream to get that perfect peak.
Essential Kitchen Tools
You don't need a professional kitchen for this, but a few specific tools make it foolproof: - 9x9 inch square baking pan (metal is best for heat conduction during chilling) - Parchment paper (essential for lifting the bars out without cracking) - Electric hand mixer or stand mixer - Rubber spatula (for scraping every
Bit of that peanut butter mix) - Medium mixing bowls
Step by step Assembly
Phase 1: Constructing the Base
- Combine the 180g cookie crumbs and 55g melted butter in a bowl. Mix until it looks like wet sand.
- Press the mixture firmly into the bottom of a parchment lined 9x9 pan. Note: Use the bottom of a flat glass to pack it tight for a shatter crisp crust.
Phase 2: The Chocolate Layer
- Whisk the 96g chocolate pudding mix with 480ml cold milk. Whisk for 2 minutes until thickened and smooth.
- Pour the mixture over the crust and smooth the top with a spatula. Note: Do this immediately before the pudding sets too much.
Phase 3: Creating the PB Velvet
- Beat the 225g softened cream cheese until completely smooth.
- Gradually add 125g peanut butter, 100g powdered sugar, and 5ml vanilla. Mix until light and fluffy.
- Gently fold in 240ml whipped topping until no white streaks remain. Spread this over the chocolate layer.
Phase 4: The Finishing Touch
- Sprinkle 40g mini chocolate chips evenly across the top.
- Refrigerate for at least 4 hours until the edges feel firm to the touch.
Chef's Note: To get those perfectly square edges, freeze the bars for 20 minutes before slicing. This firms up the peanut butter cloud and prevents the layers from smudging.
Fixing Common Texture Issues
Troubleshooting Common Issues
| Issue | Solution |
|---|---|
| Why Your Bars Are Runny | This usually happens if the cream cheese wasn't fully cold when you tried to slice them, or if you used a low-fat version. The fats need to be chilled to maintain the "wall" between layers. |
| Why Your Crust Is Crumbly | If the crust falls apart, you likely didn't press it firmly enough or didn't use enough melted butter. It should feel like a single solid piece of cake before you add the pudding. |
| Why Your Top Layer Is Grainy | Graininess comes from adding powdered sugar to cold cream cheese. If the cheese isn't truly softened, the sugar won't dissolve, leaving tiny gritty crystals. |
Common Mistakes Checklist
- ✓ Did you line the pan with parchment? (If not, they will stick)
- ✓ Is the cream cheese truly softened? (Avoids lumps)
- ✓ Did you whisk the pudding until smooth? (Avoids powder clumps)
- ✓ Did you wait the full 4 hours? (Ensures clean cuts)
- ✓ Did you use cold milk? (Prevents pudding separation)
Adjusting the Batch Size
If you're making these for a small gathering, you can scale them down. For a half batch, use a 4x9 inch loaf pan. You'll need to reduce the chilling time by about 20% since the mass is smaller, but don't go under 3 hours.
When doubling the recipe for a big party, use a 9x13 inch pan. I've found that you don't need to double the vanilla or salt (if adding extra) increase those by about 1.5x instead to keep the flavor balanced.
If you use a deeper pan, you may need to extend the chilling time to 6 hours to ensure the center is set.
Debunking Dessert Myths
"You must cook the pudding for it to set." Actually, instant pudding is designed to hydrate and thicken instantly at room temperature. Cooking it would actually break down the modified starches and make the layer runny.
"Using salted butter will ruin the flavor." Quite the opposite. A bit of salt in the butter base enhances the chocolate and peanut butter, preventing the bars from tasting "one note" sweet.
Keeping Them Fresh
Store these bars in an airtight container in the fridge for up to 5 days. I recommend placing a piece of parchment paper between layers if you stack them, or they'll fuse together.
For long term storage, these freeze beautifully. Wrap individual squares in plastic wrap and store them in a freezer bag for up to 3 months. To eat, let them thaw in the fridge for 2 hours.
Zero Waste Tip: If you have leftover whipped topping or a bit of cream cheese mixture in the bowl, don't toss it. Swirl it into a bowl of fresh berries for a quick breakfast treat.
Serving and Plating Ideas
These are versatile, but how you present them changes the whole vibe. Here are three ways to handle these Chocolate Peanut Butter Bars.
- Simple
- Slice into 2 inch squares and serve on a platter. Great for casual get togethers.
- Polished
- Cut into thin rectangles (1x3 inches). Top each with a single whole peanut or a raspberry.
- Restaurant
- Place one square slightly off center on a white plate. Add a swoop of raspberry coulis and a sprinkle of cocoa powder around the edge.
| Level | Plating Tweak | Vibe |
|---|---|---|
| Simple | Square cut | Homey |
| Polished | Rectangular cut + berry | Sophisticated |
| Restaurant | Coulis swoop + cocoa | High end |
Right then, you're all set. These peanut butter dream bars are basically a cheat code for impressive desserts. Once you've got the hang of the layers, you can start experimenting with different cookie bases. I've tried using crushed pretzels for a saltier kick, and it's brilliant.
Just remember the golden rule: don't touch them until that 4 hour 15 mins timer goes off. Trust the process, and you'll have some absolutely showstopping treats!
Recipe FAQs
Can I make these bars ahead of time?
Yes, and it's recommended. They require at least 4 hours of refrigeration to set, making them perfect for advanced prep.
How to prevent the crust from crumbling?
Press the cookie crumbs firmly into the bottom of the parchment lined pan. Ensuring the mixture is packed tight with the melted butter creates a solid base.
Why are my bars runny?
The fats were likely not chilled sufficiently. Using low-fat cream cheese or slicing before the 4-hour mark prevents the layers from stabilizing into a firm "wall."
How to avoid a grainy peanut butter layer?
Beat the softened cream cheese until completely smooth before incorporating the powdered sugar. Mixing sugar into cold or lumpy cream cheese is what creates a gritty texture.
Is it true these bars require baking?
No, this is a common misconception. These bars are completely no-bake and set exclusively through refrigeration.
How to slice the bars for clean edges?
Dip a sharp knife in hot water and wipe the blade clean after every slice. This prevents the chocolate and peanut butter layers from smearing.
How to store these bars?
Store them in an airtight container in the fridge. If you enjoyed the effortless assembly of these no-bake treats, the same quick prep approach is used for our Cinnamon Sugar Chex Mix.
Chocolate Peanut Butter Bars

