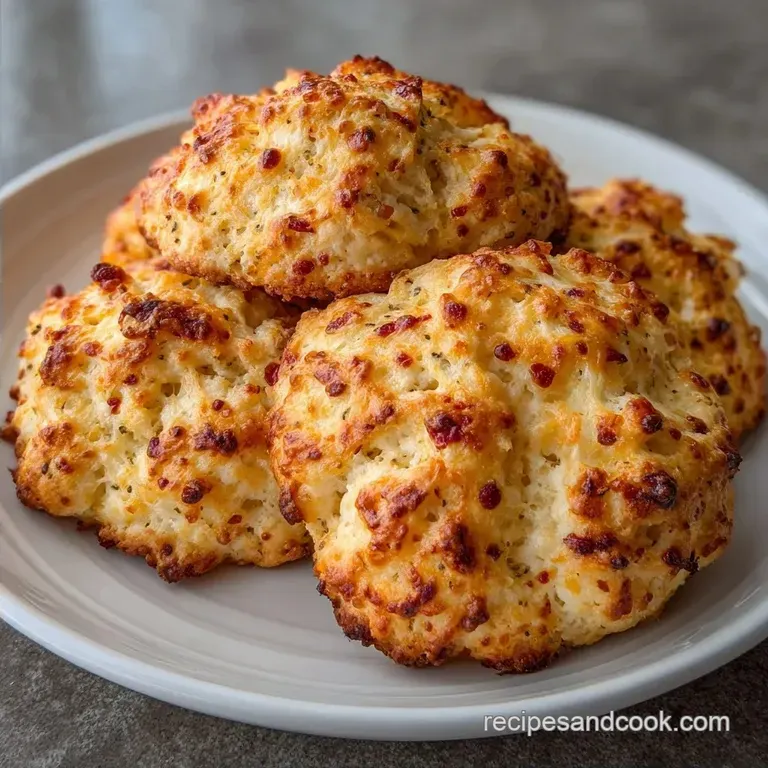
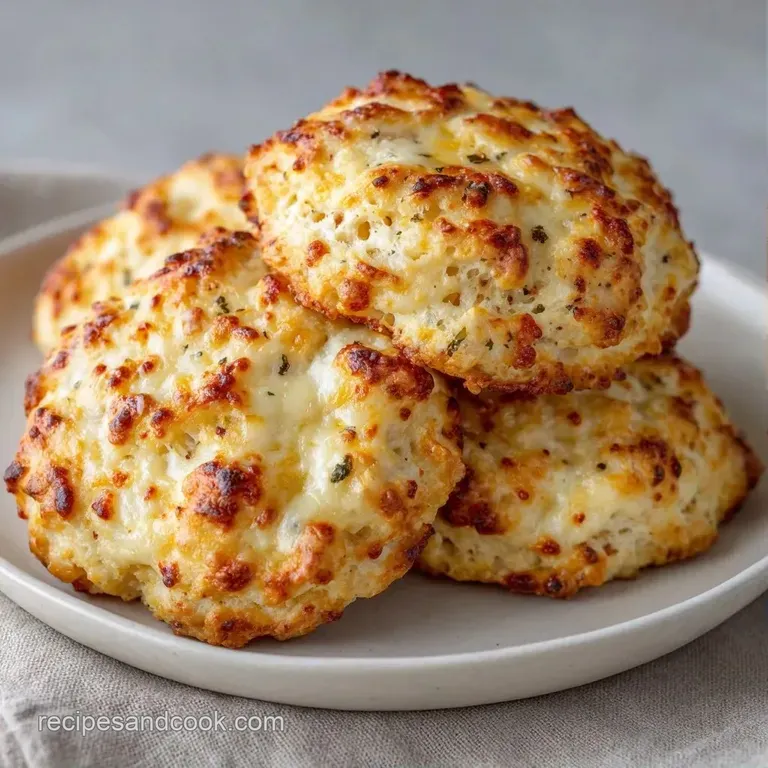
Asiago Herb Biscuits: Flaky and Savory
- Time: 15 min active + 20 min baking
- Flavor/Texture Hook: Sharp, nutty cheese with a mahogany colored crust
- Perfect for: Sunday brunch or a side for hearty stews
- Asiago Herb Biscuits for Your Next Dinner
- The Truth About Biscuit Texture
- What Each Ingredient Does
- The Gear You Need
- Step-by-Step Instructions
- Fixing Common Baking Issues
- Adding Your Own Twist
- Adjustment and Scaling
- Baking Beliefs Debunked
- Keeping Them Fresh
- What to Serve Them With
- Recipe FAQs
- 📝 Recipe Card
The smell of toasted cheese and melted butter hitting a hot oven is enough to pull anyone into the kitchen. I remember the first time I tried making savory biscuits for a family gathering.
I wanted something that felt timeless, like something my grandmother would have put on the table, but a bit more punch than a standard dinner roll.
The first batch I ever made was a disaster. I over mixed the dough until it was as smooth as play dough, and the result was a set of hard, heavy disks that could have doubled as doorstops. It took me a while to realize that the beauty of a biscuit lives in the lumps.
These Asiago Herb Biscuits are the result of learning to leave the dough alone. They have a sharp, nutty flavor from the Asiago and a hit of earthy herbs that makes them feel like a treat. You can expect a crisp exterior that cracks when you bite into it, giving way to a soft, steaming center.
Asiago Herb Biscuits for Your Next Dinner
The trick to a great savory biscuit is balancing the fat and the moisture. If you use too much milk, the dough becomes a sticky mess. Too little, and you get a crumbly heap that won't hold its shape. This recipe hits the sweet spot.
I usually make these when I'm craving something comforting but want to avoid the effort of a yeast bread. There's no waiting for a rise here. You just mix, cut, and bake. It's a budget friendly way to make a meal feel special without spending hours in the kitchen.
When you pull these out of the oven, the Asiago on top has turned into little golden lace patterns. That's where the most flavor lives. Trust me, don't skip the melted butter brush on top; it's what gives them that professional looking glow and an extra layer of richness.
The Truth About Biscuit Texture
Most people treat biscuit dough like bread dough, kneading it until it's smooth. That is the biggest mistake you can make. Kneading develops gluten, which is great for a chewy sourdough but terrible for a flaky biscuit.
Cold Butter: Keeping the butter in pea sized lumps is what creates the lift. According to Serious Eats, these fat pockets melt during baking, leaving behind steam filled gaps that push the dough upward.
The Shaggy Mass: You want the dough to look messy. If it looks a bit lumpy and barely held together, you've done it right. This ensures the biscuits stay tender instead of becoming tough.
Cheese Coating: Tossing the Asiago in flour before adding the butter stops the cheese from clumping. This means every single bite has an even distribution of flavor rather than one giant glob of cheese in one biscuit and nothing in another.
| Method | Time | Texture | Best For |
|---|---|---|---|
| Classic Hand Cut | 35 mins | Very Flaky | Small batches, traditional feel |
| Food Processor | 25 mins | Uniform Crumb | Fast weeknight sides |
| Drop Biscuits | 30 mins | Nubbly/Rustic | Zero effort plating |
What Each Ingredient Does
Choosing the right flour and cheese makes a difference in how the biscuit holds up. I prefer all purpose flour for these because it provides a sturdy enough structure to hold the heavy cheese without making the biscuit feel like a rock.
| Ingredient | What It Does | Best Swap |
|---|---|---|
| All Purpose Flour | Provides structure | Pastry flour (for a more tender crumb) |
| Cold Butter | Creates steam pockets | Chilled lard (for a more old school flavor) |
| Asiago Cheese | Adds sharp, nutty saltiness | Aged Parmesan (slightly saltier, less melt) |
| Cold Whole Milk | Binds the dough | Buttermilk (adds a subtle tang) |
The Gear You Need
You don't need a fancy kitchen to pull this off. A large mixing bowl and a sturdy fork are your primary tools. If you have a pastry cutter, use it, but a fork works just as well for breaking up the butter.
For the shaping, a 2.5 inch biscuit cutter is standard. If you don't have one, a wide mouth drinking glass or a canned goods ring works perfectly. Just make sure the edges are sharp so you don't "squish" the dough down, which prevents the biscuits from rising.
A baking sheet lined with parchment paper is non negotiable. Cheese leaks out of the sides as it melts, and without parchment, you'll be scrubbing burnt Asiago off your pan for an hour.
Step-by-step Instructions
Phase 1: The Dry Foundation
Preheat your oven to 425°F (218°C). Line your baking sheet with parchment paper so nothing sticks. In a large bowl, whisk together the 2 cups of all purpose flour, 1 tablespoon of baking powder, 3/4 teaspoon of salt, 1/4 teaspoon of cracked black pepper, and 1 tablespoon of dried Italian herbs.
Phase 2: The Cheese and Butter
Stir in 1 cup of shredded Asiago cheese. Make sure the cheese is well coated in the flour mixture. Add 1/2 cup of cold, cubed unsalted butter. Use a fork or pastry cutter to work the butter into the flour until the mixture looks like coarse crumbs with some pea sized lumps remaining.
Phase 3: Binding the Dough
Pour in 3/4 cup of cold whole milk. Use a spatula to stir gently until a shaggy mass forms. Note: Stop stirring the moment the flour disappears; do not knead the dough.
Phase 4: Shaping and Baking
Turn the dough onto a floured surface. Gently pat it into a disk. Use your cutter to press straight down and lift up to cut 8 biscuits. Place them on the sheet. Brush the tops with 2 tablespoons of melted butter and sprinkle with 1 tablespoon of chopped fresh parsley and 2 tablespoons of shredded Asiago.
Phase 5: The Golden Finish
Bake for 20 minutes until the tops are mahogany colored and golden brown. Let them cool on the pan for 5 minutes before moving them to a wire rack.
Fixing Common Baking Issues
When things go wrong with Asiago Herb Biscuits, it's usually a temperature or handling issue. If your butter gets too warm, the fat absorbs into the flour instead of staying in pockets, and you lose that flaky texture.
Why Your Biscuits Stay Flat
This usually happens if the dough was overworked or the cutter was twisted. When you twist a cutter, you seal the edges of the dough, which traps the steam and prevents the biscuit from rising. Press straight down and pull straight up.
For a Bready or Tough Texture
Over mixing is the culprit here. If you stir the milk until the dough is smooth, you've developed too much gluten. The dough should look a bit ragged and "shaggy" before it goes onto the counter.
For Burnt Bottoms
Check your oven rack position. If the pan is too low, the bottoms will char before the tops brown. Move the rack to the center position.
| Problem | Root Cause | Solution |
|---|---|---|
| Hard/Dense Center | Over kneaded dough | Stir only until combined |
| No Rise | Expired baking powder | Use fresh leavening agents |
| Greasy Bottoms | Butter too soft | Use butter straight from fridge |
Adding Your Own Twist
Once you've got the basic method down, you can play with the flavors. These are incredibly flexible. For a spicy kick, fold in a tablespoon of diced pickled jalapeños or a pinch of cayenne pepper.
If you want something more aromatic, swap the Italian herbs for fresh rosemary and thyme. For those who prefer a sweeter contrast to a savory meal, you might enjoy my Joanna Gaines Buttermilk Biscuits recipe which offers a different kind of comfort.
For a gluten-free version, you can use a 1:1 gluten-free flour blend. According to King Arthur Baking, ensuring your fats are extremely cold is even more important with gluten-free flours to prevent the dough from spreading.
Adjustment and Scaling
If you're only baking for two, you can easily half this recipe. Use 1 cup of flour and 1/4 cup of butter. Since the volume is smaller, the baking time usually drops by about 20%, so start checking them at 15 minutes.
For a crowd, doubling the recipe is simple, but don't double the salt or herbs exactly go for about 1.5x the amount to avoid an overpowering taste. Work in batches when cutting the dough so the last few biscuits don't sit out too long and warm up.
When doubling, I recommend lowering the oven temperature by 25°F and extending the bake time by 5 minutes. This ensures the middle of the larger batch cooks through without the edges burning.
Baking Beliefs Debunked
You don't actually need a specialized biscuit cutter to get a good result. You can use a glass or even just pat the dough into a square and cut it with a knife. The "cut in" method (using a knife) actually creates more layers because you're laminating the dough.
Another myth is that you need to chill the dough for an hour before baking. While chilling helps if your kitchen is 90 degrees, it's not necessary if your ingredients are cold. Just get them in the oven quickly.
Finally, some say you must use buttermilk for any kind of biscuit. While buttermilk adds a nice tang, whole milk works perfectly for these savory rolls because the sharp Asiago provides enough acidity to balance the flavor.
Keeping Them Fresh
These are best eaten warm, but they keep well if stored correctly. Place cooled biscuits in an airtight container. They will stay good in the fridge for up to 5 days.
For longer storage, freeze them. You can freeze the baked biscuits or the raw cut disks. If freezing baked ones, wrap them individually in foil and place them in a freezer bag for up to 3 months.
To reheat, avoid the microwave, which can make them rubbery. Instead, pop them in a 350°F (175°C) oven for 5-8 minutes. This brings back the crispness of the Asiago crust and makes them taste fresh baked again.
What to Serve Them With
These biscuits are a powerhouse side dish. They pair naturally with a thick beef stew or a bowl of creamy soup. I love serving them alongside a slow roasted meat, perhaps something like a sirloin tip roast where the savory herbs in the meat mirror the flavors in the bread.
If you're doing a brunch spread, serve them with honey butter or a side of poached eggs. For a more indulgent treat, try dipping them into a rich Alfredo sauce for a cheesy, comforting appetizer.
Right then, you've got everything you need to bring these to your table. Just remember: keep your butter cold, keep your stirring minimal, and let that Asiago do the heavy lifting. Happy baking!
Recipe FAQs
What herbs go with Asiago cheese?
Dried Italian herbs and fresh parsley. These options complement the salty, sharp profile of the cheese without overpowering the butteriness of the biscuit.
Is Asiago just parmesan cheese?
No, this is a common misconception. While both are hard Italian cheeses, Asiago has a milder, creamier flavor and a different aging process than Parmesan.
How to make these Asiago herb biscuits?
Preheat oven to 425°F and whisk flour, baking powder, salt, pepper, and Italian herbs. Cut in cold butter, stir in milk and Asiago, cut into 8 rounds, top with melted butter and cheese, and bake for 20 minutes.
What ingredients are needed for Asiago herb biscuits?
You need flour, baking powder, salt, black pepper, cold unsalted butter, shredded Asiago cheese, dried Italian herbs, cold whole milk, melted butter, and fresh parsley. All ingredients should be measured precisely for the best rise.
Why are my biscuits not rising properly?
Avoid over kneading the dough. Using a spatula to gently stir the milk until a shaggy mass forms prevents excess gluten development, which allows the biscuits to rise higher.
How to prevent the cheese from clumping in the dough?
Stir the shredded Asiago into the flour mixture before adding the butter and milk. Coating the cheese in flour ensures it distributes evenly throughout the dough.
Can I use room temperature butter for this recipe?
No, use chilled, cubed butter. Cold butter creates small steam pockets when it hits the 425°F oven, which is the secret to achieving a flaky texture.
Asiago Herb Biscuits