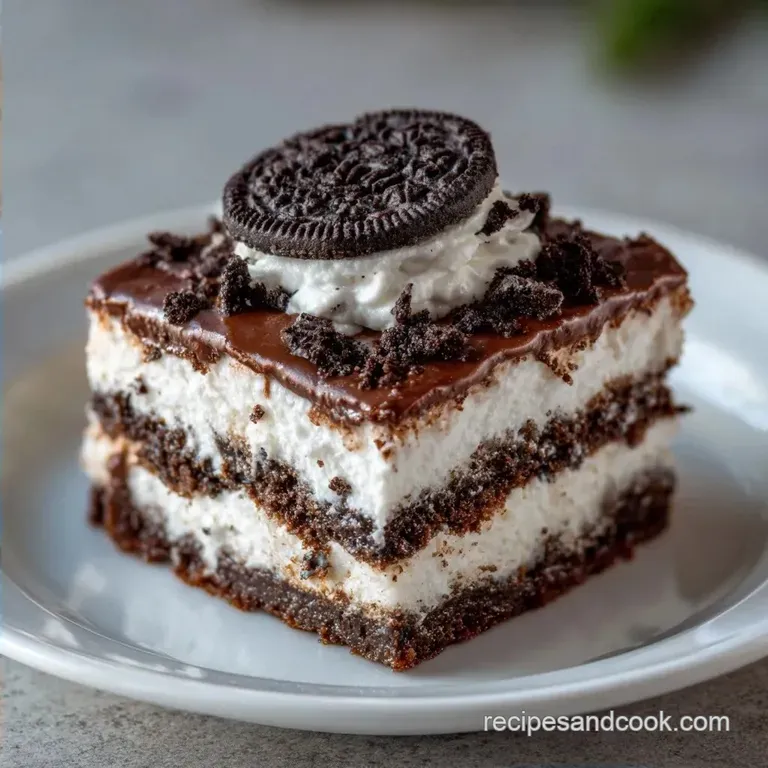
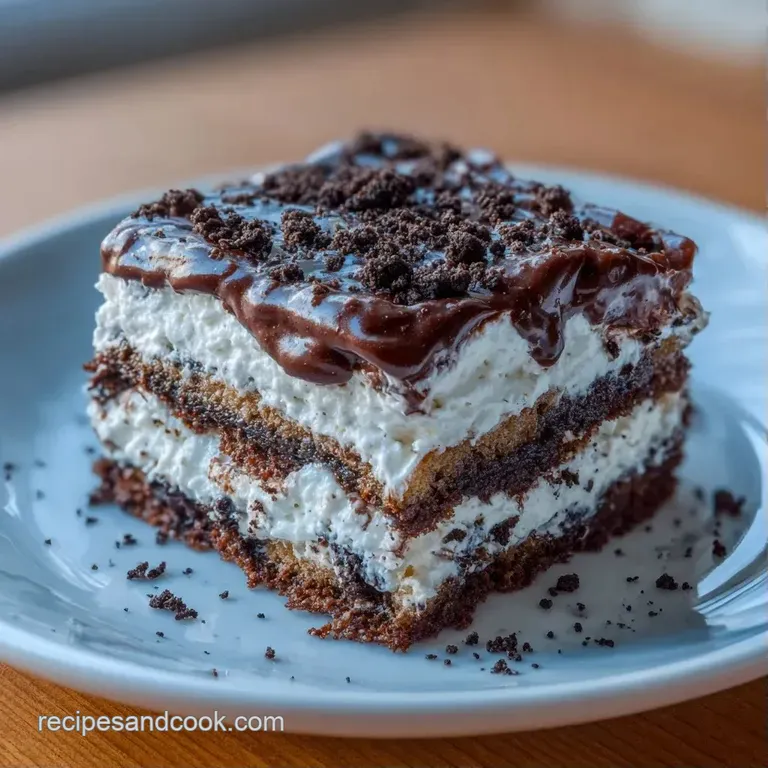
No Bake Turtle Dream Bars: Silky and Rich
- Time:30 minutes active + 4 hours chilling
- Flavor/Texture Hook: Shatter crisp Oreo base with a silky chocolate finish
- Perfect for: Last minute party desserts or an impressive holiday platter
The sound of a neighbor's doorbell ringing unexpectedly on a Friday night is usually a sign of a spontaneous get together. Last year, I found myself in that exact spot, staring at a bare kitchen counter with absolutely nothing to offer but a bag of Oreos and some random baking staples.
I didn't have time to preheat an oven or wait for a cake to cool, but I wanted something that looked like I'd spent all afternoon on it.
That's when I cobbled together these layers, experimenting with a mix of instant pudding and cream cheese to see if I could mimic that classic turtle candy feel. The result was a total win, and my neighbors actually thought I'd bought them from a boutique candy shop.
You can expect a treat that hits every single note, from the salty crunch of pecans to the deep, velvety richness of chocolate. These no bake turtle dream bars are essentially a cheat code for dessert, giving you that professional, layered look with very little actual labor.
Making No Bake Turtle Dream Bars
Right then, let's talk about how to get these exactly right. The secret isn't just in the ingredients, but in how you treat the layers. Since we aren't using heat to bind everything together, we're relying on temperature and fat to create that structural integrity.
If you've ever made a dessert that turned into a puddle the moment it hit the plate, you know the struggle. To avoid that, I focus on the "set" of each layer. Trust me on this, the freezer is your best friend here.
By flash chilling the base and the cream layers, you ensure that the caramel and chocolate stay on top instead of bleeding into the middle.
This recipe is all about the contrast. You have the dark, slightly bitter Oreo crust, the tangy cream cheese, and the sweet, gooey caramel. It's a balance that keeps you coming back for another bite without feeling overwhelmed by the sugar.
How the Layers Actually Stay
Fat Stabilization: Cold butter and cream cheese create a solid lattice that holds the sugar in place.
Starch Binding: The modified cornstarch in the pudding mix absorbs the milk, turning it from a liquid to a thick gel.
Thermal Setting: Chilling the chocolate prevents it from melting into the caramel, keeping the top layer distinct.
| Method | Active Time | Texture | Best For |
|---|---|---|---|
| No Bake (Fridge) | 30 minutes | Velvety & Creamy | Quick prep, summer heat |
| Baked (Oven) | 1 hour | Cakey & Dense | Winter comfort, hearty feel |
Component Analysis
| Ingredient | Science Role | Pro Secret |
|---|---|---|
| Cream Cheese | Structure/Tang | Must be fully softened to avoid lumps |
| Instant Pudding | Thickening Agent | Whisk vigorously to activate the starch |
| Oreo Cookies | Base/Binding | Don't over process; keep some tiny chunks |
| Heavy Cream | Chocolate Fluidity | Prevents the topping from becoming brittle |
Recipe Specs
To get that showstopping result, you need to be precise with your timing. I've found that skipping even five minutes of chilling can lead to a messy slice. According to guides on cream cheese stability at Serious Eats, maintaining the correct temperature during mixing is key to preventing the emulsion from breaking.
I always recommend using a parchment lined pan. I once tried to grease a pan with butter for a no bake recipe, and the bars practically glued themselves to the metal. The parchment allows you to lift the entire block out, meaning you can slice the bars on a cutting board for cleaner edges.
When it comes to the chocolate, don't overthink it. You don't need a fancy tempering machine. A simple microwave method in short bursts keeps the chocolate glossy and smooth without scorching it.
Essential Tool List
You don't need a professional kitchen for this, but a few specific tools make the process foolproof. A 9x9 inch baking pan is the standard, but if you only have an 8x8, your bars will just be a bit thicker (which, honestly, isn't a bad problem to have).
For the crust, I don't bother with a rolling pin. Just use the bottom of a heavy drinking glass or a flat bottomed measuring cup. It gives you much more control and ensures the corners are packed down tight, preventing the base from crumbling when you lift a slice.
Finally, a rubber spatula is non negotiable. You'll be folding whipped topping into thick pudding and cream cheese, and a whisk just isn't strong enough to incorporate the air without deflating the mixture.
The Assembly Process
Let's crack on with the build. Remember to keep your ingredients at the temperatures listed, or you'll end up with a lumpy cheesecake layer.
The Oreo Base
- Mix crushed Oreos and melted butter. Note: Ensure butter is fully melted for even coating.
- Press the mixture firmly into a parchment lined 9x9 inch pan until it feels like a solid slab.
- Freeze for 10 minutes until the base is firm to the touch.
The Cheesecake Layer
- Beat softened cream cheese and powdered sugar until smooth and velvety.
- Fold in 1 cup of whipped topping. Note: Be gentle to keep the air in the mix.
- Spread evenly over the chilled crust.
The Pudding Layer
- Whisk chocolate pudding mix and milk for 2 minutes until it thickens and looks glossy.
- Fold in the remaining 1 cup of whipped topping and pour over the cheesecake layer.
The Turtle Topping
- Drizzle salted caramel sauce in a zig zag pattern.
- Sprinkle chopped pecans over the caramel and press slightly.
- Melt chocolate chips and heavy cream in 30 second bursts until completely smooth.
- Spread the chocolate over the top and refrigerate for 4 hours until the layers are set.
Fixing Common Mistakes
The most frustrating part of making no bake turtle dream bars is when the layers merge or the chocolate cracks. Most of these issues come down to temperature. If your cream cheese is too cold, you'll get tiny white lumps in your cheesecake layer that no amount of beating will fix.
If you notice your layers are bleeding into each other, it usually means you didn't let the previous layer chill enough. The "flash freeze" step for the crust is critical because it creates a moisture barrier that stops the cream cheese from soaking into the cookies.
| Problem | Root Cause | Solution |
|---|---|---|
| Crust Crumbles | Not enough butter or under pressed | Add 1 tbsp melted butter; press harder |
| Lumpy Filling | Cream cheese was too cold | Microwave for 10 seconds; beat again |
| Chocolate Cracks | Sliced while too cold | Let bars sit at room temp for 5 mins |
Success Checklist
- ✓ Use room temperature cream cheese to avoid lumps.
- ✓ Press the Oreo base with significant force for stability.
- ✓ Use a zig zag pattern for caramel to ensure every bite has some.
- ✓ Refrigerate for the full 4 hours before the first slice.
- ✓ Use a hot knife (dip in warm water) for a clean cut.
Customizing Your Treats
If you want to tweak the flavor profile, there are plenty of ways to do it. For those who love a more complex sweetness, try using dark chocolate chips instead of semi sweet. This cuts through the richness of the caramel and creates a more sophisticated balance.
If you're looking for other layered treats to try, my Seven Layer Bars recipe is another great no bake option that uses a similar layering logic. You could even swap the pecans in this recipe for toasted walnuts or macadamias if you want a different nuttiness.
For an even more decadent finish, you could drizzle a bit of my Hot Fudge Sauce recipe over the top right before serving. Just make sure the sauce is slightly cooled so it doesn't melt the chocolate topping.
Decision Shortcut:
- Want a firmer bar? Extend chilling time to 6 hours.
- Want a saltier finish? Sprinkle flaky sea salt over the chocolate.
- Want a nut free version? Replace pecans with toasted sunflower seeds.
Preserving Your Treats
Because of the cream cheese and whipped topping, these no bake turtle dream bars need to stay cold. Store them in an airtight container in the fridge for up to 5 days. If you leave them on the counter for more than an hour, the caramel can start to migrate, and the layers may lose their definition.
For long term storage, these freeze surprisingly well. Wrap individual bars in parchment paper and place them in a freezer bag for up to 2 months. When you're ready to eat one, just let it thaw in the fridge for a couple of hours.
To avoid waste, if you have leftover Oreo crumbs from the base, don't toss them. Toss them into a smoothie or use them as a garnish for a bowl of vanilla ice cream.
Best Serving Suggestions
Since these bars are incredibly rich, they need a bit of brightness to balance them out. I love serving these with a side of fresh raspberries or sliced strawberries. The acidity of the berries cuts through the fat of the cream cheese and chocolate.
To make these look truly professional, I use a "color balance" strategy for the garnish. I add three specific accents: a few grains of white flaky sea salt for contrast, a single fresh mint leaf for a pop of green, and a raspberry on the side for a splash of red.
Pair these with a strong, unsweetened coffee or a cold glass of milk. The bitterness of the coffee complements the caramel perfectly, making the whole experience feel like a high end cafe treat.
Recipe FAQs
Are these bars actually easy to make without an oven?
Yes, they require zero baking. You simply assemble the layers and let them set in the refrigerator for at least 4 hours.
What gives these bars the "turtle" flavor profile?
The combination of salted caramel, pecans, and chocolate. These three specific components mimic the taste of classic turtle candies.
Does this version use cream cheese for a lush texture?
Yes, the second layer is a sweetened cream cheese blend. Beating softened cream cheese with powdered sugar and whipped topping creates a stable, velvety structure.
Can I use a graham cracker crust instead of Oreos?
No, stick with the Oreo cookies. The dark chocolate crunch of the Oreos provides the necessary structural base and flavor contrast for this recipe.
How to ensure the chocolate topping is smooth and glossy?
Melt chocolate chips and heavy cream in 30-second microwave bursts. Stir between each interval to prevent the chocolate from overheating or seizing.
How to slice the bars without smudging the layers?
Use a sharp knife dipped in hot water. Wipe the blade clean after every single cut to keep the pudding and cream cheese layers distinct.
How to store the bars to keep them fresh?
Keep them in an airtight container in the refrigerator. They remain fresh for up to 5 days. If you enjoyed the simple prep here, see how we use similar quick assembly methods in our Cinnamon Sugar Chex Mix.
No Bake Turtle Dream Bars

