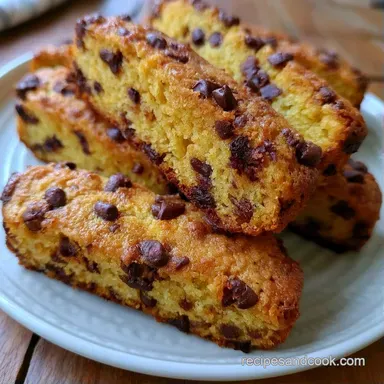
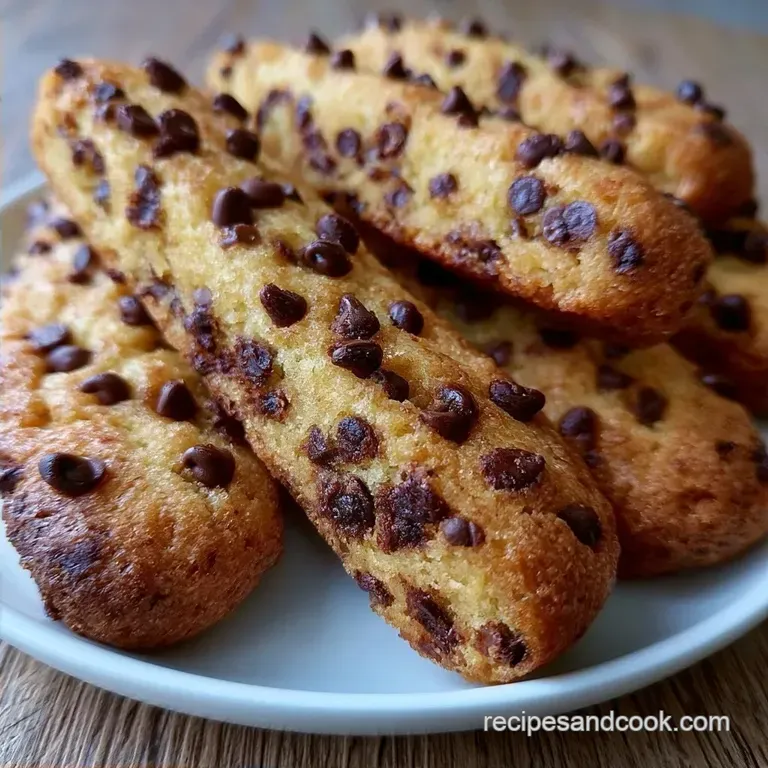
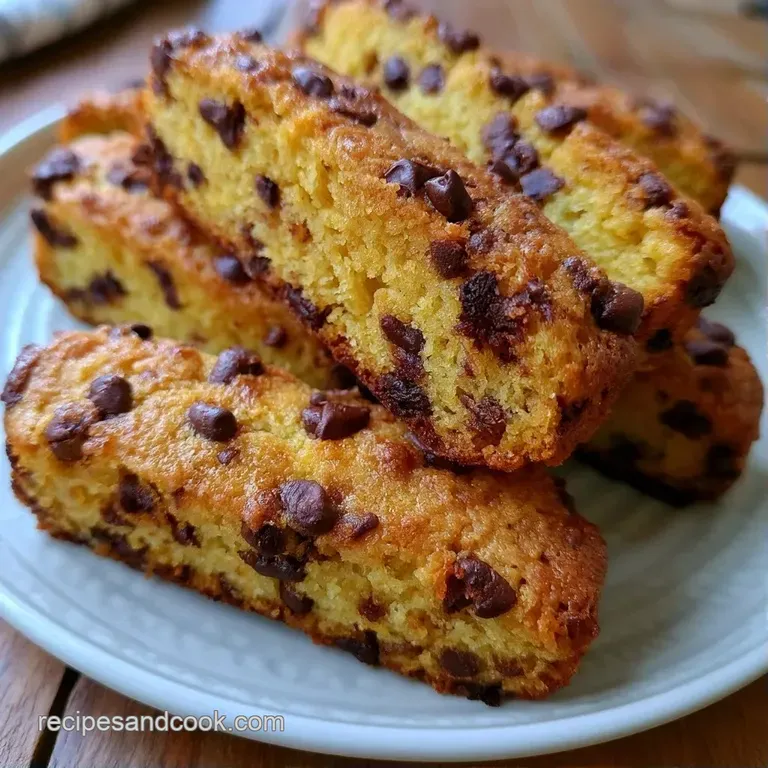
Chocolate Chip Cookie Sticks: Buttery
- Time: 20 min active + 60 min chilling
- Flavor/Texture Hook: Crispy, buttery base with a silky chocolate snap
- Perfect for: Party platters, school snacks, or coffee pairings
These treats are rooted in the old tradition of tea biscuits and finger foods designed for dipping into coffee or tea. They bring back memories of European confectionery shops where everything was sliced into neat, uniform strips and displayed in glass cases.
It's that specific, nostalgic style of baking that focuses on precision and a clean look.
I remember the first time I tried making these for a brunch. I skipped the chilling step because I was in a rush, and the result was a giant, flat sheet of chocolate chip cookie that I had to break into shards. It wasn't exactly the professional look I wanted.
Now, I stick to the process. Making Cookie Sticks is all about patience with the temperature. Once you get the chill right, the slicing is satisfying and the final dip looks like it came from a high end shop.
Cookie Sticks
Cold Dough: Chilling the fats prevents the strips from flattening out in the oven. This keeps the edges sharp and the height consistent.
Chocolate Stability: Adding a bit of fat to the chocolate, like coconut oil, keeps it from cracking when you bite into it. For a deeper look at how fats affect chocolate, Serious Eats explains the role of temper and stability.
| Method | Time | Texture | Best For |
|---|---|---|---|
| Oven Baking | 12 mins | Firm and crispy | The base dough strips |
| Stovetop Melting | 5 mins | Smooth and pourable | The chocolate coating |
Ingredient Deep Dive
| Ingredient | What It Does | Best Swap |
|---|---|---|
| Unsalted Butter | Provides structure and richness | Coconut oil (solid) |
| All Purpose Flour | Gives the stick its hold | 1:1 gluten-free blend |
| Semi Sweet Chocolate | Adds the rich, dark finish | Dark chocolate (70%) |
| Coconut Oil | Thins the chocolate for dipping | Vegetable oil |
Equipment Needed
You don't need a fancy kitchen for this. A 9x13 inch baking pan is the core requirement. I highly recommend using parchment paper to line the pan, or you'll be scrubbing butter off the metal for an hour. A pizza cutter is the best tool for getting those straight, clean lines in the chilled dough.
For the chocolate, a microwave safe bowl or a double boiler works.
Recipe Specs
For the best results, you need a few specific weights. Use a kitchen scale if you have one. For the flour, King Arthur Baking suggests spooning and leveling to avoid packing too much into the cup, which can make the dough dry.
For the base
- 1 cup (225g) unsalted butter, softened Why this? Soft butter creams better with sugar
- ¾ cup (150g) granulated sugar Why this? Provides crispness and sweetness
- 1 tsp (5ml) vanilla extract Why this? Adds aromatic depth
- 2 cups (250g) all purpose flour Why this? Standard protein for structure
- ½ tsp (3g) salt Why this? Balances the sugar
- ½ cup (90g) mini chocolate chips Why this? Even distribution in thin sticks
For the chocolate dip
- 8 oz (225g) semi sweet chocolate, chopped Why this? Classic balance of bitter and sweet
- 2 tbsp (30g) coconut oil Why this? Creates a smooth, glossy finish
Key Steps
- Cream the softened butter and sugar. Beat until the mixture is pale and fluffy, then stir in the vanilla extract.
- Stir in the flour and salt. Mix until a soft dough forms, then fold in the mini chocolate chips by hand. Note: Mixing too much here makes the dough tough.
- Line a 9x13 inch pan with parchment paper. Press the dough evenly into the bottom of the pan until it reaches a uniform thickness.
- Chill the pan. Place it in the refrigerator for 60 minutes until the dough feels firm to the touch.
- Preheat oven to 350°F (175°C). Use a pizza cutter to slice the chilled dough into 18-24 equal strips.
- Bake for 10-12 minutes until the edges are just barely golden brown. Let them cool completely in the pan.
- Melt the chocolate and coconut oil. Use 30 second microwave bursts, stirring in between to avoid burning.
- Dip the sticks. Push each one three quarters of the way into the chocolate, lift to let excess drip, and place on parchment.
Fixing Common Problems
When you first start making homemade cookie sticks, things might not look exactly like the picture. Usually, it comes down to temperature. If the dough was too warm when it hit the oven, the strips will merge.
Why Sticks Spread
If your strips lost their shape, the dough likely wasn't cold enough. The butter melts before the flour structure sets. Ensure the dough is firm before slicing.
Chocolate Seizing
If the chocolate becomes clumpy or grainy, a drop of water probably got in. You can sometimes fix this by adding a tiny bit more coconut oil and stirring vigorously over low heat.
Cookies Too Hard
Overbaking is the main culprit. Because these are thin, they go from "done" to "burnt" in about 60 seconds. Pull them out when the edges are gold, even if the middle looks soft.
| Problem | Root Cause | Solution |
|---|---|---|
| Flat strips | Insufficient chilling | Chill for full 60 mins |
| Cracked chocolate | No added oil | Add 1-2 tsp coconut oil |
| Burnt bottoms | Oven rack too low | Move rack to center position |
Dietary Adaptations
You can easily tweak this recipe to fit different needs. If you're looking for a different base, you might like my Sugar Cookie Cutout Recipe for a plainer flavor.
Matcha Twist
Swap the mini chocolate chips for matcha powder (2 tbsp) and use white chocolate for the dip. It creates a beautiful green and white contrast.
Birthday Cake Style
Add a teaspoon of almond extract to the dough and use colorful sprinkles in the chocolate dip for a festive look.
Gluten free Swap
Use a high-quality 1:1 gluten-free flour blend. The texture stays remarkably similar, though the sticks may be slightly more fragile.
Vegan Friendly Swap
Use vegan butter and dairy-free chocolate chips. The coconut oil already makes the dip vegan, so no changes are needed there.
Adjusting the Yield
Scaling Cookie Sticks is straightforward, but baking times change.
Scaling Down (1/2 batch): Use an 8x8 inch pan. Reduce the bake time by about 2 minutes. Beat one egg and use half if you're adapting a recipe that requires them.
Scaling Up (2x batch): Work in batches. Do not crowd the oven, as this lowers the temperature and causes the sticks to spread. Increase salt and vanilla to 1.5x instead of 2x to keep the flavor balanced.
Baking Note: If baking a double batch at once, lower the oven temperature by 25°F and extend the time by 2-3 minutes to ensure the center of the pan cooks evenly.
Debunking Baking Myths
Some people believe that you must "seal" the edges of the dough to prevent spreading. This isn't true for this recipe. The structural integrity comes from the cold butter and the flour ratio.
Another common thought is that you should dip the cookies while they are still warm. Don't do this. The heat will melt the chocolate too much, and you'll lose that clean, professional line. I've seen people try it with Peanut Butter Cookies, and while that works for some styles, these sticks need to be cold for the chocolate to set quickly.
Storage Guidelines
Store your Cookie Sticks in an airtight container. In the fridge, they stay fresh for 5 days. In the freezer, they last up to 3 months. If freezing, place a piece of parchment paper between layers so they don't stick together.
To reheat, let them come to room temperature naturally. Avoid the microwave, as it will melt the chocolate dip and make the cookie soft.
For zero waste, if you have leftover melted chocolate, pour it into a small mold or drizzle it over some frozen berries for a quick snack.
Serving and Enjoying
When serving these Cookie Sticks, focus on the visual. The brown of the chocolate is a neutral base, so you need a few color accents to make them pop.
I love using three specific garnishes. First, add a tiny pinch of flaky sea salt for a white sparkle and a flavor hit. Second, crushed freeze dried raspberries add a vibrant red pop. Third, toasted sesame seeds provide a gold accent and a nutty crunch. Add these immediately after dipping, before the chocolate sets.
For a coffee house style, serve them standing up in a tall glass or a ceramic jar. This makes them easy to grab and looks impressive on a table. If you're serving them at a party, a wooden platter with a few fresh berries around the base creates a bakery worthy presentation.
Recipe FAQs
What are cookie sticks?
Short, rectangular butter cookies dipped in chocolate. They are a firm, slice and-bake style treat designed for easy dipping and snacking.
How do you make cookie sticks?
Cream butter and sugar, stir in flour, salt, and mini chocolate chips, and press into a 9x13 inch pan. Chill for 60 minutes, slice into strips, bake at 350°F (175°C) for 10-12 minutes, and dip in melted chocolate and coconut oil.
Why must the dough be chilled for 60 minutes?
It firms the butter to prevent the sticks from spreading in the oven. This ensures they maintain their clean rectangular shape. If you enjoyed mastering the dough structure here, see how we adapt it for chewy snickerdoodle cookies.
How do I keep the sticks from breaking during dipping?
Let them cool completely in the pan before removing. This allows the cookies to fully harden, providing the structural integrity needed for dipping.
Is it true that cookie sticks are a cholesterol friendly snack?
No, this is a common misconception. Because the recipe contains butter and sugar, these are intended as a rich dessert rather than a health conscious snack.
How do I melt the chocolate for a smooth dip?
Melt semi sweet chocolate and coconut oil using a double boiler or 30-second microwave bursts. Stir thoroughly between each interval to prevent the chocolate from scorching.
How should I store cookie sticks to keep them fresh?
Store them in an airtight container in the fridge for up to 5 days. For longer preservation, freeze them for 3 months with parchment paper between layers to prevent sticking.
Chocolate Chip Cookie Sticks