Easy Sheet Pan Quesadillas Recipe
- Time: Active 15 minutes, Passive 20 minutes, Total 35 minutes
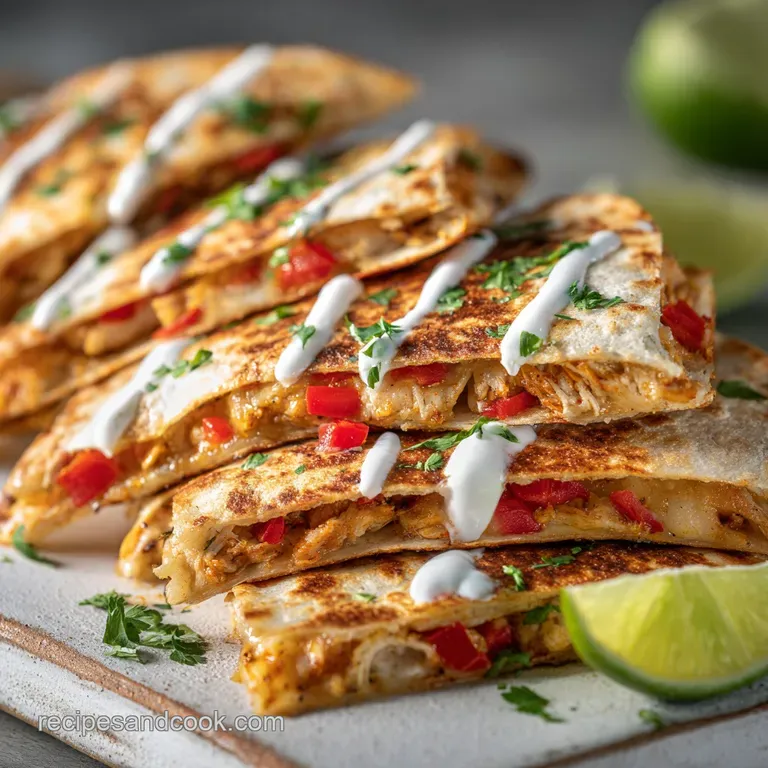
- Flavor/Texture Hook: A shatteringly crisp golden exterior with a molten, velvety cheese center.
- Perfect for: Stress free weeknight dinners or feeding a hungry crowd during game day.
- Making the Easy Sheet Pan Quesadilla Recipe
- The Physics of the Crunch
- Component Deep Dive
- Simple Ingredients and Budget Swaps
- Baking Your Golden Masterpiece
- Fixing Common Quesadilla Mishaps
- Resizing For Your Family
- Busting Traditional Kitchen Myths
- Storage and Scraps Strategy
- High in Sodium
- Recipe FAQs
- 📝 Recipe Card
Making the Easy Sheet Pan Quesadilla Recipe
I still remember the "Great Quesadilla Crisis" of 2018. It was my nephew’s birthday, and I was stuck at the stove like a short order cook, flipping one tortilla at a time while everyone else laughed in the living room. By the time I sat down with my own soggy, lukewarm triangle, the party was practically over.
I felt like I had missed the whole point of the gathering just because I wanted that perfect crunch.
That was the night I decided there had to be a better way to handle more than two people at once. I started experimenting with the oven, but the first few tries were... let's just say, "flexible." They lacked that signature sizzle you get from a hot pan.
But then I tried the double pan trick, and the sound of that first bite a literal shatter of toasted flour changed everything. It’s now my go to for bringing people together without sacrificing my own seat at the table.
This recipe is all about that nostalgic, comforting flavor we grew up with, but updated with smart shortcuts that save your sanity. We are going to build a giant, cheesy envelope that bakes into a singular, glorious sheet of goodness.
It’s budget friendly, uses up those pantry staples, and honestly, it’s just fun to assemble.
The Physics of the Crunch
Thermal Compression: Placing a heavy second sheet pan on top creates direct contact between the fat and the heat source, mimicking a press. This prevents steam from escaping slowly, which forces the tortilla to fry in the butter rather than just drying out.
| Method | Time | Texture | Best For |
|---|---|---|---|
| Stovetop | 5 minutes per piece | Crispy but uneven | Single servings |
| Oven (No Press) | 15 minutes | Chewy and soft | Low effort snacks |
| Sheet Pan Press | 20 minutes | Shattering and uniform | Feeding 8 people at once |
Traditional methods often leave you with cold spots or burnt edges, but the oven provides a steady environment. If you’ve ever mastered a Pan Seared Ribeye recipe, you know that consistent heat is the secret to a great crust, and this sheet pan method applies that same logic to tortillas.
Component Deep Dive
| Ingredient | Science Role | Pro Secret |
|---|---|---|
| Flour Tortillas | Structural Base | Room temp tortillas fold without snapping or cracking. |
| Monterey Jack Blend | The Emulsifier | High moisture content ensures a velvety, long cheese pull. |
| Melted Butter | Maillard Accelerator | Brushing the pan directly ensures the bottom toasts as fast as the top. |
| Taco Seasoning | Flavor Catalyst | Toasting the seasoning with the veggies "blooms" the spices for deeper aromatics. |
Using the right fat is crucial here. While oil works, butter contains milk solids that brown beautifully, giving you that deep, toasted aroma that oil simply can't match. It’s a small shortcut that pays off in huge flavor dividends.
Simple Ingredients and Budget Swaps
- 9 large flour tortillas (10 inch): These form our "crust." Why this? Large sizes overlap better to prevent filling leaks during the bake.
- 3 tbsp unsalted butter, melted: For that golden finish. (Sub: 3 tbsp vegetable oil if you're out of butter, though it’s less flavorful).
- 3 cups cooked chicken breast, shredded: Our main protein. (Sub: 1 lb browned ground beef for a heartier, budget friendly twist).
- 1 cup black beans, rinsed and dried: Adds bulk and fiber. (Sub: Pinto beans or even refried beans spread thin).
- 1 cup frozen corn, thawed: Provides little pops of sweetness. Why this? Frozen corn holds its texture better than canned in high heat.
- 1 large bell pepper, finely diced: For crunch and color. (Sub: Diced mild green chiles for more heat).
- 1/2 red onion, finely diced: Essential for a sharp bite. (Sub: Green onions if you prefer a milder finish).
- 2 tbsp low sodium taco seasoning: The flavor backbone. (Sub: A mix of cumin, chili powder, and garlic powder).
- 4 cups shredded Monterey Jack and Sharp Cheddar: The glue. Why this? Jack melts beautifully while Cheddar provides that nostalgic sharp tang.
- 2 tbsp fresh cilantro, chopped: For a bright finish. (Sub: Fresh parsley or a squeeze of lime juice).
If you are looking for more ways to feed a crowd on a budget, this dish fits perfectly alongside a Carrot Souffle recipe for a complete, comforting meal that feels much more expensive than it actually is.
Baking Your Golden Masterpiece
- Heat the oven. Preheat to 425°F (218°C) and place one large rimmed baking sheet inside to get hot. Note: This creates an immediate sizzle when the tortillas hit the pan.
- Prep the pan. Carefully remove the hot pan and brush it with half of the 3 tbsp melted butter.
- Lay the foundation. Arrange 6 tortillas around the edges of the pan so half of each hangs over the sides, then place one in the center to cover the gap.
- Mix the filling. In a large bowl, toss the 3 cups shredded chicken, 1 cup black beans, 1 cup corn, diced bell pepper, and red onion with the 2 tbsp taco seasoning.
- Layer the cheese. Sprinkle 2 cups of the cheese blend evenly over the bottom layer of tortillas. Ensure the cheese reaches the very edges to act as a sealant.
- Add the bulk. Spread the chicken and veggie mixture over the cheese in an even layer.
- Final cheese cap. Top the filling with the remaining 2 cups of cheese, which will "glue" the top tortillas down.
- Seal the envelope. Place the final 2 tortillas in the center, then fold the overhanging edges of the bottom tortillas back toward the middle.
- Compress and bake. Brush the top with the remaining butter, place a second baking sheet on top, and bake for 15 minutes.
- Final crisping. Remove the top sheet pan and bake for another 5 minutes until the top is golden and crackling.
Chef's Note: If your top sheet pan is very light, place a heavy oven safe skillet on top of it for the first 15 minutes. That extra weight is what guarantees the tortillas won't puff up and lose their crunch.
Fixing Common Quesadilla Mishaps
Solving The Soggy Bottom
If your quesadilla comes out limp, it's usually due to moisture. Vegetables like peppers and onions release water as they cook. If you don't dice them finely or if your beans aren't dried properly, that steam gets trapped under the tortillas.
Fixing Pale Tortillas
Sometimes the edges look great but the center is white. This happens if the top sheet pan isn't making full contact. Make sure your filling is level! If it’s mounded in the middle, the edges won't get pressed down against the hot metal.
Preventing Flimsy Folds
If the tortillas snap when you try to fold them, they are too cold. Give them 15 seconds in the microwave or let them sit on the counter for 20 minutes before assembling.
| Problem | Root Cause | Solution |
|---|---|---|
| Filling falling out | Not enough cheese at the edges | Create a "cheese border" before folding the top. |
| Tortillas sticking | Not enough fat on the pan | Use a silicone brush to ensure every inch of the pan is buttered. |
| Greasy texture | Using pre shredded "taco" blends | Grate your own cheese; pre shredded has starch that prevents a clean melt. |
Common Mistakes Checklist:
- ✓ Dry your black beans completely with a paper towel before adding them to the bowl.
- ✓ Preheat the bottom baking sheet for at least 5 minutes before assembling.
- ✓ Use a heavy duty rimmed baking sheet that won't warp under high heat.
- ✓ Don't skip the final 5 minutes of baking without the top pan it's the key to the color.
- ✓ Let the quesadilla rest for 5 minutes before slicing so the cheese sets.
Resizing For Your Family
When you need to scale this down for just two or three people, you can easily use a quarter sheet pan. Simply cut the ingredient quantities in half and use 5 tortillas instead of 9. You'll still want to use the double pan method, just with smaller pans!
Reduce the initial bake time by about 3 minutes since a smaller mass heats through faster.
For a massive party, you can run two sheet pans side-by-side. If you have a convection setting on your oven, turn it on and reduce the temp by 25°F. This will help the air circulate around both pans evenly.
Just remember that the total liquid from the veggies doubles, so you might want to sauté the peppers and onions for 2 minutes first to cook off excess moisture.
| Servings | Ingredient Adjustments | Pan Size | Cook Time |
|---|---|---|---|
| 4 people | Half quantities | 9x13 inch pan | 18 minutes |
| 8 people | Original Schema quantities | 13x18 inch pan | 20 minutes |
| 16 people | Double all quantities | Two 13x18 pans | 25 minutes |
Busting Traditional Kitchen Myths
One common myth is that you must use oil to get a "real" fried texture. In reality, the milk solids in butter actually help the tortilla brown at a lower temperature than oil, giving you a more complex flavor profile. You aren't just frying; you're browning.
Another misconception is that you need to flip the entire sheet pan halfway through. Trust me, I’ve tried it, and it usually ends with a face full of hot cheese and a ruined dinner.
The double pan method provides heat from both the bottom (conductive) and the top pan (radiant/conductive), making a dangerous flip completely unnecessary.
Storage and Scraps Strategy
These leftovers stay surprisingly good in the fridge for up to 4 days. Store them in a single layer or with parchment paper between slices to keep the tortillas from sticking together. When you're ready for round two, stay away from the microwave! It will turn your beautiful crunch into a gummy mess.
Instead, pop a slice into a dry skillet over medium heat for 2 minutes per side, or use an air fryer at 350°F for 4 minutes.
If you find yourself with extra filling, don't throw it out. The chicken, bean, and corn mix is a fantastic base for a "taco salad" the next day. You can even freeze the assembled, unbaked quesadilla. Just wrap the whole pan in plastic wrap and foil. Bake it directly from frozen at 400°F, adding about 10-15 minutes to the total time. It's the ultimate "emergency dinner" for those nights when you just can't even think about cooking. For more easy tray style ideas, my GlutenFree DairyFree Recipes offer another great way to use up leftover veggies in a single pan.

High in Sodium
1120 mg mg of sodium per serving (49% % of daily value)
The American Heart Association recommends limiting sodium intake to about 2,300mg per day.
Tips to Reduce Sodium in Your Chicken Burritos
-
Reduce Cheese-15%
Use half the amount of shredded cheese or switch to a lower sodium cheese option like Swiss. This will significantly cut down on the overall sodium content.
-
DIY Taco Seasoning-15%
Prepare your own taco seasoning blend from scratch using chili powder, cumin, garlic powder, onion powder, paprika, oregano, and a pinch of salt. store-bought mixes are very high in sodium.
-
Fresh Beans-10%
Use freshly cooked black beans instead of canned. Canned beans are often packed with sodium. If using canned, rinse very well to remove excess salt.
-
Tortilla Choice-10%
Choose lower sodium tortillas or make your own. Many store-bought tortillas contain a surprising amount of sodium.
-
Spice it Up
Enhance the flavor of your burritos with sodium free herbs and spices like cumin, chili powder, garlic powder, and smoked paprika for a delicious alternative to salt.
Recipe FAQs
Can I use corn tortillas instead of flour for the sheet pan method?
No, you should stick to large flour tortillas. Corn tortillas are smaller and much more brittle, meaning they will crack when you try to fold the edges over the filling.
How do I ensure the bottom of the quesadilla gets as crispy as the top?
Preheat a heavy rimmed baking sheet in the oven at 425°F for at least five minutes. The immediate searing contact with the hot metal starts the Maillard reaction instantly, mimicking a stovetop press.
What is the secret to keeping the filling from making the tortillas soggy?
Sauté high moisture ingredients first, or dice them very finely. Specifically, cook down any onions or peppers until they release some steam, similar to how we manage moisture control when creating a crispy crust on a Pan Seared Ribeye recipe.
Is it true you must leave the top sheet pan on for the entire cooking time?
No, this is a common misconception. Keep the top pan on for the first 15 minutes to compress and toast the bottom layer, then remove it for the final 5 minutes to allow the top surface to brown fully.
How to prepare the shredded chicken if I don't have pre-cooked meat ready?
Boil or bake 1 lb of raw chicken breasts until just done, then shred it immediately. Ensure the cooked chicken is completely cooled before mixing it with the seasonings, or it will steam the raw vegetables inside the filling.
Can I prepare this entire quesadilla the night before and bake it in the morning?
Yes, you can assemble and freeze the unbaked quesadilla. Wrap the entire assembly tightly in plastic and foil, then add about 10 to 15 minutes to the total bake time when cooking directly from frozen.
What cheese blend melts best without separating or becoming oily?
Use a blend dominated by Monterey Jack cheese, balanced with sharp cheddar. The high moisture content in Jack ensures a creamy melt, whereas aging the cheddar helps provide flavor without compromising the texture, much like using a good quality fat for texture in other baked goods.
Sheet Pan Quesadilla Recipe
Ingredients:
Instructions:
Nutrition Facts:
| Calories | 656 kcal |
|---|---|
| Protein | 40 g |
| Fat | 31 g |
| Carbs | 53 g |
| Fiber | 6 g |
| Sugar | 4 g |
| Sodium | 1120 mg |
