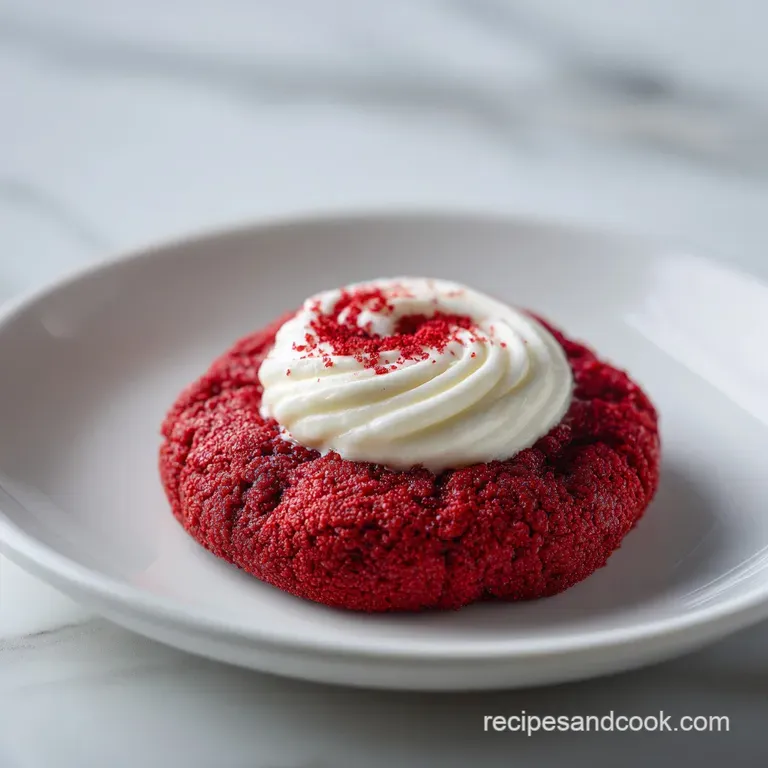
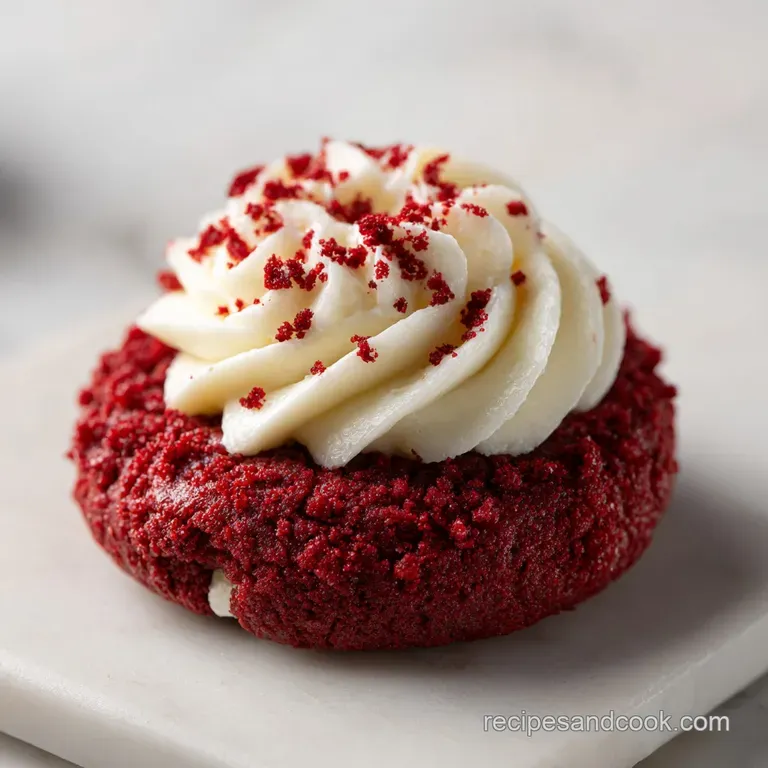
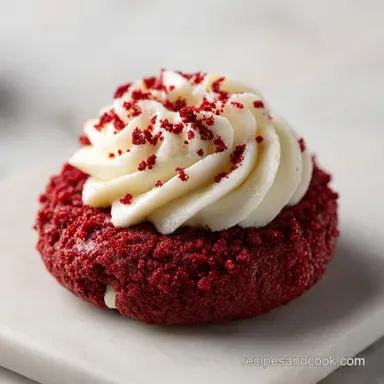
Red Velvet Cream Cheese Thumbprint Cookies
- Time:20 minutes active + 30 minutes chilling + 12 minutes baking = 62 minutes total
- Flavor/Texture Hook: Velvety cocoa crumb with a creamy, melted cheesecake heart
- Perfect for: Holiday cookie swaps, festive parties, or impressing the neighbors
- Making Red Velvet Cream Cheese Thumbprint Cookie
- Secrets to the Perfect Crumb
- Essential Cookie Recipe Specs
- Essential Ingredients and Substitutions
- Necessary Kitchen Tools List
- Step by Step Baking Guide
- Fixing Common Baking Problems
- Smart Recipe Dietary Swaps
- Storing and Freshness Tips
- Stunning Presentation Plating Levels
- Debunking Common Kitchen Myths
- Recipe FAQs
- 📝 Recipe Card
Making Red Velvet Cream Cheese Thumbprint Cookie
Did you know that the original "red" in red velvet was never about food coloring? In the early days of baking, a chemical reaction between raw cocoa powder and acidic ingredients like vinegar or buttermilk would naturally tint the batter a soft, rusty mahogany.
It wasn't the neon crimson we see in bakeries today, but it was a sign of a very specific, tender texture that earned the name "velvet." When you bite into this Red Velvet Cream Cheese Thumbprint Cookie, you're actually tasting that history, just with a little extra boost from the bottle to give it that iconic, vibrant punch we all love.
Discover a standout recipe for Red Velvet Cream Cheese Thumbprint Cookies, a festive twist on a classic. I remember the first time I pulled these out of the oven, the kitchen smelled like a mix of a high end chocolatier and a New York cheesecake factory.
The edges were just set, while the centers remained soft and molten. It's a sensory experience that starts with the scent of toasted cocoa and ends with the tangy zip of a perfectly sweetened cream cheese filling.
We aren't just making another cookie here, we're crafting a miniature dessert that feels like a full sized cake in three bites. Most people think red velvet is just chocolate cake with red dye, but the truth is in the tang.
The addition of vinegar and a higher ratio of sugar to cocoa is what creates that unique flavor profile. It's not quite chocolate, not quite vanilla, but something entirely its own. Trust me, once you see that vibrant red dough contrasted against the snow white filling, you'll be hooked.
Secrets to the Perfect Crumb
Understanding the "why" behind your baking makes the "how" so much easier. In this recipe, we are manipulating fats and acids to ensure the cookie stays soft without falling apart.
Red velvet relies on a very specific balance where the acidity of the vinegar reacts with the proteins in the flour to keep the crumb tight but tender. This isn't a "crunchy" cookie, it's a velvety one, hence the name.
- Fat Stabilization
- Chilling the dough for 30 minutes ensures the butter doesn't melt instantly in the oven, preventing a flat, greasy puddle.
- Acid Activation
- White vinegar reacts with the cocoa and flour to tenderize the gluten, giving us that signature soft "velvety" bite.
- Aeration Control
- Creaming the butter for exactly 3 minutes creates micro bubbles that hold the weight of the heavy cream cheese center.
- Sugar Saturation
- Using granulated sugar in the dough provides structure, while the sugar in the filling keeps the cheese from drying out.
| Method | Time | Texture | Best For |
|---|---|---|---|
| Classic Chill | 62 minutes | Soft and thick | Gift boxes and parties |
| Fast Bake (No chill) | 32 minutes | Thinner, crispier edges | Quick late night snacks |
| Double Chill | 2 hours | Ultra puffy and tall | Photography and displays |
Choosing the right method depends on your patience. While the fast bake works if you're in a total rush, the classic chill is the sweet spot for that professional, bakery style look where the thumbprint doesn't crack or spread into a pancake.
Essential Cookie Recipe Specs
When we talk about precision in baking, it's not just to be fussy. These cookies involve two different batters, essentially: the red velvet base and the cheesecake core. Because the dough is quite rich with 225g of unsalted butter, temperature is your biggest ally. If your butter is too hot, the cookies spread.
If your cream cheese is too cold, it will be lumpy rather than silky.
For a deep dive into how fat affects different bakes, you might want to look at the chemistry in this Chocolate Raspberry Cupcake recipe which uses similar ratios. The goal here is a cookie that feels substantial in your hand but melts the moment it hits your tongue. We use a single egg in the dough to provide just enough bind without making it "cakey" or tough.
| Component | Science Role | Pro Secret |
|---|---|---|
| Unsweetened Cocoa | Provides structure and flavor | Use Dutch processed for a deeper, darker base |
| White Vinegar | Tenderizes gluten strands | Don't skip this; it's the "velvet" in the name |
| Cream Cheese | Adds tang and moisture | Use full fat bricks for the most stable filling |
| Liquid Food Color | Visual identity | Add it to the wet ingredients for even distribution |
I always recommend weighing your flour. 315g can vary wildly if you use a measuring cup, leading to either a dry, crumbly mess or a sticky dough that you can't roll. If you don't have a scale, fluff your flour with a fork before spooning it into the cup.
Essential Ingredients and Substitutions
To get the most vibrant Red Velvet Cream Cheese Thumbprint Cookie, you need to be intentional with your pantry choices. This isn't the time for low-fat alternatives. We want the full fat, high moisture goodness that makes these feel like a luxury.
Each ingredient plays a role, from the 25g of cocoa powder providing the earthy undertone to the 0.5 tsp of salt that wakes up all the sugar.
- 315g All purpose flour: The backbone of the cookie. Why this? Provides enough protein for a sturdy thumbprint shape.
- 25g Unsweetened cocoa powder: For that subtle chocolate note. Why this? Essential for the authentic red velvet flavor profile.
- 225g Unsalted butter: Softened to room temperature. Why this? Creates the tender, buttery base we need.
- 150g + 50g Granulated sugar: Used in both dough and filling. Why this? Sweetens and aids in browning the edges.
- 225g Full fat cream cheese: The star of the filling. Why this? Stays creamy during baking without becoming runny.
- 1 tbsp Liquid red food coloring: For that classic look. Why this? Provides the most intense, uniform color throughout.
- 1 tsp + 0.5 tsp Pure vanilla extract: Flavor enhancer. Why this? high-quality vanilla makes the cream cheese taste like cheesecake.
| Original Ingredient | Substitute | Why It Works |
|---|---|---|
| White Vinegar (0.5 tsp) | Lemon Juice (0.5 tsp) | Provides the same acidity to tenderize the dough |
| Liquid Food Color (1 tbsp) | Gel Food Color (1 tsp) | More concentrated. Note: Use less to avoid bitter aftertaste |
| All purpose Flour (315g) | GF 1 to-1 Blend (315g) | Similar weight. Note: May require 10 more mins of chilling |
If you're looking for a similar vibe but with a bit more holiday "pop," you should definitely check out these Red Velvet Blossom Cookies which use a chocolate kiss instead of the cheese filling. Both are absolute winners on a dessert tray.
Necessary Kitchen Tools List
You don't need a professional kitchen to pull this off, but a few specific items will make your life much easier. First and foremost, a stand mixer is your best friend here. Creaming 225g of butter with 150g of sugar until "pale and aerated" takes real power.
While a hand mixer works, the stand mixer allows you to prep your filling while the dough is working.
A 1 tablespoon cookie scoop is another non negotiable for me. Consistency is king in baking. If one cookie is 2 tablespoons and the next is 1.5, they will bake at different rates. You'll end up with some burnt edges and some raw centers. Using a scoop ensures all 24 portions are identical.
Chef's Tip: Use the back of a rounded 1/2 teaspoon measuring spoon to make the "thumbprint" indent. It creates a cleaner, more uniform well than your actual thumb, and it doesn't leave those little cracks along the edges.
Finally,, make sure you have high-quality parchment paper or a silicone baking mat. The cream cheese filling can be a bit sticky if it bubbles over, and you don't want to be scraping your beautiful creations off a bare metal sheet.
step-by-step Baking Guide
- Cream the 225g softened butter and 150g sugar on medium high speed for 3 minutes. Note: Stop when the mixture looks like pale, fluffy clouds.
- Beat in the egg, 1 tbsp food coloring, 1 tsp vanilla, and 0.5 tsp vinegar. until the color is a uniform, vibrant red.
- Sift the 315g flour, 25g cocoa, and 0.5 tsp salt together into a separate bowl. Note: Sifting prevents cocoa "clumps" in your final dough.
- Turn the mixer to the lowest setting and slowly add the dry ingredients to the wet. until no white streaks remain.
- Cover the bowl tightly with plastic wrap and refrigerate for 30 minutes. until the dough feels firm to the touch.
- Whisk the 225g cream cheese, 50g sugar, 1 egg yolk, and 0.5 tsp vanilla in a small bowl. until silky and completely smooth.
- Preheat your oven to 180°C (350°F). Scoop 1 tablespoon portions of dough and roll into smooth balls.
- Place balls on a lined tray and press a deep well into the center of each. until it looks like a small nest.
- Spoon or pipe the cream cheese mixture into each indent until just level with the top.
- Bake for 12 minutes. until the edges are matte and the filling is set.
Let them rest on the baking sheet for at least 5 minutes before moving them to a wire rack. This "carryover" heat finishes the center without over browning the delicate red dough.
Fixing Common Baking Problems
Even the best of us hit a snag sometimes. The most common issue with any Cheese Thumbprint Cookie is the dreaded "spreading." If your beautiful round balls turn into flat discs, it usually means your butter was too soft or the oven wasn't preheated correctly.
The 30 minute chill time is your insurance policy against this.
Another hiccup is the cream cheese filling cracking. This usually happens if you over beat the filling once the egg yolk is added. You want to incorporate the yolk, but you don't want to whip in a ton of air. Air bubbles expand in the oven and then collapse, leaving cracks in your pristine white centers.
| Problem | Root Cause | Solution |
|---|---|---|
| Cookies are dry | Too much flour or overbaked | Weigh your flour (315g) and pull at 12 mins |
| Filling is runny | Used low-fat cream cheese | Only use full fat block cheese for stability |
| Colors are dull | Poor quality cocoa or old dye | Use vibrant liquid coloring and fresh cocoa |
Why Your Filling Bleeds
If you notice the red dye "bleeding" into the white cream cheese, it's usually because the dough was too warm when you added the filling. The moisture from the cheese pulls the dye from the dough. To prevent this, make sure your dough is properly chilled and work quickly when filling the wells.
Checklist for Success
- ✓ Chill the dough for the full 30 minutes (no shortcuts here!)
- ✓ Use a spoon to create the well for a smoother look
- ✓ Ensure the cream cheese is truly at room temperature before mixing
- ✓ Don't over mix the dry ingredients; stop as soon as the flour disappears
- ✓ Let cookies cool completely before stacking to protect the filling
Smart Recipe Dietary Swaps
Adjusting a Red Velvet Cream Cheese Thumbprint Cookie for dietary needs is surprisingly easy if you know what to swap. For a gluten-free version, a high-quality 1 to-1 baking flour works beautifully because the cocoa powder and cream cheese provide enough moisture to hide the typical "grittiness" of rice based flours.
If you are looking for a lower sugar option, you can replace the granulated sugar in the dough with a monk fruit sweetener blend. However, keep the real sugar in the cream cheese filling if possible, as it helps the cheese maintain its smooth, creamy texture during the bake.
- Downscaling (12 cookies): Halve all ingredients. For the egg, whisk it in a cup and use exactly 25g. Reduce bake time by 1-2 minutes.
- Upscaling (48 cookies): Double everything but the salt and vinegar (use 1.5x for those). Work in two batches so the dough doesn't get too warm while sitting on the counter.
- Baking 2x: If using two racks at once, rotate the pans halfway through the 12 minute bake to ensure even coloring.
Storing and Freshness Tips
Because of the cream cheese filling, these aren't your typical "leave on the counter for a week" cookies. You need to treat them with a bit more care. They will stay fresh in the fridge for up to 5 days. I actually think they taste better on day two once the flavors have had a chance to marry.
For long term storage, these freeze exceptionally well. Place them in a single layer on a tray to freeze them solid, then transfer to a freezer safe bag. They will stay perfect for up to 3 months. To eat, just let them thaw in the fridge overnight.
Zero Waste Tip: If you have leftover cream cheese filling, don't throw it out! It's basically a mini cheesecake batter. You can bake it in a greased muffin tin for a tiny crustless cheesecake snack, or use it as a dip for graham crackers.
Stunning Presentation Plating Levels
Level 1: The Simple Home Style
Place the cookies on a rustic wooden board or a simple white plate. The contrast of the red and white is already quite striking, so you don't need much. This is perfect for a casual afternoon tea or a quick snack with friends.
Level 2: The Polished Bakery Look
Dust the cooled cookies lightly with powdered sugar, but only on the red edges. You can do this by placing a small circular cutout over the cream cheese center before dusting. Add a tiny sprig of mint on the side of the plate for a pop of green that screams holiday festive.
Level 3: The Restaurant Showstopper
Pipe a small dot of raspberry coulis or chocolate ganache right in the center of the white cream cheese after baking. Serve the cookie on a dark slate plate with a few fresh raspberries and a faint drizzle of melted white chocolate across the entire plate.
| Plating Level | Tweak | Effect |
|---|---|---|
| Simple | Group in a circle | Creates a "wreath" look |
| Polished | Powdered sugar edges | Mimics a snowy winter scene |
| Restaurant | Added coulis dot | Adds a gourmet flavor layer |
Debunking Common Kitchen Myths
One big myth is that you need buttermilk for red velvet. While buttermilk is traditional for cakes, it would make cookie dough much too soft and sticky to roll. The 0.5 tsp of vinegar combined with the egg gives you all the acidity and lift you need without ruining the structure of your Thumbprint Cookie.
Another misconception is that the red color is just for show. While it doesn't have a "flavor," the psychological impact of the color changes how we perceive the chocolate. Without the red, your brain just thinks "mild chocolate." With the red, it registers as that specific, tangy red velvet experience.
Chemistry is as much about the mind as it is the ingredients!
Finally, don't believe the idea that you can't over cream butter. If you go way past the 3 minute mark, you can actually break the emulsion, leading to a cookie that leaks oil in the oven. Stick to the timer, and you'll get that bakery worthy result every single time. Happy baking, friend!

Recipe FAQs
Can I make these without red food coloring?
Yes, but the cookies will be brown. Omitting the 1 tablespoon of red food coloring won't change the flavor or texture, but you lose the signature color that defines this specific treat.
How should I store them?
Keep them in the refrigerator. Because of the cream cheese filling, these cookies must be stored chilled to remain food safe; they will last for up to 5 days in an airtight container.
What's the best way to press the thumbprints?
Use the back of a rounded teaspoon or your thumb while the dough is on the baking sheet. Press gently into the center of each ball after rolling, but be careful not to push all the way through to the pan.
Can I freeze these for later?
Yes, they freeze beautifully for up to 3 months. Freeze them in a single layer on a tray first so they don't stick together, then transfer them to a freezer safe bag. If you enjoy mastering this texture control during the freezing process, you can apply similar logic to keep cakes and other delicate bakes moist in the freezer.
Why do I need to refrigerate the dough for 30 minutes?
Refrigeration stabilizes the fats in the butter. This prevents the cookies from spreading too thin in the oven, ensuring they hold their shape and that distinctive thumbprint indentation during the 12-minute bake.
Why did my cookies come out tough?
You likely overmixed the dough after adding the flour. Only mix on low speed until the white streaks just disappear, as overworking the flour develops gluten that leads to a chewy rather than tender texture.
Is it true I can skip sifting the cocoa powder?
No, this is a common misconception. Sifting the 25g of cocoa powder with the flour and salt is essential to prevent unsightly bitter cocoa clumps from appearing in your finished cookie dough.
Red Velvet Thumbprint Cookies
Ingredients:
Instructions:
Nutrition Facts:
| Calories | 187 calories |
|---|---|
| Protein | 2.7 g |
| Fat | 11.8 g |
| Carbs | 19.1 g |
| Fiber | 0.5 g |
| Sugar | 8.3 g |
| Sodium | 78 mg |
