Peppermint Chocolate Christmas Treat
- Time: Active 10 minutes, Passive 5 minutes, Total 15 minutes
- Flavor/Texture Hook: A velvety chocolate base with a sharp, minty shatter
- Perfect for: Last minute holiday gifting or a beginner friendly dessert platter
- Create a Showstopping Peppermint Chocolate Christmas Treat
- Mastering Physics for Snap Success
- Essential Timing and Yield Data
- Sourcing Your Chocolate and Toppings
- Tools for Smooth Melting Success
- Step-By-Step Melting and Marbling
- Troubleshooting Your Chocolate Batch
- Scaling and Creative Variations
- Storage and Reducing Kitchen Waste
- Debunking Common Kitchen Myths
- Pro Level Garnish Strategy
- Recipe FAQs
- 📝 Recipe Card
Create a Showstopping Peppermint Chocolate Christmas Treat
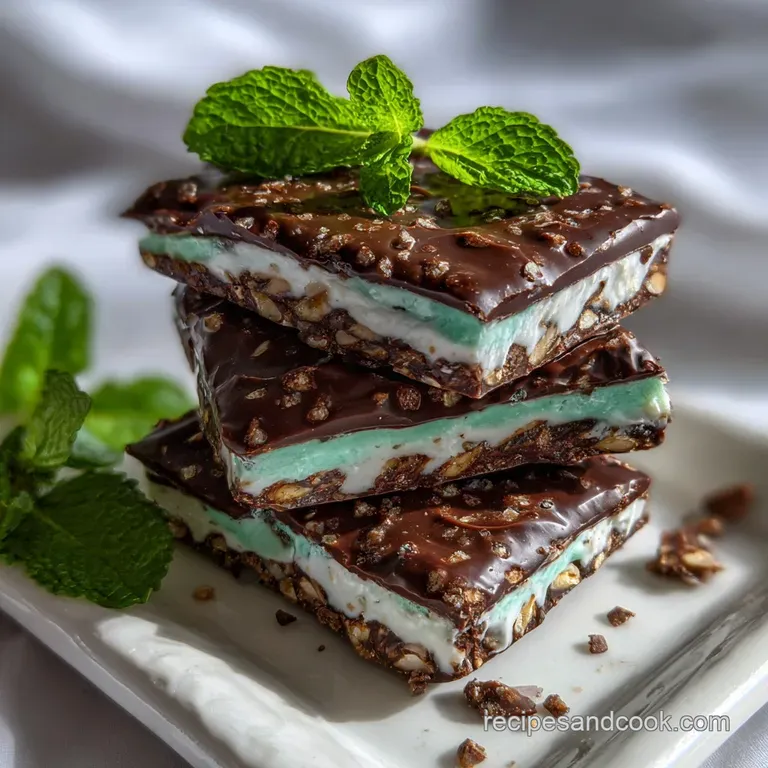
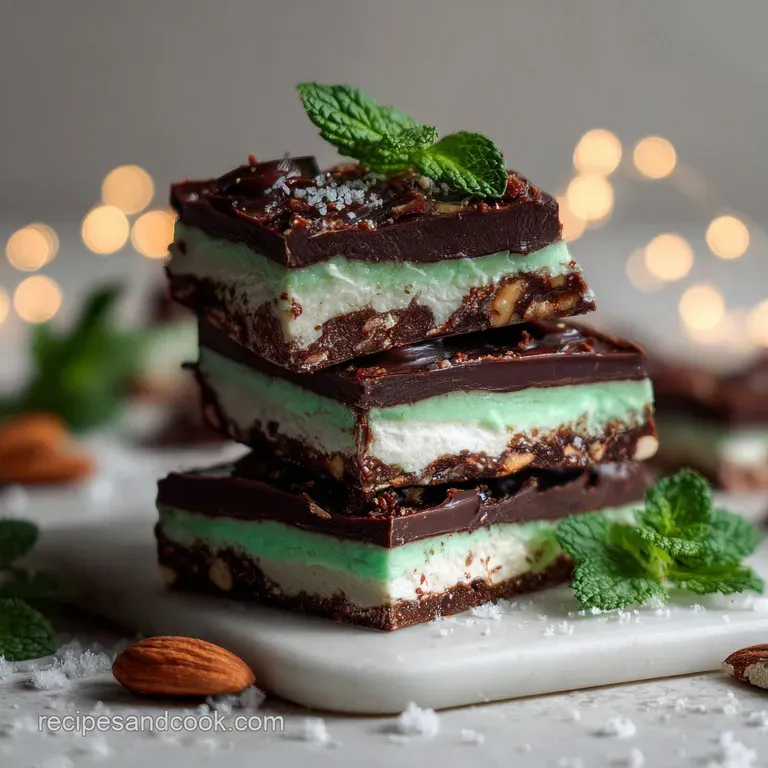
Imagine the sound of a thin sheet of chilled chocolate snapping under your thumb, sending a flurry of red and white candy cane dust onto the counter. The smell is the first thing that hits you not just sugar, but that sharp, cool peppermint oil cutting through the rich, earthy scent of dark cocoa.
I remember the first time I tried to make this; I rushed the cooling process and ended up with a dull, bendy mess that tasted fine but looked like a disaster. It was a total flop, but it taught me that the secret isn't in the mixing, it's in the waiting.
This recipe delivers a quick and easy Christmas treat with peppermint chocolate. We aren't just melting candy here; we are working with the physics of fats to get that professional sheen and a clean break.
Whether you're making this for a neighborhood exchange or just to keep in a jar by the kettle, the result is always impressive. You don't need fancy molds or a culinary degree, just a little patience and some decent chocolate.
We've all been there, staring at a bowl of seized, grainy chocolate because a single drop of water found its way into the pot. I've ruined more batches than I'd like to admit by being careless with a wet spoon. But once you nail the technique, you'll see why this is the ultimate holiday shortcut.
It's fast, it's beautiful, and it satisfies that specific winter craving for something both rich and refreshing. Let's get into how we make this work every single time.
Mastering Physics for Snap Success
Crystal Alignment: Melting chocolate slowly and "seeding" it with un melted bits ensures the cocoa butter forms stable V form crystals for a glossy finish. Without this, the fats separate, leading to that unappealing grey "bloom" on the surface.
Temperature Gradient: White chocolate has a lower melting point than dark, so layering them while the base is slightly set but still tacky allows for marbling without the two colors muddying into a grey swirl.
Evaporative Cooling: Peppermint oil is highly volatile, meaning its flavor compounds can "cook off" if added to boiling liquids, so we stir it in after the heat is removed to keep the aroma sharp.
Surface Tension: Adding a pinch of sea salt at the very end breaks the surface tension of the sugar, which highlights the cocoa notes rather than just the sweetness.
| Method | Control | Risk | Best For |
|---|---|---|---|
| Stovetop (Double Boiler) | High control over gentle heat | Risk of steam/moisture entry | Smooth, even melting of large batches |
| Oven (Warmth method) | Set and forget | High risk of scorching edges | Slow tempering professional grades |
The stovetop method is my go to because I can see exactly when the last lump of chocolate disappears. If you use the oven, you risk the bottom of the pan getting too hot, which ruins the velvety texture we're after.
Essential Timing and Yield Data
| Component | Science Role | Pro Secret |
|---|---|---|
| Bittersweet Chocolate | Structural foundation | Use 60% cacao or higher for a clean, brittle snap rather than a chewy bite. |
| Peppermint Oil | Aromatic intensity | Choose oil over extract to avoid "seizing" the chocolate with water based alcohol. |
| White Chocolate | Visual contrast | High cocoa butter content ensures it flows smoothly for the marbling effect. |
If you find yourself wanting more variety for your holiday spread, this technique pairs beautifully with a classic Christmas Cookies recipe to balance the textures on a dessert board. The crisp chocolate shards provide a great contrast to the buttery crumb of traditional sugar cookies.
Sourcing Your Chocolate and Toppings
To get that bakery worthy result, the quality of your base is everything. Don't settle for "candy melts" which are mostly palm oil; you want the real deal.
- 10 oz bittersweet chocolate (60% cacao or higher), finely chopped: The dark base provides the structural "shatter." Why this? Higher cocoa solids ensure the bark stays firm at room temperature.
- Substitute: Semi sweet chocolate chips (adds more sweetness, slightly softer snap).
- 0.25 tsp pure peppermint oil: Provides the signature cool finish. Why this? Oil won't cause the chocolate to clump like water based extracts do.
- Substitute: 1 tsp peppermint extract (add cautiously as it may thicken the mixture).
- 8 oz high-quality white chocolate, finely chopped: For the snowy, marbled top layer. Why this? High cocoa butter content creates a silky mouthfeel.
- Substitute: White chocolate chips (note: these often contain stabilizers and won't flow as easily).
- 0.5 cup crushed candy canes: For texture and color. Why this? Adds a necessary crunch that breaks up the smooth chocolate.
- Substitute: Crushed hard peppermint candies or red sanding sugar.
- 0.5 tsp flaky sea salt: To balance the sugars. Why this? The flakes sit on top and provide bursts of contrast.
- Substitute: Fine kosher salt (use half the amount).
| Original Ingredient | Substitute | Why It Works |
|---|---|---|
| Bittersweet Chocolate | Milk Chocolate | Higher sugar/milk solids. Note: Will be much softer and melt faster in hands. |
| Peppermint Oil | Crushed Peppermint Patties | Adds mint flavor. Note: Changes texture from a snap to a chewy center. |
Adding these small tweaks can change the entire profile of your easy Christmas treat with peppermint chocolate. If you prefer a more complex flavor, consider adding a dash of espresso powder to the dark layer.
Tools for Smooth Melting Success
Having the right gear makes the difference between a foolproof experience and a kitchen disaster. You don't need a lot, but what you have must be dry.
- Heat proof glass bowls: Perfect for the double boiler method as they don't hold residual heat as long as metal.
- Small saucepan: To hold the simmering water.
- Silicone spatula: This is non negotiable for scraping every bit of that velvety chocolate out of the bowl.
- Baking sheet with parchment paper: This is your canvas. Avoid wax paper as it can stick to the warm chocolate.
- Offset spatula: For spreading the chocolate into a thin, even sheet without creating "valleys."
- Chef's knife: For finely chopping the chocolate bars before melting, which ensures even heat distribution.
step-by-step Melting and Marbling
- Prepare your canvas. Line a large baking sheet with parchment paper. Ensure it lies completely flat so the chocolate doesn't pool in one corner.
- Chop the chocolate. Finely mince both the bittersweet and white chocolates into uniform bits. Note: Small pieces melt faster and more evenly, preventing the edges from burning while the center is still solid.
- Setup the double boiler. Fill a saucepan with 1 inch of water and bring to a simmer. Place a dry glass bowl over the top, making sure the bottom doesn't touch the water.
- Melt the dark base. Add 8 oz of the bittersweet chocolate to the bowl. Stir constantly until the mixture is glossy and smooth.
- Tempering step. Remove the bowl from heat and stir in the remaining 2 oz of bittersweet chocolate and the peppermint oil. Continue stirring until the last lump vanishes.
- Spread the base. Pour the dark chocolate onto the parchment and use an offset spatula to spread it into a 1/4 inch thick rectangle.
- Melt the white layer. Clean your tools (ensure they are 100% dry!) and repeat the melting process with the white chocolate until it flows like warm honey.
- The marble effect. Drop spoonfuls of the white chocolate onto the dark base. Use a toothpick or knife to swirl them together in a figure eight motion.
- Garnish and set. Immediately sprinkle the crushed candy canes and sea salt over the wet surface. Note: You want the toppings to sink in just slightly so they stay attached.
- Final chill. Let the bark sit at room temperature for 30 mins, then transfer to the fridge for 15 mins until the surface is hard and matte.
Troubleshooting Your Chocolate Batch
Why Your Chocolate Seized
If your chocolate suddenly turns into a dry, gritty paste, it's likely "seized." This happens when even a tiny amount of moisture (steam or a wet spoon) enters the bowl. It causes the sugar and cocoa to clump together and separate from the fat.
The Problem of Fat Bloom
If your bark has white streaks or a dusty appearance after it sets, it's called bloom. This isn't mold; it's just the cocoa butter rising to the surface because the chocolate got too hot or cooled too slowly. It’s still safe to eat, just less pretty!
| Problem | Root Cause | Solution |
|---|---|---|
| Grainy texture | Overheated chocolate | Remove from heat sooner; stir in "seed" chocolate to cool. |
| Toppings falling off | Chocolate set too fast | Sprinkle toppings immediately after marbling while the surface is still wet. |
| Sticky surface | High humidity or fridge condensation | Store in a cool, dry place instead of the fridge once fully set. |
Common Mistakes Checklist
- ✓ Ensure all bowls and spatulas are bone dry before starting (moisture is the enemy).
- ✓ Never let the water in your double boiler reach a rolling boil; a gentle simmer is enough.
- ✓ Avoid using chocolate chips if you want a professional snap; bars have fewer stabilizers.
- ✓ Don't over swirl the colors, or you'll end up with a muddy grey instead of a clean marble.
- ✓ Let the bark set at room temperature first to avoid "sweating" in the fridge.
For another festive option that looks amazing on a plate, you might enjoy my Christmas Cookies recipe, which uses a similar "set and chill" technique for the candy centers. Both treats make for a stunning presentation.
Scaling and Creative Variations
Adjusting the Batch Size
To double this recipe, work in two separate batches rather than one giant bowl. Chocolate is sensitive to volume; a massive bowl takes too long to melt and even longer to cool, which can ruin the tempering process.
If you're making a treat with peppermint chocolate for a large party, use two separate baking sheets to ensure the layers stay thin.
The Mocha Twist
If you want to deepen the flavor, whisk 1 teaspoon of espresso powder into the dark chocolate as it melts. The bitterness of the coffee rounds out the sweetness of the candy canes and makes the peppermint pop even more. It’s a sophisticated version that adults usually prefer.
The dairy-free Swap
You can easily make this vegan by using a high-quality dairy-free dark chocolate and a cocoa butter based vegan white chocolate. Just be aware that vegan white chocolate often has a lower melting point and might be more temperamental during the marbling stage.
| Servings | Bittersweet Chocolate | White Chocolate | Pan Size |
|---|---|---|---|
| 8 People | 5 oz | 4 oz | 9x9 inch |
| 16 People | 10 oz | 8 oz | 10x15 inch |
| 32 People | 20 oz | 16 oz | Two 10x15 inch |
If you find yourself with leftover white chocolate, it's perfect for drizzling over Halloween Party Treats recipe or other seasonal snacks. Nothing goes to waste in a smart kitchen!
Storage and Reducing Kitchen Waste
To keep that perfect snap, store your peppermint chocolate in an airtight container with layers of parchment paper between the pieces. At room temperature (if your kitchen is cool), it will last about 2 weeks.
In the fridge, it stays fresh for 3 weeks, but be careful of condensation when you take it out; let the container reach room temperature before opening it. For long term storage, you can freeze the bark for up to 3 months. Wrap it tightly in plastic wrap and then foil to prevent freezer burn.
Don't throw away the "dust" and tiny shards left on the cutting board after you break the bark! Those little bits are gold. Save them in a jar and use them as a topping for hot cocoa, or fold them into a batch of brownie batter.
You can even stir the leftover crushed candy canes into your morning coffee for a festive mocha. It’s a great way to ensure every bit of your easy Christmas treat with peppermint chocolate is used.
Debunking Common Kitchen Myths
Myth: You must use a microwave to melt chocolate fast. Actually, while the microwave is quick, it’s the easiest way to burn chocolate. It heats unevenly, creating "hot spots" that can scorch the cocoa solids before the rest is even soft.
The double boiler gives you visual control and a much smoother result.
Myth: Adding oil makes the chocolate shiny. While a drop of vegetable oil can help thin out cheap chocolate chips, it won't give you a true temper. The shine comes from the specific alignment of fat crystals through temperature control, not from adding extra liquid fat.
Pro Level Garnish Strategy
When it comes to visual appeal, we are looking for a specific color balance. Think of the dark chocolate as your canvas and the toppings as the paint. This recipe relies on three distinct color accents to look professional.
- Midnight Obsidian (Base): The 10 oz of bittersweet chocolate provides a dark, sophisticated background that makes the other colors pop.
- Snow White (Contrast): The 8 oz of white chocolate shouldn't just be mixed in; it should be swirled so that large "clouds" of white remain visible against the dark.
- Vivid Crimson (Highlight): The crushed candy canes provide the festive red. Add these immediately while the chocolate is wet so they embed themselves into the surface.
The Artisan Shard Look
Instead of cutting the bark into perfect squares with a knife, I prefer the "hand broken" look. It feels more organic and artisan. Simply lift the entire sheet of chilled chocolate and drop it from a height of about two inches onto the baking sheet. It will naturally fracture into beautiful, jagged shards.
This is much better than dining out because you get those unique, rustic shapes that prove it’s homemade.
This treat with peppermint chocolate is a showstopper because of that final sprinkle of flaky salt. The salt catches the light like little crystals and provides a savory "hit" that makes you want to go back for a second piece. Just a tiny pinch is all it takes to turn a simple candy into a gourmet gift.
Trust me, once you try the salt trick, you'll never go back to plain peppermint bark again!
For more holiday inspiration, check out my Peppermint Chocolate brittle which uses a slightly different technique for a more traditional candy crunch. Both are fantastic additions to your winter baking repertoire.

Recipe FAQs
Can I use chocolate chips instead of chopped chocolate bars?
No, bars are better for a clean snap. Chocolate chips contain stabilizers that prevent them from melting as smoothly, which can affect the final texture and crispness of the bark.
How do I prevent my chocolate from seizing?
Ensure all equipment is completely dry. Even a tiny drop of water or steam entering the melted chocolate will cause the sugar and cocoa solids to clump, resulting in a gritty, seized texture.
What's the best way to create a marbled effect?
Drizzle melted white chocolate onto the slightly set dark chocolate. Use a toothpick or knife to swirl gently; avoid overmixing, which will turn the colors muddy.
Why does my chocolate have white streaks after setting?
This is likely fat bloom, caused by temperature fluctuations. It occurs when cocoa butter crystals separate and rise to the surface, but it's still safe to eat and doesn't affect flavor.
How should I store the peppermint chocolate bark?
Store in an airtight container with parchment paper between layers. At cool room temperature, it lasts about two weeks; in the fridge, it’s good for three weeks, but let it come to room temp before opening to prevent condensation.
Can I substitute peppermint extract for peppermint oil?
Yes, but use less and add cautiously. Use about one teaspoon of extract for every quarter teaspoon of oil, as extracts are water based and can sometimes cause chocolate to seize more easily than oil.
Is it true that I need to temper the chocolate for a good snap?
Yes, controlled cooling is key for that signature snap. While not a full temper, melting and cooling the chocolate correctly aligns the fat crystals for a brittle texture, unlike simple melting which can result in a softer, chewier bark.
Peppermint Chocolate Treat

Ingredients:
Instructions:
Nutrition Facts:
| Calories | 201 kcal |
|---|---|
| Protein | 2.2g |
| Fat | 12.1g |
| Carbs | 21.1g |
| Fiber | 1.3g |
| Sugar | 17.4g |
| Sodium | 78mg |
