Back to School Snack with Peanut Butter and Oats
- Time: Active 15 minutes, Passive 30 minutes, Total 45 minutes
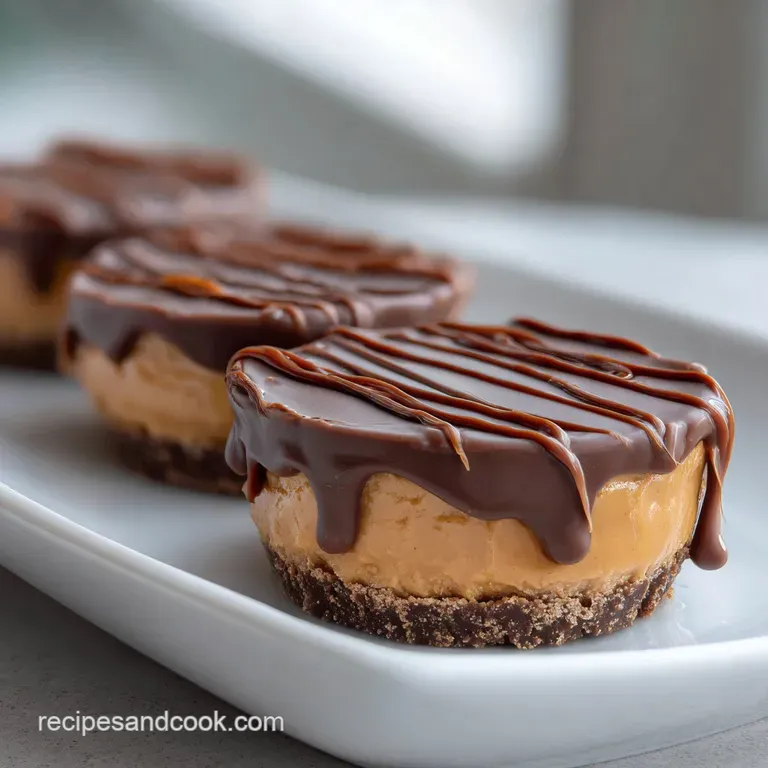
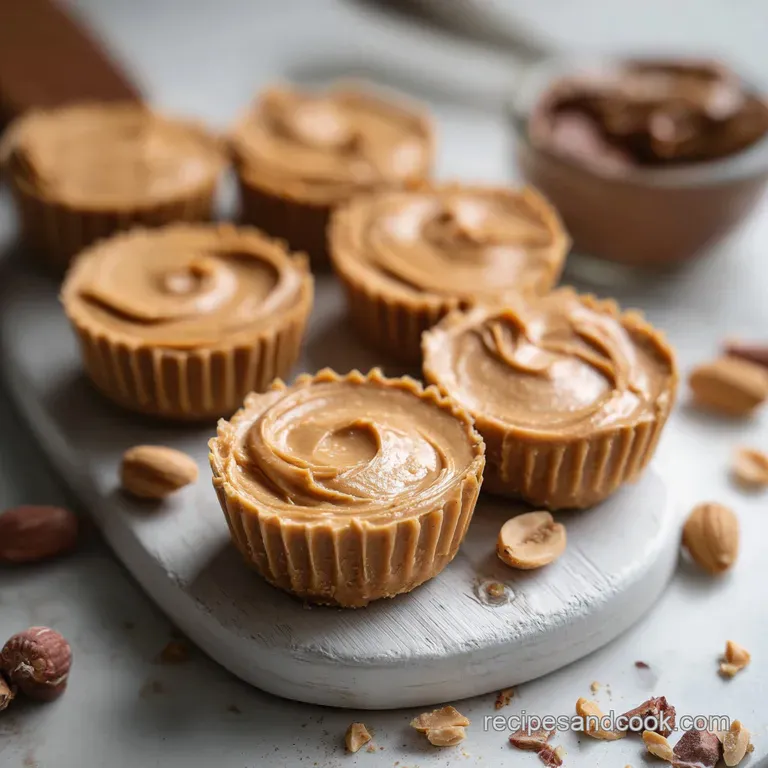
- Flavor/Texture Hook: Silky peanut butter paired with chewy oats and chocolate
- Perfect for: School lunchboxes, busy mornings, or budget conscious meal prepping
- Back to School Snack with Peanut Butter and Oats
- The Science of Binder Success
- Oven Versus Stovetop Preparation
- Pantry Staples and Key Components
- Essential Tools for Quick Prep
- Step-by-Step Mixing and Shaping
- Fixes for Common Texture Problems
- Flavor Variations and Budget Adjustments
- Debunking Raw Oat Myths
- Fresh Storage and Waste Tips
- Timeless Pairings and Serving Ideas
- Recipe FAQs
- 📝 Recipe Card
Back to School Snack with Peanut Butter and Oats
I remember the chaos of Monday mornings when I was a kid, the smell of toasted bread and the frantic search for matching socks. My mom always had a trick up her sleeve for those days when we were running late but needed something substantial.
This article shares a simple, delicious back to school snack with peanut butter and oats that kids will love. It is the kind of recipe that feels like a warm hug in a lunchbox, bringing back that timeless comfort of home cooked goodness without needing a massive grocery budget.
Honestly, I’ve tried the store-bought granola bars, and they always seem to either crumble into dust or taste like cardboard. We’ve all been there, right? You spend five dollars on a box of six bars, and by Wednesday, the kids are complaining they’re bored of them.
That is why I started making these at home. They are more reliable, way more filling, and you can control exactly what goes into them. Plus, using shortcuts like buying oats in bulk makes this a total win for the wallet.
Trust me on this one: the secret isn't just in the ingredients, but in the way we handle the binder. I once made the mistake of using cold honey straight from the fridge, and I ended up with a crumbly mess that wouldn't hold its shape.
We’re going for a velvety consistency that grips the oats and keeps everything intact until the very last bite. It’s brilliant for meal prep because they actually get better after sitting in the fridge for a few hours.
The Science of Binder Success
The structural integrity of this snack relies on emulsification, where the fats in the peanut butter and the sugars in the honey create a sticky, stable matrix. This process is supported by hygroscopy, as the oats and flaxseed slowly absorb moisture from the binder, softening the fibers and preventing the final product from becoming brittle.
- Mechanical Binding: The ground flaxseed acts as a secondary glue once it hydrates, creating a "flax egg" effect that reinforces the peanut butter.
- Lipid Stability: Natural oils in the peanut butter keep the mixture pliable even when chilled, preventing a rock hard texture.
- Starch Softening: The rolled oats undergo a minor "cold cook" as they pull moisture from the honey, making them easier to digest without heat.
- Viscosity Control: The ratio of liquid to dry ingredients ensures the chocolate chips stay suspended rather than sinking to the bottom of the bowl.
| Thickness | Internal Setting | Rest Time | Visual Cue |
|---|---|---|---|
| 3 cm balls | Firm to touch | 30 minutes | Matte surface, no longer oily |
| 1 cm bar | Semi firm | 45 minutes | Edges pull away slightly |
| 5 cm jumbo | Very firm | 1 hours | Holds shape when squeezed |
Making sure the mixture is chilled properly is the biggest hurdle for most home cooks. If you try to roll these while the honey is still warm from the pantry, you'll end up with "velvety" hands but no actual snack balls.
Giving the dough that 30 minute rest allows the flax and oats to really do their job, soaking up the liquids so the final result is chewy rather than sticky.
Oven Versus Stovetop Preparation
While this is technically a no bake recipe, I often get asked if toasting the ingredients helps. If you have an extra ten minutes, toasting the 180g of rolled oats in the oven can transform the flavor profile from "raw grain" to "toasted nut." It adds a subtle shatter to the texture that contrasts beautifully with the creamy peanut butter.
| Component | Science Role | Pro Secret |
|---|---|---|
| Rolled Oats | Complex Carbohydrate | Toast at 350°F for 8 mins for a deeper, nuttier aroma. |
| Peanut Butter | Protein & Fat Binder | Use a "natural" variety to avoid excess palm oil graininess. |
| Raw Honey | Liquid Adhesive | Warm slightly to help it coat every single oat flake evenly. |
Using the stovetop method to melt the peanut butter and honey together is a fantastic shortcut for ensuring a smooth mix. You don't want to boil it just a gentle sizzle around the edges is enough to make the binder fluid.
This ensures that every bit of flax and coconut gets coated, which is essential for that uniform, comforting taste we're looking for.
Pantry Staples and Key Components
- 2 cups (180g) Old Fashioned Rolled Oats: These provide the hearty, chewy base. Why this? Rolled oats hold their shape better than quick oats, which can turn mushy.
- 1/2 cup (60g) Ground Flaxseed: Adds a nutty depth and essential omega-3s. Why this? It acts as a natural binder to keep the balls from falling apart.
- 1/2 cup (45g) Unsweetened Shredded Coconut: Provides a light, tropical sweetness. Why this? The fine texture fills the gaps between the larger oat flakes.
- 1 cup (250g) Natural Creamy Peanut Butter: The primary protein source and glue. Why this? High fat content ensures the snack remains moist and silky.
- 1/2 cup (170g) Raw Honey: The natural sweetener that provides the "sticky" factor. Why this? Honey has the perfect viscosity for no bake structural integrity.
- 1 tsp (5ml) Pure Vanilla Extract: For that timeless, bakery style aroma.
- 1/2 tsp Sea Salt: To balance the sweetness and pop the chocolate flavor.
- 1/2 cup (90g) Mini Dark Chocolate Chips: The "treat" element. Why this? Mini chips distribute better than large chunks in a small sphere.
- 1/4 tsp Ground Cinnamon: A subtle spice that brings everything together.
| Original Ingredient | Substitute | Why It Works |
|---|---|---|
| Peanut Butter | Sunflower Seed Butter | Nut free for schools. Note: Slightly more bitter, may need extra honey. |
| Raw Honey | Maple Syrup | Vegan alternative. Note: Thinner consistency; add 2 tbsp extra flax. |
| Shredded Coconut | Almond Meal | Same dry volume. Note: Adds more protein but loses the chewy texture. |
If you find yourself out of chocolate chips, don't panic. You can easily pivot to raisins or dried cranberries for a more traditional feel. If you're looking for another classic treat to pack alongside these, my Peanut Butter Cookies recipe uses a similar flavor profile but in a baked format that's just as nostalgic.
Essential Tools for Quick Prep
You don't need a high end laboratory to make a great back to school snack with peanut butter and oats. Most of these tools are already sitting in your kitchen cupboard. I highly recommend using a large glass mixing bowl. Why glass?
It doesn't retain smells like plastic can, and you can pop it in the microwave for ten seconds if your peanut butter is a bit too stiff to stir.
Chef's Tip: Freeze your chocolate chips for 10 minutes before adding them to the warm mixture. This prevents them from melting and turning your beautiful golden balls into a muddy brown mess.
A small cookie scoop is my ultimate secret weapon here. It ensures every snack is the exact same size, which isn't just about being a perfectionist it helps with portion control and makes sure they fit perfectly into those tiny lunchbox compartments.
If you don't have one, just use a tablespoon, but keep a small bowl of water nearby to dip your fingers in so the dough doesn't stick to you.
step-by-step Mixing and Shaping
1. Combining the Foundations
In your largest bowl, whisk together the 180g of oats, 60g of flaxseed, 45g of coconut, salt, and cinnamon. Note: Mixing the dry ingredients first ensures the spices are evenly distributed before the sticky binder hits.
2. Melting the Binders
If your 250g of peanut butter is firm, warm it with the 170g of honey in a small saucepan over low heat. Cook 2 mins until the mixture is fluid and glossy.
3. Folding and Hydrating
Pour the warm liquid over the dry ingredients. Use a sturdy spatula to fold everything together until no dry oat patches remain.
4. Cooling the Base
Let the mixture sit for about 5 minutes before adding the 90g of chocolate chips. Note: This prevents the chocolate from melting into the dough.
5. The First Chill
Pop the entire bowl into the fridge for 30 minutes. Wait until the dough feels firm and slightly tacky.
6. Shaping the Spheres
Scoop about 1 tablespoon of dough and roll it between your palms. Shape until a smooth, round ball forms.
7. Final Set
Place the finished balls on a parchment lined tray. Refrigerate for 15 mins until the exterior is matte and set.
8. Quality Check
Press one ball lightly; it should spring back slightly without sticking to your finger. If it's too soft, it needs more time in the cold.
Fixes for Common Texture Problems
One of the most frustrating things is spending time on a recipe only to have it fall apart. Usually, if your "and Oats" mixture is crumbly, it’s a hydration issue. Oats are like little sponges; if they soak up all the honey too fast, there’s nothing left to act as glue.
Fixing a Crumbly Mix
If you try to roll a ball and it just shatters into a pile of oats, you need more "wet" binder. Add 1 tablespoon of peanut butter at a time. It’s a delicate balance too much and they become greasy; too little and they’re a mess. If you're looking for a more structured, baked version of a portable treat, check out our Healthy School Snacks recipe for more ideas.
Managing Overly Sticky Dough
Sometimes, especially with very fresh natural peanut butter, the mix is just too oily. If you can’t get the dough off your hands, add a handful of extra oats. Let it sit for another 10 minutes; time is often the best "fixer" for no bake snacks.
| Problem | Root Cause | Solution |
|---|---|---|
| Balls falling apart | Not enough binder/honey | Add 1-2 tbsp extra peanut butter and re chill. |
| Too sticky to roll | Honey/PB ratio too high | Add 1/4 cup extra oats or flaxseed. |
| Chocolate melted | Mix was too warm | Chill the dough for 10 mins before adding chips. |
Common Mistakes Checklist
- ✓ Using "Quick Oats" instead of Rolled Oats (results in a mushy, pasty texture).
- ✓ Skipping the refrigeration step (makes shaping nearly impossible and messy).
- ✓ Not stirring the natural peanut butter well (the bottom of the jar is too dry).
- ✓ Forgetting the salt (the flavors will taste flat and overly sugary).
- ✓ Adding chocolate chips to a hot mixture (they will melt and streak).
Flavor Variations and Budget Adjustments
When the budget is tight, you can still make this snack shine. Instead of expensive dark chocolate chips, try chopping up a leftover chocolate bar from the pantry. I've even used crushed pretzels for a "salty sweet" vibe that my kids absolutely loved.
It adds a satisfying crunch that mimics more expensive granola brands.
Scaling for Large Batches
- UP (2x-4x): When doubling the recipe, keep the salt and cinnamon at 1.5x the original amount to avoid overpowering the palate. You’ll need a very large bowl a stand mixer with a paddle attachment works wonders here.
- DOWN (½): This is easy to halve. Since there are no eggs, you don't have to worry about weird liquid ratios. Just keep the 30 minute chill time the same.
Chef's Tip: Add a teaspoon of instant espresso powder to the honey. It doesn't make the snacks taste like coffee, but it makes the chocolate flavor much richer and more intense.
If you want a crunch factor without nuts, toasted sunflower seeds are a budget friendly way to add texture. They have a similar fat content to nuts, meaning they won't dry out the mixture.
This keeps the recipe flexible for school environments that might have strict nut free policies just swap the PB for sunbutter.
Debunking Raw Oat Myths
One common misconception is that you have to cook oats for them to be digestible. In reality, rolled oats are steamed during processing, so they aren't truly "raw." The soaking process with honey and peanut butter further softens them, making them perfectly safe and delicious to eat as is.
Another myth is that you need "specialty" expensive honey. Honestly, don't even bother with the super premium manuka for this. A standard, reliable clover honey from the grocery store works perfectly because it has the exact sugar to water ratio needed for binding. Save the fancy stuff for your tea!
Fresh Storage and Waste Tips
These snacks are quite hardy, but they do have their limits. Because they contain natural oils from the peanut butter and flax, they can go rancid if left in a warm pantry for weeks. I always recommend the fridge for the best "snap" and freshness.
- Fridge: Store in an airtight container for up to 10 days. Place a piece of parchment paper between layers to prevent them from sticking together.
- Freezer: These freeze beautifully! They will last for up to 3 months. I suggest freezing them on a tray first, then transferring them to a zip top bag.
- Zero Waste: If you have a few crumbs at the bottom of the bowl that won't form a ball, don't throw them away. Sprinkle them over Greek yogurt or a bowl of morning cereal for an instant flavor boost.
I've even used the "scraps" to top a fruit crumble before. The flax and oats crisp up nicely in the oven. It's a great way to make sure every cent of your grocery budget is being used. Nothing goes to waste in a busy kitchen!
Timeless Pairings and Serving Ideas
These little powerhouses are great on their own, but they play well with others. For a full "back to school" lunch, I like to pair them with sliced Granny Smith apples. The tartness of the apple cuts through the rich, velvety peanut butter. It’s a classic combination that never goes out of style.
- The Protein Pack: Serve with a hard boiled egg and some string cheese for a high energy afternoon.
- The Breakfast Shortcut: Two or three of these with a glass of cold milk makes a surprisingly decent breakfast when you're dashing out the door.
- The Dessert Plate: Drizzle with a little extra melted chocolate and a sprinkle of sea salt for a more sophisticated evening treat.
If you are looking for more high protein ideas, you might enjoy our Breakfast On The Go recipe. It's another one of those "save the day" recipes that keeps everyone full and happy. At the end of the day, that's what cooking is all about taking simple ingredients like oats and honey and turning them into something that makes life just a little bit easier for the people we love. Enjoy the process, and don't worry if your first few balls aren't perfectly round they'll still taste amazing!

Recipe FAQs
Can I make these peanut butter oat balls ahead of time?
Yes, definitely. They are perfect for meal prepping and can be stored in an airtight container in the refrigerator for up to a week.
What is the best way to store these snacks?
Refrigerate them in an airtight container. This keeps them firm and fresh for up to 10 days, preventing the natural oils from going rancid.
My mixture is too crumbly, what can I do?
Add more binder. If the mixture crumbles when you try to roll it, add peanut butter 1 tablespoon at a time until it holds together. You can also explore our Healthy School Snacks recipe for other make-ahead options.
Can I substitute the peanut butter?
Yes, sunflower seed butter is a good alternative. This is ideal for nut-free school policies. Be aware it might be slightly more bitter, so you may need a touch more honey.
How do I get the chocolate chips to stay in the mixture?
Chill the mixture before adding chocolate chips. Adding them after the dough has chilled for about 5 minutes prevents them from melting and creating a muddy appearance.
Can I freeze these peanut butter oat balls?
Yes, they freeze very well. Freeze them on a tray first to prevent sticking, then transfer to a zip-top bag for up to 3 months.
Are raw oats safe to eat in these snacks?
Yes, rolled oats are safe and digestible. They are steamed during processing, and the moisture from the binder further softens them, making them perfectly edible without baking.
Peanut Butter Oat Balls

Ingredients:
Instructions:
Nutrition Facts:
| Calories | 186 kcal |
|---|---|
| Protein | 5.2 g |
| Fat | 10.9 g |
| Carbs | 19.7 g |
| Fiber | 3.1 g |
| Sugar | 9.2 g |
| Sodium | 78 mg |
