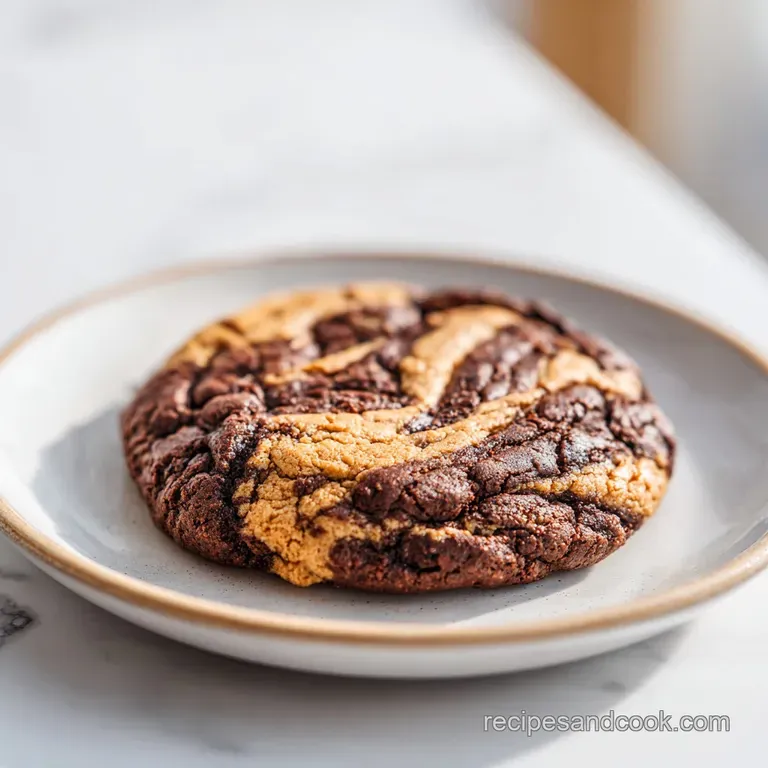
Peanut Butter Brownie Swirl Cookies: Chewy and Rich
- Time: Active 20 minutes, Passive 40 minutes, Total 60 minutes
- Flavor/Texture Hook: Shatter crisp top with a velvety, truffle like center
- Perfect for: Showing off at dinner parties or gourmet gift boxes
- Precise Specifications for a Fudgy Center
- Selecting Elements for Maximum Flavor Impact
- Essential Tools for Bakery Worthy Results
- Step By Step Marbling Technique
- Avoiding Common Texture and Spread Issues
- Creative Variations for Custom Batches
- Proper Storage for Long Lasting Freshness
- Elevated Plating for Every Occasion
- Recipe FAQs
- 📝 Recipe Card
Precise Specifications for a Fudgy Center
Success in baking is about understanding the baseline you're working from. To get that iconic brownie texture in a cookie format, we have to play with the ratio of fats to flour. Too much flour and you’ve got a cake; too much fat and you’ve got a mess.
This recipe leans into the "fudgy" category by keeping the flour count relatively low (only 95g) while using a combination of melted butter and melted chocolate to provide structure and richness.
| Method | Total Time | Texture | Best For |
|---|---|---|---|
| Fast Method | 25 minutes | Soft and cakey | Instant cravings |
| This Classic | 60 minutes | Fudgy, dense, chewy | Professional results |
| Aged Dough | 24 hours | Deeply caramelized | High end events |
When we talk about "fast" versus "classic," the biggest differentiator is the resting time. If you skip the 30 minute chill, the lipids (the fats from the butter and peanut butter) won't have time to stabilize. Without that stabilization, the cookies will spread across the pan into one giant brownie sheet.
It might still taste good, but you’ll lose those distinct ridges and the contrast in the swirl that makes this Peanut Butter Brownie Swirl Cookie a match made in dessert heaven.
Why the Butter Goes In Warm
Most cookie recipes ask for "room temperature" butter, but we’re breaking the rules here. By whisking warm melted butter with the coconut sugar and eggs, you’re creating an emulsion similar to a meringue. This is what creates that iconic, paper thin "crinkle" top.
The warmth helps the sugar dissolve just enough to form a stable film on top of the cookie as it bakes.
How the Swirl Stays Separate
If you just plopped regular peanut butter on top of brownie batter, it would likely sink or blend in completely. We’re adding maple syrup to the natural peanut butter to create a "lava like" consistency that has a slightly different density than the chocolate base.
This ensures the two batters coexist without fully merging, giving you those beautiful, professional looking streaks.
Selecting Elements for Maximum Flavor Impact
The ingredients you choose are the foundation of this bake. Since we’re dealing with a high percentage of cocoa, using Dutch processed powder is non negotiable. It’s been treated with alkali to neutralize its acidity, resulting in a darker color and a much smoother, deeper chocolate flavor than the sharp, acidic bite of natural cocoa powder.
| Component | Science Role | Pro Secret |
|---|---|---|
| Coconut Sugar | Moisture retention | Provides a subtle caramel undertone without being cloying |
| Egg Yolk | Emulsification | Adding an extra yolk provides a richer, more velvety mouthfeel |
| Dark Chocolate (70%) | Structural fat | Melts into the dough to create a fudge like set when cooled |
| Vanilla Bean Paste | Flavor bridge | The tiny flecks add visual appeal and a more intense aroma |
For the chocolate, aim for something high-quality around the 70% cocoa mark. The bitterness of the dark chocolate balances the salty sweet nature of the peanut butter. If you're looking for a heartier, more textured snack, you might even consider how these flavors compare to a Peanut Butter Oatmeal Bar, which uses many of the same flavor profiles but with a denser, more fibrous crumb.
The Official Shopping List
- 115g unsalted butter: Melted and kept warm to help dissolve the sugar.
- 150g coconut sugar: This gives a deep, earthy sweetness that pairs perfectly with chocolate.
- 1 large egg + 1 yolk: Must be room temperature so they don't seize the melted butter.
- 1 tsp vanilla bean paste: For that gourmet, speckled look.
- 125g dark chocolate chips (70%): Melted gently until glossy.
- 40g Dutch processed cocoa powder: Sift this! Lumps of cocoa are the enemy of a smooth batter. Why this? Dutch process provides the dark, "ore like" color and smooth finish.
- 95g all purpose flour: Just enough to hold the structure together.
- 0.5 tsp sea salt: To balance the sugar.
- 125g natural creamy peanut butter: Look for the "stir only" kind for the best results.
- 30g maple syrup: Acts as a binder and softener for the peanut butter swirl.
- 0.5 tsp flaky sea salt: For the final, essential garnish.
Essential Tools for Bakery Worthy Results
You don't need a professional kitchen, but a few specific tools will make this process foolproof. A high-quality whisk is your best friend during the first stage you need to beat the eggs and sugar until they're truly glossy to get that crackle top. I also highly recommend using a digital scale.
When dealing with "fudgy" textures, being off by even 10 grams of flour can turn a velvety cookie into a dry biscuit.
Chef's Tip: Use a 2 tablespoon cookie scoop. Not only does it keep your hands clean, but it ensures every cookie is the exact same size, so they all finish baking at the exact same moment.
Another unconventional trick is to use a metal spatula for the final swirl. A rubber spatula can sometimes be too "blunt" and end up mixing the batters too much. A thin metal knife or a small offset spatula allows you to cut through the dough with precision, leaving the peanut butter in distinct, bold ribbons rather than a muddy smudge.
step-by-step Marbling Technique

- Whisk the base. Combine 115g warm melted butter with 150g coconut sugar in a large bowl. Add the egg, yolk, and vanilla paste. Whisk vigorously for 1 minute until the mixture looks glossy and pale. Note: This creates the "meringue" top.
- Bloom the cocoa. Stir in 125g melted dark chocolate and 40g sifted cocoa powder. Wait until the aroma of chocolate intensifies as the warm butter "blooms" the cocoa solids.
- Incorporate dry goods. Gently fold in 95g all purpose flour and 0.5 tsp sea salt. Stop the moment you see no white streaks—until the dough is thick and uniform.
- Prepare the swirl. In a small bowl, whisk 125g natural peanut butter with 30g maple syrup until it reaches a fluid, lava like consistency.
- Create the marble. Dollop the peanut butter mixture over the brownie dough in 5-6 spots. Use a knife to swirl exactly three times—until you see distinct orange and black ribbons.
- Stabilize the lipids. Cover and chill the bowl in the fridge for 30 minutes. This prevents the cookies from spreading too thin.
- Preheat and scoop. Set your oven to 175°C (350°F). Scoop 2 tablespoon portions onto parchment paper, leaving 5cm of space between each.
- Bake to set. Bake for 10 minutes. The edges should be set but the center will look slightly underdone—until the surface starts to crackle.
- The final touch. Immediately sprinkle with flaky sea salt. Allow them to cool completely on the pan; they will firm up into a fudgy center as they rest.
Avoiding Common Texture and Spread Issues
The most common heartbreak with this recipe is the "Greasy Spread." This usually happens for one of two reasons: the butter was too hot when the eggs were added (cooking them slightly) or the dough wasn't chilled long enough.
If the dough feels oily to the touch before it goes in the oven, it needs more time in the fridge.
Why Your Cookies Are Flat
If your cookies come out like pancakes, your oven might be running too cold, or you over creamed the butter and sugar. While we want a glossy mix, we don't want to beat air into it like a sponge cake. Air bubbles expand in the oven and then collapse, leaving you with a flat, sad cookie. If you're struggling with getting that perfect bite sized treat, you might find that a no bake peanut butter ball is a great way to practice handling these oily ingredients without the stress of the oven!
| Problem | Root Cause | Solution |
|---|---|---|
| No Crackle Top | Eggs weren't whisked enough | Whisk eggs/sugar for a full 60 seconds until glossy |
| Dry/Crumbly | Overbaked or too much flour | Pull out at 10 mins; use a digital scale for flour |
| Muddled Colors | Over swirling the dough | Only swirl 2-3 times with a thin knife |
Common Mistakes Checklist:
- ✓ Ensure eggs are at room temperature to prevent the melted butter from seizing.
- ✓ Sift the cocoa powder; Dutch processed cocoa is notorious for stubborn lumps.
- ✓ Do not skip the 30 minute chill; it’s the difference between a cookie and a puddle.
- ✓ Tap the pan on the counter once after baking to "deflate" the cookies into a fudgy texture.
Creative Variations for Custom Batches
While the classic Peanut Butter Brownie Swirl Cookie a match made in dessert heaven is hard to beat, there are ways to pivot based on your pantry. If you’re out of peanut butter, almond butter works beautifully, though it has a slightly higher oil content, so you may need to add an extra 10 minutes to your chill time.
For a protein boosted version, you can swap 20g of the flour for a chocolate or vanilla protein powder. However, be warned: protein powder absorbs moisture much faster than flour, so the cookies will be slightly more "bitey" and less "melt in-your mouth." If that's the vibe you're after, check out my Peanut Butter Protein Balls for a snack that's specifically designed for that texture.
Scaling the Batch
- To Half (9 cookies): Use 1 egg yolk only (omit the whole egg), halve all other weights. Use a smaller bowl to ensure the whisking action is still effective.
- To Double (36 cookies): Do not double the salt use 0.75 tsp total. Bake in two separate batches; do not crowd the oven, as the steam from two pans will prevent the tops from crackling.
Proper Storage for Long Lasting Freshness
These cookies are moisture rich thanks to the coconut sugar and peanut butter, which means they stay "fresh" feeling longer than a standard chocolate chip cookie. Store them in an airtight container at room temperature for up to 4 days.
If you find they've firmed up too much, a 5 second zap in the microwave will return them to that "just baked" molten state.
For freezing, I recommend freezing the dough balls before baking. Scoop them onto a tray, freeze until solid, and then move to a bag. You can bake them straight from the freezer just add 2 minutes to the bake time. If you have leftover peanut butter mixture, don't throw it out!
It’s essentially a maple peanut glaze that is incredible drizzled over morning oatmeal or stirred into a yogurt bowl.
Elevated Plating for Every Occasion
Presentation is where you can really show off the "match made in dessert heaven" aspect of this recipe. Because of the bold contrast between the dark chocolate and the tan peanut butter, these cookies are naturally striking. But you can take them through three levels of plating depending on who you're serving.
| Level | Styling Elements | Vibe |
|---|---|---|
| Simple | Stacked on a wooden board | Rustic, homey, "help yourself" |
| Polished | Single cookie, offset, extra sea salt | Modern, bakery style |
| Restaurant | Warm, with vanilla bean gelato | Decadent, gourmet dessert |
Three Levels of Presentation
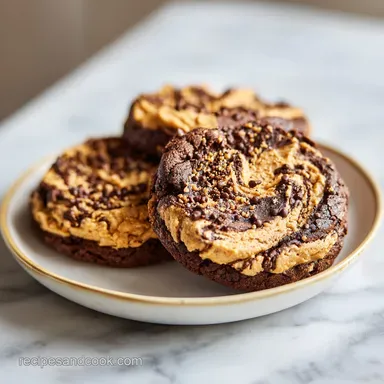
- Simple Plating: Lean into the rustic charm. Stack the cookies in a haphazard pyramid on a dark wooden board or a piece of crumpled parchment paper. This highlights the textures and makes them look approachable.
- Polished Plating: Place three cookies in a neat, overlapping row on a matte white plate. Sprinkle a tiny bit of extra cocoa powder on the side of the plate and top the cookies with a fresh pinch of Maldon sea salt. The white background makes the dark chocolate pop.
- Restaurant Plating: Place one warm cookie in the center of a shallow bowl. Top with a perfect sphere of high-quality vanilla bean gelato. Drizzle a tiny bit of warmed peanut butter over the ice cream so it melts down the sides of the cookie. This creates a temperature contrast that is absolutely world class.
Myth: Cocoa is Just for Flavor
Actually, cocoa powder provides significant structure to these cookies. It acts similarly to flour by absorbing moisture, but it also provides a "tannic" structure that keeps the center fudgy rather than chewy. This is why you can't just swap cocoa for more flour; the chemical balance would be completely off.
Myth: Natural Peanut Butter is Too Oily
Many people think the oil separation in natural peanut butter ruins bakes. In reality, that natural oil is what provides the "lava" texture in our swirl. By adding maple syrup, we're emulsifying that oil into a stable paste that holds its shape in the oven heat.
Don't fear the oil just stir it well before measuring!

Recipe FAQs
Can I use regular granulated sugar instead of coconut sugar?
No, avoid swapping sugars. Coconut sugar has a lower glycemic index and specific moisture content that helps achieve the necessary fudgy consistency for this brownie swirl texture.
Why is it necessary to chill the dough for 30 minutes?
Chilling stabilizes the lipids. This step prevents the cookies from spreading too thinly in the oven and ensures the peanut butter swirl stays distinct rather than melting into the dough.
How to achieve the perfect marble effect?
Dollop the peanut butter mixture over the brownie dough and fold gently. Use a spatula or knife to create a marbling pattern, taking care not to over mix, as excessive folding will combine the colors into a solid brown shade.
Is it true the cookies need a long time to bake?
No, this is a common misconception. These cookies only require 10 minutes in a 350°F (175°C) oven to remain perfectly soft in the center.
How to ensure the glossy finish on the cookie surface?
Whisk the butter, sugar, egg, and yolk for one full minute. Achieving a glossy, pale appearance at this stage is the key to creating a crackled top; if you enjoyed mastering this aeration technique, you can apply similar logic to our creamy finish methods.
How to fix dough that feels too oily before baking?
Check your measurements and ensure the melted chocolate wasn't too hot. If the butter and chocolate were incorporated at a high temperature, the fats can separate; simply let the dough rest and cool down before scooping to firm up the emulsion.
Can I skip the final dusting of sea salt?
No, the salt is essential for flavor balance. The flaky sea salt cuts through the richness of the dark chocolate and peanut butter, providing the necessary contrast to elevate the final flavor profile.
Peanut Butter Brownie Swirl Cookies
Ingredients:
Instructions:
Nutrition Facts:
| Calories | 195 kcal |
|---|---|
| Protein | 3.9g |
| Fat | 12.3g |
| Carbs | 18.9g |
| Fiber | 1.8g |
| Sugar | 11.1g |
| Sodium | 97mg |
