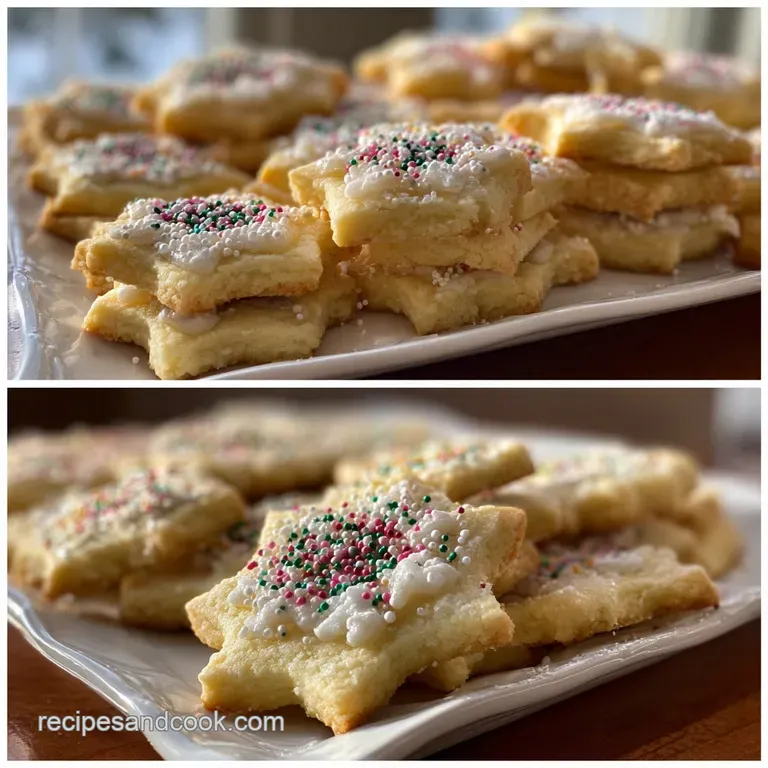
Sugar Cookies: the Ultimate No-Spread Recipe

- Mastering the Classic: The Ultimate No-Spread Cut-Out Sugar Cookie
- The Science of a Sturdy Dough: Why These Sugar Cookies Won't Spread
- Pantry Essentials: Detailed Breakdown of Your Sugar Cookie Ingredients
- Method: Crafting the Perfect Roll-Out Dough (Step-by-Step Guide)
- Troubleshooting and Expert Baking Secrets
- Longevity: Storing Baked Cookies and Freezing Dough
- Decoration and Pairing Suggestions
- Recipe FAQs
- 📝 Recipe Card
Mastering the Classic: The Ultimate No-Spread Cut-Out Sugar Cookie
That smell, honestly. Warm butter, vanilla, and pure possibility wafting from the oven it’s one of the few things in life that instantly cures a bad mood. Few baked goods are as universally loved, or as instantly recognizable, as classic Sugar Cookies .
They just smell like home, don’t they?
So many people tell me they avoid making roll out cookies because the dough spreads, the shapes distort, and they end up with sad, amorphous blobs instead of crisp stars or squares. That stops today. This recipe is your reliable roadmap to sturdy, beautiful results every single time.
It uses simple pantry staples and comes together faster than you think.
Forget the frustration of cookies spreading into weird amoebas or being too crumbly to handle. We are making flat, sturdy, perfectly shaped cut-out Sugar Cookies today. Trust me, I made all the spreading mistakes in the early years so you don't have to worry about a thing.
The Science of a Sturdy Dough: Why These Sugar Cookies Won't Spread
The biggest secret to perfectly shaped Sugar Cookies is simple: control the spread. We want the cookie structure (the flour and egg) to set before the fat (the butter) has time to melt completely and cause the dough to deflate.
This recipe is formulated specifically to minimize that spread, making it ideal for detailed decorating work.
Why Precision Matters in Baking
Baking is not like cooking dinner; you can’t eyeball ingredients and expect flawless results. A proper batch of roll out cookies, especially ones intended for detailed royal icing, demands accuracy. Measuring your flour correctly is probably the most critical step here.
Don’t scoop the flour right out of the bag with your measuring cup! That compacts it too much, leading to dry, crumbly dough that splits when you roll it. We are aiming for tender, structural Sugar Cookies .
Quick Look: Recipe Prep Time and Yield
These aren’t instant gratification cookies, simply because chilling is non-negotiable. But the hands-on time is minimal. We aim for a yield of 30 36 cookies, depending on the size of your cutter, giving you plenty for sharing, or decorating practice!
Essential Tools for Rolling and Cutting Dough
You technically only need a rolling pin, but if you do a lot of cut-outs, invest in a rolling pin with adjustable thickness guides. They have little rings that slide on the ends, ensuring you roll the dough to exactly 1/4 inch thickness every time.
Consistency in thickness is paramount; it guarantees every single one of your Sugar Cookies bakes perfectly in the same amount of time.
The Role of Cold Butter and Reverse Creaming
While we start by creaming softened butter, the essential step is the double chill. We cream the butter to incorporate air (tenderness), but then we chill it hard twice! The colder the butter is when the cookies hit the oven, the longer it takes to melt.
That buys time for the proteins in the flour and egg to lock the structure into place before the fat gives way, resulting in zero spread Sugar Cookies .
Balancing Flour and Fat Ratios for Structure
This dough uses a slightly higher flour-to-fat ratio than a typical chewy drop cookie recipe (like a classic Chocolate Chip Cookies: Ultimate Brown Butter Recipe ). This ensures the dough is sturdy enough to be rolled, cut, and transferred without tearing or warping. Too much fat, and you get spreading; too much flour, and you get dry, tough cookies. This specific balance yields crisp edges and a soft, tender centre.
The Chill Factor: Setting the Gluten Network
Chilling the dough accomplishes two things for our Sugar Cookies . First, it solidifies the butter, as we discussed. Second, it gives the gluten a chance to relax after the mixing and rolling.
If you try to roll dough that hasn’t been chilled, the gluten is tense and will cause the dough to shrink back dramatically every time you roll it out. Don't skip this step. Ever.
Pantry Essentials: Detailed Breakdown of Your Sugar Cookie Ingredients
The ingredient list is minimal, but the quality and temperature of those ingredients dictate the success of your Sugar Cookies . Pay attention to temperatures!
Choosing the Right Type of Granulated Sugar
We are using standard granulated sugar here. It melts beautifully, promoting that classic crisp edge we love in cut-out Sugar Cookies . If you only have caster sugar (superfine), that works, but it might contribute to a slightly more fragile cookie.
Do not substitute with brown sugar entirely; brown sugar contains molasses and moisture, which causes cookies to spread much more aggressively.
Butter Temperature: The Most Crucial Step
The butter must be softened, but still slightly cool to the touch. Press it; your finger should leave an indentation without sinking completely through it. If the butter is greasy and melting, your creaming step will fail, and your dough will be sticky and unmanageable.
If you notice it getting too soft, pop it back into the fridge for 5 minutes before mixing.
Flour Variations: Achieving the Perfect Texture
We use all-purpose flour. Remember to weigh it if possible! If you don't have a scale, use the spoon and level method to measure. If you want a slightly softer, cake like cookie, you can substitute 2 tablespoons of the all-purpose flour with cornstarch, which helps tenderize the dough.
| Ingredient | Standard Requirement | Substitution Strategy |
|---|---|---|
| Flour (AP) | 3 cups, accurately measured | Use a 1:1 gluten-free Blend (add 1/4 tsp xanthan gum if necessary) |
| Unsalted Butter | Softened, but still cool | high-quality, solid plant based sticks (slightly firmer texture) |
| Egg | Large, room temperature | Flax Egg (1 tbsp ground flax + 3 tbsp water) |
| Vanilla Extract | Pure, high-quality | Vanilla bean paste for intense flavor depth |
Flavoring Variations: Extract vs. Paste
I am an advocate for a tiny touch of almond extract in my Sugar Cookies . It doesn't make them taste like almonds; it just deepens the vanilla flavour beautifully. If you dislike almond, omit it entirely, but try using vanilla bean paste instead of liquid extract.
The little black specks look professional, and the flavour intensity is unbeatable.
Method: Crafting the Perfect Roll Out Dough (step-by-step Guide)
We’re going to approach this in stages, focusing on mixing the least amount possible at the end. That is key to tender Sugar Cookies .
Stage 1: Creaming the Wet Ingredients
First, combine the flour, salt, and baking powder in a separate bowl and whisk well. Now, in your stand mixer, beat the softened butter and sugar together on medium speed for a good 3 to 5 minutes.
You are looking for a mixture that is lightened, fluffy, and almost white not just combined. This aeration helps keep the final Sugar Cookies light. Once you’ve reached that perfect cloud like stage, scrape the bowl down.
Beat in the egg and extracts on low speed until just mixed.
Stage 2: Mixing and Monitoring Dough Consistency
Reduce the mixer speed to its lowest setting. Gradually add the flour mixture, about 1 cup at a time. Mix only until the dough begins to clump and pull away from the sides of the bowl. Stop the mixer the second you see no streaks of dry flour remaining.
The dough will still look slightly crumbly, but when you pinch it, it should hold together perfectly. This ensures tender Sugar Cookies . Overmixing develops tough gluten threads.
Crucial Chef’s Note: If you see any white dust, stop the mixer, scrape down the bowl, and gently finish combining the last bits of flour by hand using a spatula. This guarantees a softer outcome.
Stage 3: The Critical Step of Chilling and Rolling
Divide the dough in half. Press each half into a disc shape and wrap tightly in cling film. Chill for a minimum of 1 hour, though 2 hours is better for guaranteed no-spread results.
When ready to roll, remove one disc and let it sit at room temperature for about 10 minutes this prevents it from cracking when you apply the rolling pin.
Roll the dough out gently on a lightly floured surface or, even better, between two large sheets of parchment paper, aiming for exactly 1/4 inch thick.
Stage 4: Precise Cutting and Transferring to the Sheet
Cut your shapes using your favourite cutters. Use a thin metal spatula to lift the shapes and place them onto a parchment lined baking sheet. Leave about an inch between the shapes. This second chill is what locks in the integrity of the Sugar Cookies .
Place the entire sheet pan into the freezer for 10 minutes. If you are prepping holiday Sugar Cookies , this step is critical. Bake immediately after freezing. Bake for 8– 10 minutes at 350°F (175°C).
Troubleshooting and Expert Baking Secrets
I've learned these secrets through epic failures (hello, batch of star cookies that turned into sad melted discs). Save yourself the grief!
Handling Sticky Dough: Quick Fixes
If your dough starts feeling sticky or warm while you’re rolling it, your kitchen is too warm, or you handled it too much. Do not panic. Do not add 1/4 cup of extra flour! Simply gather the dough, wrap it, and stick it back in the fridge for 15 minutes.
A slightly cooler dough is always better than adding flour that will dry out your final batch of Sugar Cookies .
Achieving Uniform Thickness for Even Baking
Seriously, if you are making delicate, decorated cookies, buy the rolling pin guides. If you roll one side too thin (say, 1/8 inch) and the other too thick (1/2 inch), the thin ones will burn before the thick ones cook through. Uniformity ensures a perfect batch of vanilla Sugar Cookies .
Identifying the Perfect Bake (Doneness Cues)
We want pale, set cookies. Look for the very edges to turn a light, faint gold. The centre should look dry and set, not glossy or wet. If you are baking these specifically to decorate with royal icing, the lighter the bake, the softer the cookie will be and the less likely it is to crack during handling.
The perfect texture for these Sugar Cookies should be crisp at the edge and slightly tender in the middle.
Longevity: Storing Baked Cookies and Freezing Dough
The beauty of these sturdy cookies is that they store and freeze incredibly well. Perfect for planning Christmas or birthday parties months in advance.
Optimal Freshness: Storing Finished Vanilla Treats
Once they are baked and completely cooled (and if you’ve iced them, once the icing is completely rock hard and dry), store the Sugar Cookies in an airtight container at room temperature. They will retain their freshness and crisp texture for up to five days.
Layer them gently, separated by wax or parchment paper, to prevent chipping the delicate icing.
How to Freeze Unbaked Cut-Out Shapes
This is my absolute favourite hack for making life easier. Cut out all your shapes, place them on a baking sheet, and freeze until solid (about 30 minutes). Once frozen, transfer the solid shapes into a large zip-top freezer bag. They store brilliantly for up to 3 months!
This lets you have homemade Sugar Cookies ready to bake at a moment’s notice.
Thawing and Finishing Frozen Cookie Dough
You don't thaw the cut-out shapes! Simply place the frozen shapes directly onto a parchment lined baking sheet and proceed to bake them as directed in the recipe. You might need to add 1 to 2 minutes to the total baking time since they start frozen.
The convenience of having ready-to-bake Sugar Cookies in the freezer is priceless, trust me.
Decoration and Pairing Suggestions
This is where the fun starts! Because our base cookie is so stable, you have endless options for decoration.
For detailed work, royal icing is the standard it dries hard and holds colour beautifully. If you want something quick, a simple powdered sugar glaze made with lemon juice gives a lovely tart contrast to the rich buttery flavour of the Sugar Cookies .
These pair beautifully with bold, warm drinks. Try serving them with a homemade Brown Sugar Shaken Espresso: Barista Style Recipe at Home for a cozy, sophisticated treat. If you want to expand your cookie platter, the texture of these crisp Sugar Cookies is a wonderful foil for the intense chewiness of my perfect Snickerdoodle Cookies: Classic Chewy Crinkly Perfection .
Remember the foundational rule: patience and cold butter equal perfection. Enjoy baking the best, no-spread Sugar Cookies you'll ever make!

Recipe FAQs
Why are my roll out sugar cookies spreading too much during baking?
Spreading is usually caused by insufficient chilling or having used butter that was too warm initially. Ensure your dough is properly chilled for at least one hour before cutting and baking; the cold butter is critical for shape retention.
You must also measure your flour accurately, as too little flour results in a higher fat ratio, encouraging spread.
My cookies came out hard and dry. What went wrong?
The primary culprit for hard or dry cookies is overbaking; always remove them from the oven immediately when the edges just begin to turn a very light gold. Secondly, take care not to overwork the dough when mixing or re-rolling scraps, as this overdevelops the gluten, resulting in a tough final texture.
How far in advance can I make the sugar cookie dough?
The prepared dough is highly stable and can be kept tightly wrapped in the refrigerator for up to 5 days. If the dough has been chilled overnight or longer, allow it to sit at room temperature for 15 minutes before rolling; this prevents excessive cracking.
Can I freeze the dough or the baked cookies?
Both dough and baked cookies freeze extremely well. For the dough, wrap discs tightly in plastic wrap and freeze for up to 3 months, thawing overnight in the fridge before rolling. Baked and cooled cookies should be frozen in an airtight container, preferably before icing, for the best results.
Is it possible to adapt this recipe to be gluten-free?
Yes, you can substitute the standard all-purpose flour with a quality 1:1 gluten-free baking blend that includes xanthan gum. Since gluten-free flours absorb liquid differently, you may need to add a teaspoon of milk if the dough appears too crumbly, but maintain the crucial chilling step.
What is the best way to roll the dough to ensure even thickness?
The professional trick is to use rolling guides, which are wooden or silicone strips placed on either side of the dough to ensure a consistent height, usually 1/4 inch thick. Rolling the dough between two sheets of parchment paper also prevents sticking and eliminates the need for excess flour, keeping the cookies tender.
No Spread Sugar Cookies Recipe
Ingredients:
Instructions:
Nutrition Facts:
| Calories | 100 kcal |
|---|---|
| Protein | 1.0 g |
| Fat | 4.5 g |
| Carbs | 14.0 g |
