Pistachio Butter Recipe: the Silky Green Dream Homemade Spread
- The Allure of Artisanal Pistachio Butter
- Unlocking Maximum Flavor: The Science Behind Perfect Pistachio Butter
- Selecting and Prepping the Finest Pistachios
- Step-by-Step Method: From Crunchy Nut to Silky Spread
- Mastering the Grind: Troubleshooting and Texture Fixes
- Storing Your Homemade Pistachio Gold
- Culinary Applications: The Best Ways to Serve This Delicate Spread
- Recipe FAQs
- 📝 Recipe Card
The Allure of Artisanal Pistachio Butter
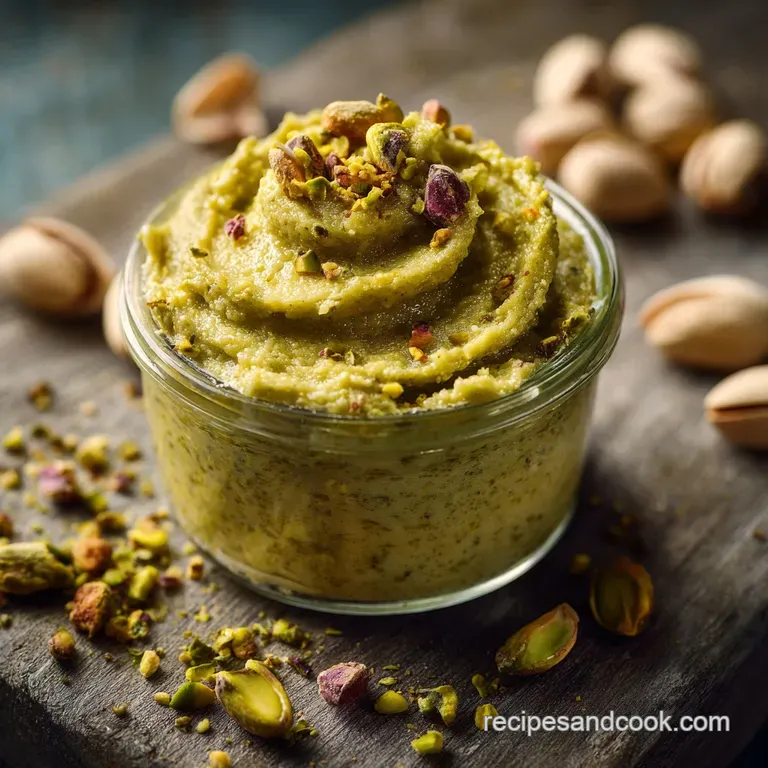
That vibrant emerald colour just screams luxury, right? When you make Homemade Pistachio Butter, the aroma of lightly toasted nuts fills the entire kitchen. It’s warm, earthy, and totally intoxicating; forget those pale, bland spreads you see on store shelves.
Look, store-bought jars are okay, but they often taste flat, sometimes metallic, and cost an absolute fortune. This Luxury Pistachio Butter Recipe is unbelievably easy and way cheaper than the fancy imports, requiring only pistachios, a pinch of salt, and a dash of patience. Seriously, it's the ultimate kitchen win.
I’ve broken more blenders than I care to admit figuring out the perfect smooth spread, but now I know the exact tricks. Let's get into the crucial details so you can nail that silky, pourable texture on the very first try.
Unlocking Maximum Flavor: The Science Behind Perfect Pistachio Butter
Differentiating Homemade vs. store-bought Quality
The biggest difference between commercial pistachio butter vs pistachio cream (which usually has added sugar and palm oil) and our version is the sheer intensity of the flavor. We are focusing purely on the nut.
Homemade Pistachio Butter maintains that gorgeous, rich flavour because we control the roasting time, ensuring the delicate oils are fresh when processed. You get an honest, pure pistachio spread recipe, not a shelf stable paste full of fillers.
Why the Emerald Color Matters (And How to Preserve It)
Everyone wants that vibrant green, right? To get it, you must start with raw, shelled pistachios —the brighter, the better. Over roasting the nuts or using excessive heat during processing will turn that gorgeous green into a dull, yellowish brown.
We use a low and slow toasting method specifically to enhance the flavour without sacrificing the vibrant color.
The Essential Equipment Check (Assessing Food Processor Power)
You simply cannot skip this: you need a powerful machine. Making nut butter is essentially forcing the nuts to release their stored fats, and that requires sustained power. If your food processor sounds like it's dying after five minutes, you might need to process in shorter, five minute bursts with mandated rests.
A weak motor leads straight to gritty, stalled butter.
The Importance of Low and Slow Roasting for Depth
We toast the pistachios for two reasons: to deepen the overall flavor profile, and to dry them out slightly. This drying step makes it easier for the nuts to break down and release their oils quickly during processing.
A quick 8- 10 minutes at 325° F is the sweet spot; you want fragrance, not darkness.
Transforming Solids into Silky Smooth Pistachio Butter
The magic happens when the cellular structure of the pistachio breaks down entirely, allowing the natural fats (the oil) to create an emulsification. This process requires friction and time. The mixture moves from powder to ball, and finally, collapses into a liquid.
This transition is non-negotiable and requires patience.
Achieving the Perfect Viscosity
Pistachio butter, when warm from the processor, looks quite thin, almost like thick paint. Don't worry, it thickens up beautifully when it cools down. If your machine is struggling to get it smooth, that optional tablespoon of neutral oil acts as a lubricant, kick starting the emulsification process to achieve that smooth, desired flow.
Selecting and Prepping the Finest Pistachios
Raw vs. Roasted: Making the Flavor Choice
I highly recommend starting with raw pistachios and roasting them yourself (Stage 1, Step 2). Pre-roasted nuts are often too dark and sometimes heavily salted, which throws off the balance of this delicate spread.
If you must use pre-roasted, ensure they are unsalted and reduce the oven time to just 5 minutes for a quick warming.
The Crucial Role of a Pinch of Sea Salt
Salt is non-negotiable, even in a sweet spread. Salt brightens the nuttiness. Without that half teaspoon of fine sea salt, the flavor of the finished product will be flat and boring.
| Ingredient | Substitute | Note |
|---|---|---|
| Pistachios | Other Nuts (e.g., Cashews, Almonds) | Note that the flavour/colour will be totally different. |
| Fine Sea Salt | Kosher Salt | Ensure you use a bit less, as Kosher salt is less dense. |
| Maple Syrup | Honey or Agave Nectar | Start small, as honey can dominate the delicate pistachio flavour. |
| Neutral Oil | Avocado Oil | Avoid strong tasting oils like olive oil. |
Optional Additions for Natural Sweetness (e.g., Maple Syrup)
I love a touch of maple syrup here. It provides a deeper, almost caramelly sweetness that complements the pistachio's earthiness without overpowering it. Feel free to skip it entirely for a purely savoury or sugar-free spread. If you are making pistachio butter cookies later, you might want it sweeter!
Troubleshooting Supplemental Oil Quantity (If needed)
I rarely need extra oil if I use my high speed blender, but sometimes a food processor can stall. If the mix looks like a dry, stubborn ball after 10 minutes and won't thin out, add just one tablespoon of neutral oil. Blend for a minute, then assess.
Adding too much oil too soon results in a greasy butter that separates quickly.
step-by-step Method: From Crunchy Nut to Silky Spread
Phase 1: Grinding the Initial Meal and Paste
Toast your nuts lightly (see Roasting section above) and let them cool completely. This is the first rookie mistake I made processing them warm makes the oil rush out, causing separation later. Put the cool nuts and salt into the processor and start blending. Within two minutes, you will have pistachio flour.
Keep going.
Phase 2: Scraping Down and Mandatory Rest Periods
Around the 5 7 minute mark, the mixture will clump into a solid, dry ball that rattles around the processor. This is critical. Stop the machine and scrape every single bit off the sides and the blade, pushing it back towards the bottom. This ensures the rest of the grinding happens evenly.
Phase 3: The Magic of Emulsification (Pistachio Butter Formation)
Once the paste ball breaks, usually after 10 minutes, things start moving fast. The natural oil pours out, and the mixture suddenly changes from thick dough to a gritty liquid. Process for another 5– 8 minutes, and it will smooth out completely.
It's truly mesmerizing to watch the vibrant Pistachio Butter take form.
Crucial Chef’s Note: "If your processor begins to smell hot or metallic, stop immediately! Let the motor rest for five minutes, or you risk burning out the machine and potentially heating the butter too much, causing it to lose its gorgeous colour."
Knowing Exactly When Your Butter is Finished
The butter is done when it is completely pourable and smooth, with zero visible graininess. Test a small amount by rubbing it between your fingers. If you feel any grit, process for another minute. Finally, add your sweetener, give it a quick thirty second blend, and you are golden.
Mastering the Grind: Troubleshooting and Texture Fixes
Preventing Overheating: The Processor Rest Tactic
Continuous processing is necessary, but relentless heat ruins both your machine and the butter's colour. If you feel the base of the processor bowl getting significantly warm not just warm, but hot pause for five minutes. Patience guarantees silkiness and preserves the emerald hue.
Fixing Grainy or Dry Butter Consistency
If your butter looks like wet sand and refuses to thin out, it needs two things: more time or a slight lubrication . Don't panic. If you’ve processed for 15 minutes already, add that optional tablespoon of neutral oil.
This helps the machine capture the remaining solids and break them down into the available oil, leading to instant smoothness.
Adjusting Texture Without Using Excess Oil
Want it thinner but don't want to use vegetable oil? Try adding a very small splash about half a teaspoon of liquid sweetener like maple syrup or honey, even if you planned to keep it unsweetened. The added liquid helps break the surface tension and increases flow without adding pure fat.
Storing Your Homemade Pistachio Gold
Shelf Life and Refrigeration Guide
Because this spread is pure nut butter with minimal additives, it needs careful storage. You can keep it in an airtight container at room temperature (in a cool, dark pantry) for up to 1 week . For longer storage, refrigerate it.
It will keep beautifully in the fridge for up to 3 4 weeks .
Recognizing Oil Separation and Re-Emulsifying
Just like natural peanut butter, oil separation is totally normal! The natural oils rise to the top over time. If this happens, don't throw it out. Simply stir vigorously with a fork until recombined, or if it's been refrigerated and is very solid, let it warm up slightly, then give it a quick 30 second pulse in the food processor.
Tips for Freezing Large Batches Safely
Making a huge batch for holiday baking? Pistachio butter freezes exceptionally well. Pour it into freezer safe containers, leaving about a half inch of headspace. It will last frozen for up to 6 months . To thaw, simply transfer the container to the refrigerator overnight.
It will be very hard when cold, so let it sit at room temperature for an hour before stirring or re-processing.
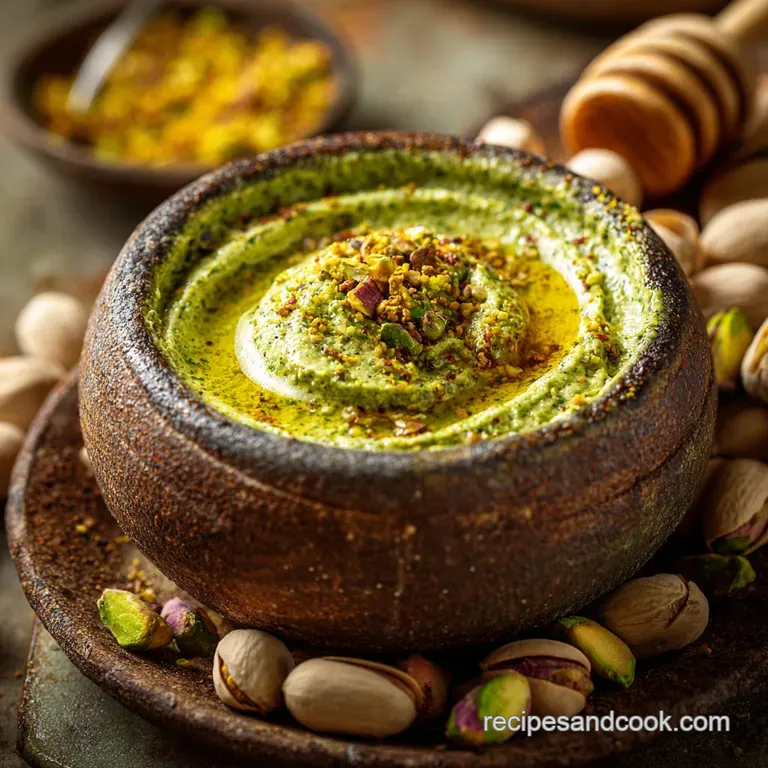
Culinary Applications: The Best Ways to Serve This Delicate Spread
You've made this incredible spread; now what? The subtle sweetness and vibrant colour make it versatile for both sweet and savoury pairings.
- Pistachio Ice Cream Base: Stir a few tablespoons into heavy cream and a little condensed milk for the fastest, most flavourful homemade ice cream ever.
- The Ultimate Toast: Slathered thickly on sourdough, topped with flaky salt, and maybe some finely chopped mint.
- Waffles and Pancakes: Drizzle it over stacks of fluffy buttermilk pancakes instead of heavy maple syrup.
- Cake Fillings: Use it as a decadent filling for sponge cakes or layered desserts. It pairs brilliantly with citrus zest.
 : PIN FOR LATER")
Recipe FAQs
Why is my pistachio butter gritty and not achieving a silky smooth texture?
Achieving silkiness requires patience; you must run the food processor long past the "crumbles" and "wet dough" stages until the nuts release their natural oils entirely. If necessary, add a tiny splash of neutral oil (like grapeseed) to help the blades catch the nuts and encourage full emulsification.
Ensure you scrape down the sides every 60-90 seconds to guarantee uniform processing.
How should I store homemade pistachio butter, and how long does it last?
Store the pistachio butter in an airtight container or jar in the refrigerator, where it will last reliably for 3 to 4 weeks. Due to the lack of stabilizers found in commercial brands, some natural oil separation may occur, so simply stir it well before serving.
For safety, always use clean utensils when scooping and check for any off smells past the third week.
Is it necessary to roast the pistachios before blending, or can I use them raw?
Yes, roasting the pistachios is highly recommended as it significantly deepens the nutty aroma and yields a more complex, savoury flavour profile for the butter. A light toast (about 8-10 minutes at 300°F/150°C) is sufficient, but ensure the nuts are completely cooled before you begin blending them.
Using raw pistachios results in a flatter, less intense flavour.
How can I make my pistachio butter a more vibrant, vivid green colour?
The best technique for achieving a vivid emerald green is blanching the shelled pistachios briefly in boiling water, then immediately plunging them into an ice bath (thermal shocking). This crucial step sets the chlorophyll pigment and removes any dusty residue, resulting in a much brighter, more appealing colour.
Avoid over roasting, as this can dull the green hue.
My food processor motor is getting very hot during blending. What should I do?
Nut butters require heavy processing, which often strains standard equipment due to the friction involved. If your machine feels excessively hot, stop immediately and allow the motor 10-15 minutes to cool down completely before continuing.
Processing the butter in shorter, pulsed bursts (3-4 minutes maximum per session) helps prevent overheating and potential motor damage.
Can I substitute the neutral oil listed in the recipe, or omit it entirely?
While you can omit the oil, adding a neutral oil is usually necessary to achieve the desired pourable, smooth consistency and aid the emulsification process. If substituting, choose an oil that won't compete with the pistachio flavour, such as avocado or grapeseed oil; avoid strongly flavoured options like extra virgin olive oil.
If you omit the oil, you may get a slightly thicker, paste like butter.
Can I freeze pistachio butter?
Yes, pistachio butter freezes exceptionally well. Pour it into freezer safe jars, leaving about half an inch of headspace, or freeze it flat in a zip-top bag to save space. It will keep for up to three months in the freezer; thaw overnight in the refrigerator before using, stirring well once defrosted.
Homemade Silky Pistachio Butter Recipe

Ingredients:
Instructions:
Nutrition Facts:
| Calories | 423 kcal |
|---|---|
| Protein | 12.5 g |
| Fat | 34.7 g |
| Carbs | 20.4 g |
