Homemade Cheddar Crackers: Crispy and Savory
- Time: Active 45 minutes, Passive 15 minutes, Total 1 hour
- Flavor/Texture Hook: Sharp, salty cheddar bite with a flaky, toasted butter finish
- Perfect for: School lunchbox surprises, sophisticated cheese boards, or weekend snack prep
- Master This Nostalgic Homemade Cheddar Crackers Recipe
- Why These Crackers Are Timeless
- Essential Preparation and Cooking Metrics
- Ingredients for the Ultimate Crunch
- Essential Tools for Cracker Success
- Mastering the Three Phase Process
- Expert Tips and Troubleshooting Solutions
- Variations for Every Palate
- Storage and Freshness Protection Tips
- Ideal Pairings and Presentation Ideas
- Recipe FAQs
- 📝 Recipe Card
Master This Nostalgic Homemade Cheddar Crackers Recipe
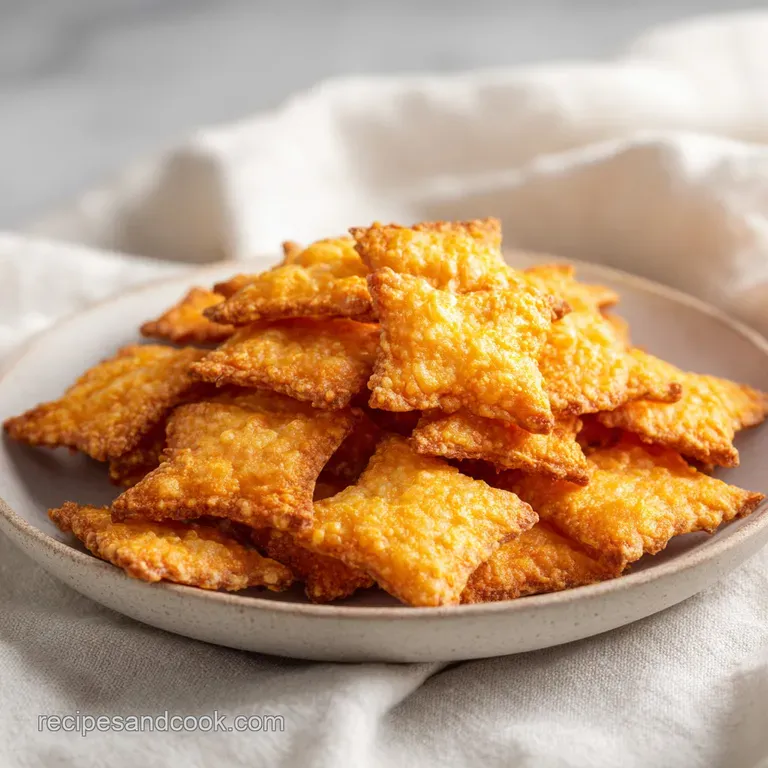
The first thing you notice is the aroma. It isn't that artificial, dusty smell from a cardboard box. It is the scent of real, bubbling fat and toasted protein hitting a hot pan. When I first pulled a tray of these out of the oven, the kitchen smelled like a high end grilled cheese sandwich.
There is a specific, sharp sizzle that happens in the final three minutes of baking, where the edges of each square turn a deep mahogany gold. That is the moment the magic happens.
We have all had those orange stained fingertips from the commercial snacks, but those are mostly air and vegetable oil. This version is all about the cheddar. I remember sitting at my kitchen table, frustrated because my early versions were either too soft or way too hard. I realized the secret was the cheese itself.
You cannot use the pre shredded stuff in a bag. It is coated in potato starch to keep it from clumping, and that starch is the enemy of a flaky cracker. You need a block of extra sharp cheddar and a box grater to get that silky, melty integration we are looking for.
This snack is a love letter to the simple joy of a salty crunch. It is about taking four or five basic pantry staples and turning them into something that feels like a luxury. We are going to walk through how to handle the dough so it stays tender but snaps when you bite it.
Trust me, once you hear that first "shatter" of a cracker you made yourself, there is no going back to the grocery store aisle. It is a small victory in the kitchen that feels absolutely massive.
Why These Crackers Are Timeless
Fat Temperature Control: Keeping the butter and cheese cold creates tiny steam pockets during baking, which is what gives the cracker its airy, flaky internal structure.
Gluten Relaxation Period: Chilling the dough for 30 minutes allows the flour proteins to settle, ensuring the crackers don't shrink or become tough and rubbery when rolled.
Docking for Evenness: Poking a hole in the center allows steam to escape, preventing the crackers from puffing into pillows so they stay flat, crisp, and uniform.
| Servings | Ingredient Adjustments | Baking Sheet Count | Total Bake Time |
|---|---|---|---|
| 8 People | 1x recipe (8 oz cheese) | 1 Large Sheet | 15 minutes |
| 16 People | 2x recipe (16 oz cheese) | 2 Large Sheets | 20 minutes (rotate) |
| 24 People | 3x recipe (24 oz cheese) | 3 Large Sheets | 25 minutes (rotate) |
The table above helps you plan for the crowd. If you are hosting a gathering, doubling the batch is usually the smartest move because these tend to disappear while they are still warm on the cooling rack.
Just remember that when you double up, the oven might need a few extra minutes to recover the heat lost from opening the door to rotate the pans.
Essential Preparation and Cooking Metrics
| Ingredient | Science Role | Pro Secret |
|---|---|---|
| Extra Sharp Cheddar | Structural Fat & Flavor | Use 2 year aged for the best "snap" and flavor profile. |
| Cold Unsalted Butter | Lamination Agent | Cube it into 1 cm pieces before chilling to ensure even distribution. |
| All Purpose Flour | Protein Framework | Weigh your flour if possible to avoid a dry, sandy dough. |
| Ice Water | Hydration Binder | Use only enough to clump the dough; too much leads to sogginess. |
The relationship between the flour and the cheese is where the texture lives. The cheese isn't just a flavoring; it actually provides a significant portion of the fat that coats the flour particles. This prevents the gluten from over developing, which is why these crackers feel so light rather than bread like.
It is a delicate balance of moisture and fat.
Ingredients for the Ultimate Crunch
To get the best results, stick to these specific components. Each one plays a part in the final "crunch" factor.
- 8 oz extra sharp cheddar cheese, freshly grated: Why this? Pre shredded cheese has starch coatings that prevent the dough from binding properly.
- 1/4 cup unsalted butter, cold and cubed: Why this? Cold butter creates steam pockets for a flaky, layered texture.
- 1 cup all purpose flour: Why this? Provides just enough structure without being too heavy or dense.
- 3/4 tsp kosher salt: Why this? Sharpens the cheese flavor; use sea salt for a coarser bite.
- 2 tbsp ice water: Why this? Binds the dough without melting the fats prematurely.
- 1/4 tsp smoked paprika: Why this? Adds a subtle depth and a beautiful golden orange hue.
- 1/8 tsp garlic powder: Why this? Provides an umami undertone that makes the cheese taste "cheesier."
| Original Ingredient | Substitute | Why It Works |
|---|---|---|
| Extra Sharp Cheddar | Pepper Jack | Similar fat content. Note: Adds significant heat and a creamier melt. |
| Unsalted Butter | Salted Butter | Same texture. Note: Reduce the added kosher salt by half. |
| All Purpose Flour | White Whole Wheat | Higher fiber. Note: Result will be nuttier and slightly denser. |
| Smoked Paprika | Cayenne Pepper | Same color boost. Note: Will be much spicier; use only a pinch. |
If you are out of cheddar, a firm Gouda or even a Gruyère can work beautifully. Just stay away from soft cheeses like mozzarella, as they have too much moisture and will turn your crackers into little chewy bits of bread rather than crispy snacks.
Essential Tools for Cracker Success
You don't need a professional bakery setup, but a few specific tools will make your life much easier. A food processor is the MVP here. It allows you to pulse the cold fat into the flour in seconds, which prevents the heat from your hands from melting the butter.
If you don't have one, a pastry cutter and a lot of patience will suffice, but the texture is much more consistent with the machine.
A pastry wheel or even a simple pizza cutter is another lifesaver. Trying to cut 100 little squares with a paring knife is a recipe for a headache. The wheel allows for long, straight, continuous cuts. Also, don't sleep on the parchment paper.
Not only does it prevent sticking, but it allows you to roll the dough out to that paper thin 1/8 inch thickness without adding extra flour, which would toughen the crackers.
Mastering the Three Phase Process
- Combine the dry base. Place the flour, salt, paprika, and garlic powder in a food processor and pulse to combine. Note: This ensures the spices are evenly distributed before the fats are added.
- Incorporate the fats. Add the cold, cubed butter and the freshly grated cheese. Pulse until the mixture resembles coarse sand with pea sized bits of fat remaining. Stop when you see small lumps.
- Hydrate the dough. Add ice water one tablespoon at a time while pulsing. Stop as soon as the dough begins to clump together into a ball.
- Chill and relax. Wrap the dough tightly in plastic wrap, flatten into a disk, and chill in the refrigerator for 30 minutes to relax the gluten. Note: Skipping this will make the dough spring back when rolling.
- Preheat and prepare. Preheat oven to 350°F (175°C) and line a baking sheet with parchment paper.
- Roll it out. Roll the dough between two sheets of parchment paper until approximately 1/8 inch thick. The thinner the dough, the better the snap.
- Cut the shapes. Use a pastry wheel or pizza cutter to cut the dough into 1 inch squares. You don't need to separate them; they will shrink slightly as they bake.
- Dock the centers. Use a toothpick to dock a hole in the center of each square to prevent puffing.
- Bake to gold. Transfer the parchment to a baking sheet and bake for 12–15 minutes. Bake until edges are mahogany gold and centers are firm.
- Cool completely. Let the crackers cool on the pan. They will finish crisping up as the fat solidifies.
Chef's Tip: To get a professional look, use a ruler to guide your pizza cutter. It takes an extra minute but results in perfectly uniform squares that look like they came from a high end boutique.
Expert Tips and Troubleshooting Solutions
The most common issue folks have is the "soggy center." This usually happens because the dough was rolled unevenly. If the middle is thicker than the edges, the edges will burn before the middle dries out. Using rolling pin spacer rings can help you maintain that perfect 1/8 inch thickness across the entire sheet.
Why Your Crackers Are Chewy
If your crackers aren't snapping, it's almost always a moisture issue. Either the oven wasn't hot enough, or they were pulled out too early. A cracker should feel firm to the touch when you pull the tray out. If they feel soft or spongy, give them another 2 minutes.
Remember, they will firm up more as they cool, but they shouldn't be soft in the oven.
| Problem | Root Cause | Solution |
|---|---|---|
| Crackers are tough | Over worked dough | Mix only until it clumps; don't over pulse the flour. |
| Edges are burnt | Uneven rolling | Use a heavy rolling pin and rotate the dough frequently. |
| No "sharp" flavor | Mild cheese used | Always use "Extra Sharp" or "Vintage" cheddar for impact. |
Common Mistakes Checklist
- ✓ Always grate your cheese fresh from a block (avoid pre shredded bags).
- ✓ Ensure your butter is "cold from the fridge" when it hits the food processor.
- ✓ Don't skip the 30 minute chill time; the dough needs to relax.
- ✓ Make sure to dock every single cracker to prevent air bubbles.
- ✓ Let them cool entirely on the tray before storing in a jar.
Variations for Every Palate
If you want to move beyond the classic cheddar profile, the base dough is incredibly forgiving. For a "Taco Style" cracker, swap the paprika for a bit of cumin and chili powder. For something more sophisticated, try adding a tablespoon of finely chopped fresh rosemary or thyme during the first pulse.
- For a Spicy Kick: Add 1/2 tsp of red pepper flakes or a dash of cayenne to the dry mix.
- For Herb Infused Crackers: Incorporate dried oregano or fresh chives for a garden fresh aroma.
- For a Cheesy Dusting: Sprinkle a little extra parmesan or flaky sea salt on top right before they go into the oven.
If you are looking for a different kind of snack project, you might also enjoy making some homemade silky pistachio butter to serve as a dip for these crackers. The nuttiness of the pistachio against the sharp cheddar is a pairing you wouldn't expect, but it works brilliantly on a snack board.
| Method | Time | Texture | Best For |
|---|---|---|---|
| Standard Oven | 15 minutes | Classic Crisp | Daily Snacking |
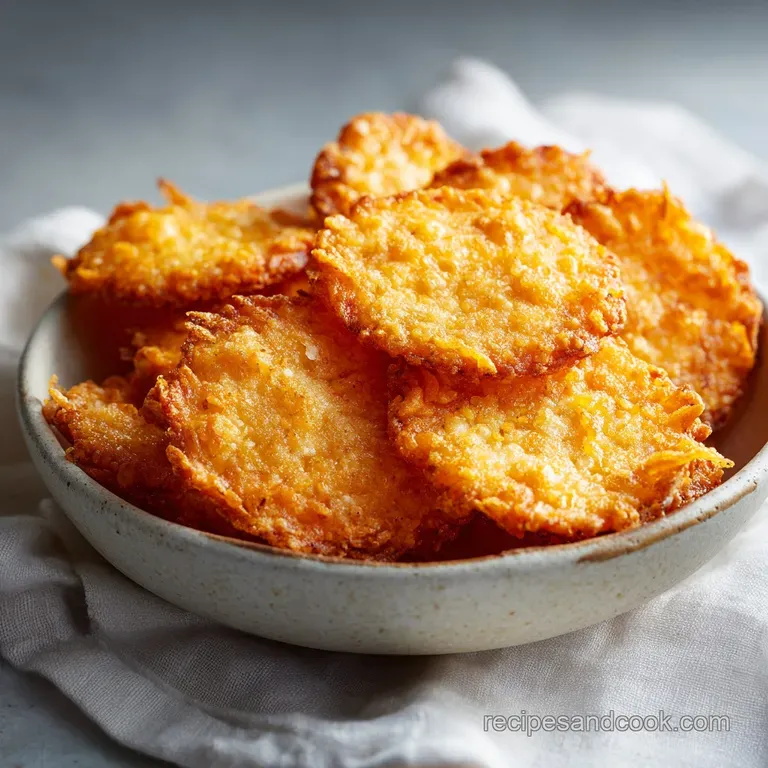
| Air Fryer | 8 minutes | Extra Crunchy | Small Batches |
| Convection | 12 minutes | Shattering Flake | Professional Results |
Storage and Freshness Protection Tips
Once these have cooled completely, you want to keep them away from humidity. An airtight glass jar or a tin is best. They will stay perfectly crisp at room temperature for up to 5 days.
If they do happen to lose their snap because of a humid day, you can "revive" them by popping them back into a 300°F (150°C) oven for about 3 to 5 minutes.
You can also freeze the baked crackers for up to 2 months. Just make sure they are in a heavy duty freezer bag. For zero waste, take any of the "shards" or scraps from the edges that didn't make perfect squares and pulse them in a blender. These make the most incredible cheesy breadcrumbs for topping a broccoli casserole or a mac and cheese.
Ideal Pairings and Presentation Ideas
These crackers are sturdy enough to handle heavy dips but flavorful enough to stand alone. I love serving them with a sharp apple slice or a bit of honey. The sweetness of the fruit cuts through the richness of the cheddar and butter in a way that feels very balanced.
If you are putting together a full spread, these crackers are the perfect crunchy element to balance out softer textures. They are a great precursor to a comforting meal. For example, if you are planning a nostalgic dinner, these crackers followed by a classic pecan pie for dessert will give your guests that "home cooked" feeling from start to finish.
| Feature | Fresh Homemade | Shortcut (store-bought) |
|---|---|---|
| Fat Source | Real Butter/Cheese | Vegetable Oils/Powders |
| Texture | Flaky & Shattering | Crunchy but Airy |
| Flavor | Deep, Aged Cheddar | Salty & Artificial |
If you want a different finish, try these tweaks: For a glossy look, brush the tops with a very thin egg wash before baking. For a rustic feel, don't cut them into perfect squares; just break the baked sheet into irregular "shards." For extra umami, add a teaspoon of nutritional yeast to the flour mixture.
The beauty of this homemade cheddar crackers recipe is that it is fundamentally simple. It relies on the quality of the ingredients and the patience of the cook. When you see that mahogany gold color and hear that distinct snap, you'll know exactly why we bother doing this from scratch.
It’s about the comfort of knowing exactly what went into your food and the joy of sharing something that actually tastes like real cheese.

Recipe FAQs
Can I use pre-shredded cheese instead of freshly grated?
No, avoid pre-shredded cheese. It is coated in anti caking starches that prevent the cheese from melting into the dough, leading to a dry and crumbly texture.
How to keep these crackers crispy for several days?
Store them in an airtight glass jar or tin. Keeping them away from humidity is the key to maintaining that snap for up to 5 days.
Why is it necessary to chill the dough for 30 minutes?
Chilling relaxes the gluten and firms the butter. This prevents the crackers from spreading or losing their shape in the oven, ensuring a consistent texture similar to the precision needed for our make-ahead breakfast strata.
How to revive crackers if they lose their crispness?
Place them in a 300°F (150°C) oven for 3 to 5 minutes. This gentle heat evaporates excess moisture and restores their original crunch.
Is it true that I can skip the docking step?
No, this is a common misconception. Docking a hole in the center of each square with a toothpick is essential to prevent them from puffing up into uneven pillows during baking.
How to tell when the crackers are perfectly baked?
Look for mahogany gold edges and firm centers. Relying on these visual and tactile cues at the 12 15 minute mark ensures you avoid burnt batches.
Can I freeze these crackers for later?
Yes, they freeze exceptionally well. Place the baked crackers in a heavy duty freezer bag to keep them fresh for up to 2 months.
Homemade Cheddar Crackers

Ingredients:
Instructions:
Nutrition Facts:
| Calories | 222 kcal |
|---|---|
| Protein | 8.7 g |
| Fat | 15.4 g |
| Carbs | 12.9 g |
| Fiber | 0.4 g |
| Sugar | 0.2 g |
| Sodium | 362 mg |
