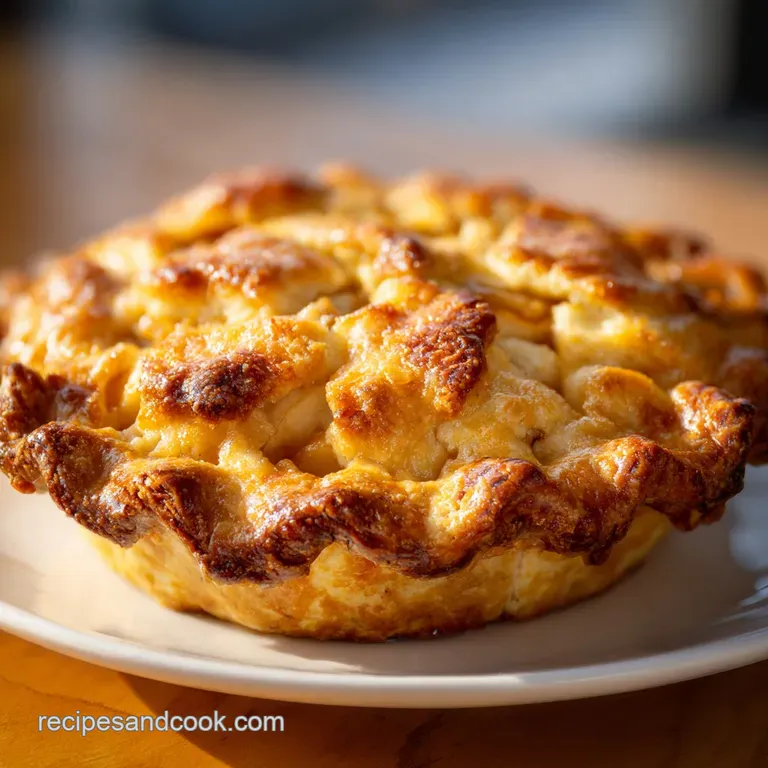
Homemade Apple Pie: Velvety Filling
- Time: Active 40 minutes, Passive 55 minutes, Total 1 hour 35 minutes
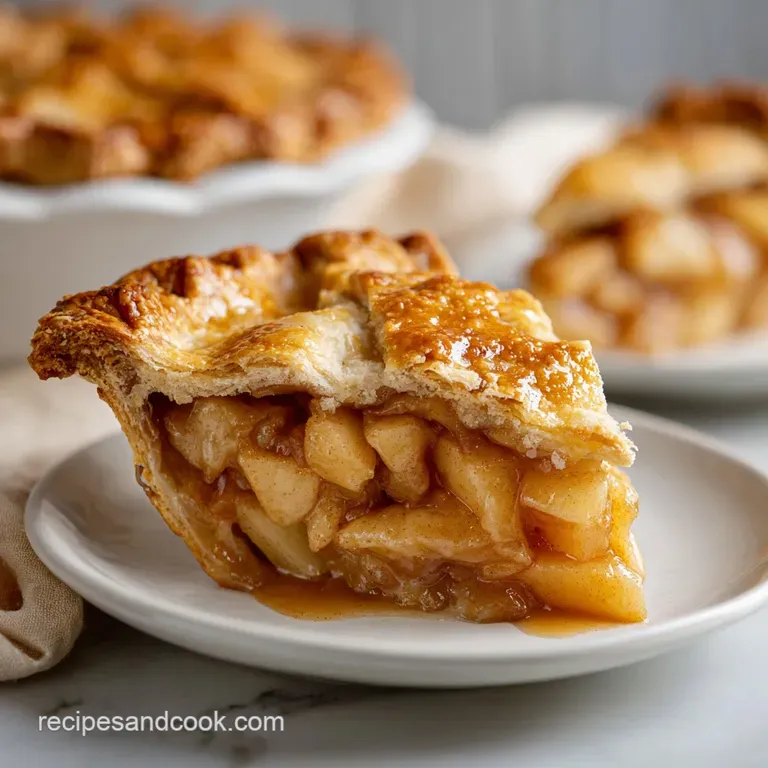
- Flavor/Texture Hook: Shattering, buttery crust surrounding a velvety, cinnamon spiced apple core
- Perfect for: Timeless family gatherings and traditional holiday centerpieces
- Mastering the Ultimate Homemade Apple Pie
- The Science of Structural Integrity
- Component Analysis for Perfection
- Selecting Your Baking Elements
- Necessary Tools for Baking
- Step By Step Assembly Guide
- Solving Common Baking Problems
- Flavor Variations and Substitutes
- Storing and Freezing Guidelines
- Best Ways to Serve
- Recipe FAQs
- 📝 Recipe Card
Mastering the Ultimate Homemade Apple Pie
There is something about the scent of cinnamon and warm butter drifting through the house that just settles the soul. It’s the ultimate sensory trigger, isn't it? I remember being eight years old, standing on a stool in my grandmother’s kitchen, watching her hands move with a speed that seemed like magic.
She never used a scale, just "felt" the dough, but for those of us who weren't born with those magical hands, a little precision goes a long way. I’ve had my fair share of "apple soup" pies and crusts that felt more like cardboard than pastry, but we’ve learned from those mistakes.
This recipe is about bringing people together around a table with something truly timeless. We aren't doing anything fussy or over complicated here. We are using minimal tools just a bowl, a grater, and a rolling pin to create a result that looks like it came from a professional bakery.
The secret is all in the temperature and the blend of apples. We want that perfect balance of tart and sweet, wrapped in a crust that yields with a satisfying shatter when your fork hits the plate. Trust me, once you nail this, you'll never look at a store-bought pie the same way again.
The Science of Structural Integrity
The Cold Fat Friction: Using frozen butter creates tiny, isolated pockets of fat that steam rapidly in the oven heat, forcing the dough layers apart to create a shattering, flaky texture.
The Starch Gelatinization: Cornstarch acts as a thickening agent by absorbing the released apple juices and forming a stable gel once the internal temperature hits 80°C.
The Serving Size Calculator
| Servings | Ingredient Adjustments | Pan Size | Cook Time |
|---|---|---|---|
| 4 People | Use 160g flour, 750g apples | 15cm deep dish | 40 minutes |
| 8 People | Standard recipe (320g flour) | 23cm pie plate | 55 minutes |
| 12 People | 1.5x ingredients (480g flour) | 23x33cm slab | 50 minutes |
Finding the right balance for your crowd is essential, especially when you’re planning a big Sunday roast. This dish pairs beautifully with a side of Roasting Sweet Potato Cubes recipe if you're leaning into those cozy, earthy autumn flavors for a full meal.
Component Analysis for Perfection
| Ingredient | Science Role | Pro Secret |
|---|---|---|
| Frozen Butter | Provides lift and flakiness | Grate the frozen block directly into the flour to keep it cold |
| Apple Cider Vinegar | Inhibits gluten development | This makes the crust much easier to roll without it snapping back |
| Cornstarch | Controls moisture migration | Toss it with the sugar first to prevent lumps in the filling |
| Mixed Apples | Provides flavor complexity | Mixing Granny Smith (tart) and Honeycrisp (sweet) prevents a one note flavor |
The mix of fats and acids in the crust is what creates that traditional mouthfeel we all crave. It's a bit like the logic behind a great Pistachio Butter recipe where the fat content determines the silkiness of the final spread.
Selecting Your Baking Elements
For the crust, we are keeping it simple. You’ll need 320g of all purpose flour don't reach for the bread flour here, we want a lower protein content for tenderness. 227g of unsalted butter is the star; make sure it is cubed and frozen for at least 30 minutes before you start.
You'll also need 15g of granulated sugar, 5g of fine sea salt, 120ml of ice filled water, and 1 tsp of apple cider vinegar. Why this? The vinegar ensures the crust remains tender and doesn't get tough from over working.
For that velvety filling, gather 1.5kg of mixed apples I swear by a 50/50 split of Granny Smith and Honeycrisp. You'll need 100g of light brown sugar for depth, 50g of granulated sugar for sweetness, 15ml of lemon juice to keep the colors bright, and 30g of cornstarch for the set.
For the spices, use 1.5 tsp ground cinnamon, 0.25 tsp ground nutmeg, 0.25 tsp ground ginger, and a tiny pinch (0.125 tsp) of ground cardamom. Finish with an optional egg wash (1 egg) for that golden glow.
| Original Ingredient | Substitute | Why It Works |
|---|---|---|
| Unsalted Butter | Cold Lard (equal weight) | Creates an even flakier, more traditional "old-fashioned" crust texture |
| Cornstarch | Tapioca Starch (40g) | Gives the filling a clearer, glossier look; holds up better to freezing |
| Light Brown Sugar | Dark Brown Sugar | Adds a more intense molasses flavor best for a deep, wintery taste |
Necessary Tools for Baking
You don't need a pantry full of gadgets for a Homemade Apple Pie. Honestly, the best tools are often the simplest ones you already have in the drawer. A large mixing bowl and a sturdy box grater are your best friends for the crust.
A rolling pin is essential, but if you're in a pinch, a smooth wine bottle works surprisingly well.
You will definitely want a 23cm pie plate glass or ceramic is best so you can see if the bottom crust is actually browning. A sharp vegetable peeler and a chef's knife will make quick work of those 1.5kg of apples.
If you have a pastry brush for the egg wash, great; if not, the back of a small spoon can spread it just fine. We’re going for timeless comfort here, not a tech heavy laboratory setup.
step-by-step Assembly Guide
Executing the Crust Recipe
- Whisk solids. Combine the 320g flour, 15g sugar, and 5g salt in a large bowl. Note: This ensures the seasoning is even.
- Grate butter. Take the 227g frozen butter and grate it directly into the flour. Note: This keeps the fat cold and the pieces uniform.
- Hydrate dough. Stir in the 120ml ice water and 1 tsp vinegar until a shaggy mass forms.
- Chill disks. Divide the dough into two disks, wrap them, and refrigerate for 1 hour. Note: This allows the gluten to relax.
Preparing the Filling Recipe
- Prep fruit. Peel and slice 1.5kg of apples into 5mm thick wedges. until they are uniform.
- Macerate apples. Toss apples with 100g brown sugar, 50g white sugar, lemon juice, 30g cornstarch, and all the spices. Note: Let this sit for 15 minutes to draw out excess moisture.
Assembly and over High heat Launch
- Roll out. Roll one disk to 30cm and fit it into your 23cm pie plate. until edges overhang slightly.
- Fill center. Heap the apple mixture into the crust, including the juices. Note: Pile them high as they will shrink.
- Top crust. Roll out the second disk, place it over the apples, and crimp the edges tightly.
- Vent and wash. Cut four slits in the top and brush with the beaten egg.
The Two Stage Bake
Bake at 200°C for 20 minutes, then reduce to 180°C for 35 minutes until the crust is golden and the filling sizzles. This over high heat start sets the pastry, while the lower heat finishes the apples without burning the edges.
Solving Common Baking Problems
Gap Between Crust and Fruit
This happens when the apples shrink significantly during baking, leaving a cavern under the top crust. It’s a classic heartbreak. To avoid this, make sure you slice your apples thinly and pack them in tightly.
Prematurely Browned Edge
The edges of the pie are thinner and hit the heat first. If they look dark before the middle is done, don't panic. Just wrap a little aluminum foil around the rim to protect it while the rest of the pie catches up.
The Soupy Slice
If you cut into the pie while it's still warm, the cornstarch hasn't had time to fully set. The filling will run everywhere. Patience is the hardest ingredient here, but it's the most important.
| Problem | Root Cause | Solution |
|---|---|---|
| Soggy Bottom | Undercooked base | Place the pie plate on a preheated baking sheet to jumpstart the bottom |
| Tough Crust | Overworking dough | Stop mixing as soon as the water is incorporated; keep butter visible |
| Dull Color | Missing egg wash | Always brush the top with egg or milk for that professional sheen |
Common Mistakes Checklist
- ✓ Use frozen butter, not just "cold" fridge butter, for maximum lift.
- ✓ Don't skip the vinegar; it prevents the dough from turning gray and tough.
- ✓ Let the pie cool for at least 3 hours before slicing to allow the juices to thicken.
- ✓ Preheat your baking sheet in the oven to ensure the bottom crust starts cooking immediately.
Flavor Variations and Substitutes
The beauty of a Homemade Apple Pie is how easily it adapts to your mood. If you're feeling a bit adventurous, try adding 50g of chopped walnuts or pecans to the filling for a bit of crunch. It changes the texture completely and adds a lovely toasted flavor.
Salted Caramel Variation
Instead of just tossing the apples in sugar, you can melt the brown sugar with a bit of extra butter and a pinch of flaky salt to create a caramel sauce. Pour this over the apples before sealing the top crust. It creates a velvety, rich interior that is absolutely decadent.
gluten-free Adaptation
You can use a high-quality 1:1 gluten-free flour blend. Just be aware that gluten-free dough tends to be more brittle, so you might need an extra tablespoon of water and a bit more patience when rolling it out. It won't have the same "stretch," but the flavor remains timeless.
| Fast Method | Classic Method | Why Choose? |
|---|---|---|
| store-bought crust | Handmade frozen butter crust | Classic gives a much more flaky, buttery shatter |
| Canned filling | Fresh 1.5kg mixed apples | Fresh allows you to control the spice level and texture |
Storing and Freezing Guidelines
Storage: Keep your baked pie on the counter for up to 2 days covered with a clean kitchen towel. For longer storage, move it to the fridge for up to 5 days. Just know the crust will lose some of its "shatter" in the fridge moisture.
Zero Waste: Don't throw away those apple peels! Toss them with a little sugar and cinnamon and bake them at 150°C for 15 minutes for "apple chips." Or, simmer them with water and a cinnamon stick to make a quick stovetop potpourri that makes your house smell like a dream.
Best Ways to Serve
Serving this is the best part. I’m a purist give me a slice that is slightly warm, but not hot, with a massive scoop of vanilla bean ice cream. The way the cold cream melts into the warm, spiced apple juices is something I could write poetry about.
If you want to get fancy, a drizzle of maple syrup or a dollop of unsweetened whipped cream balances the sweetness perfectly. And honestly? A cold slice for breakfast the next morning with a cup of strong coffee might actually be better than the first serving.
It’s the ultimate reward for your hard work in the kitchen.
Chef's Tip: If you find your bottom crust is always a bit pale, try baking on the lowest rack of the oven. The proximity to the heating element helps the glass or ceramic heat up faster, ensuring a crisp base that can stand up to the heavy filling.

Recipe FAQs
Why is my apple pie filling runny after cooling?
No, you must cool it completely. The cornstarch thickener needs time to fully gelatinize and set, which typically takes a minimum of three hours on the counter.
How to achieve a flaky crust instead of a tough one?
Use grated frozen butter and minimal water. Working the dough as little as possible prevents excessive gluten development; if you enjoyed controlling spread in this dough, see how that technique is adapted in our Sugar Cookie Cutout Recipe.
Must I pre-bake the bottom crust (blind baking) for this recipe?
No, blind baking is unnecessary here. Baking the pie on a preheated tray at high heat initially forces the bottom crust to cook rapidly and crisp up against the heavy filling.
Is it true that using only Granny Smith apples gives the best flavor?
No, this is a common misconception. A blend provides superior flavor complexity; use tart apples like Granny Smith balanced with sweeter, firmer varieties like Honeycrisp.
How to prevent the edges of the top crust from burning?
Cover the perimeter with foil during baking. Wrap thin strips of aluminum foil around the exposed rim once the crust achieves a light golden color, usually about halfway through the bake time.
How to quickly tell if the apples are cooked through before removing the pie?
Listen for consistent bubbling and look for steam. You should see the filling gently yet vigorously bubbling through the vents, indicating the internal temperature is high enough for the thickener to activate.
What is the best way to store leftover baked apple pie?
Store covered at room temperature for two days. The crust remains crisper on the counter; refrigeration is only recommended after 48 hours to prevent mold.
Homemade Apple Pie Recipe

Ingredients:
Instructions:
Nutrition Facts:
| Calories | 540 kcal |
|---|---|
| Protein | 4.8g |
| Fat | 23.8g |
| Carbs | 80.4g |
| Fiber | 4.2g |
| Sugar | 44.8g |
| Sodium | 246mg |
