Hummus Without Tahini: Achieve Silken Creaminess Without the Sesame Paste

- Ditching the Sesame: An Expert Guide to Hummus without Tahini
- The Science of Smoothness: Why This Tahini-Free Method Delivers
- Essential Components for the Best Tahini-Free Hummus
- Step-by-Step: Crafting Your Luxurious Tahini-Free Dip
- Expert Techniques and Troubleshooting for Perfect Results
- Storage Solutions: Keeping Your Hummus Without Tahini Fresh
- The Ultimate Pairing Guide: What to Serve with Sesame-Free Hummus
- Recipe FAQs
- 📝 Recipe Card
Ditching the Sesame: An Expert Guide to Hummus without Tahini
When you dip into a bowl of perfectly made hummus, you want that immediate, satisfying feeling of velvety richness clinging to your pita chip. That smooth, garlicky, slightly bright tang is the culinary equivalent of a hug.
Achieving that famous whipped texture without using tahini that thick, oily sesame paste might sound like a tricky kitchen challenge, but I promise you it’s completely doable and incredibly delicious.
Listen, we've all been there: The craving hits hard, the chickpeas are drained, but the tahini jar is stubbornly empty or perhaps you just don't love the strong sesame flavor. This "hummus without tahini" recipe is my back pocket lifesaver for fast dips and easy entertaining.
It uses clever technique, not fancy ingredients, proving that simple food can truly shine brightly.
This isn’t just a substitute; this is a genuinely superior dip that lets the delicate flavor of the chickpeas and quality olive oil come through beautifully. Get your food processor ready, because we are about to create the silkiest, easiest batch of sesame free hummus you’ve ever tasted, and we’re going to blow the lid off a few kitchen secrets along the way.
The Science of Smoothness: Why This Tahini Free Method Delivers
What Tahini Really Does (And How We Replace It)
Tahini is essentially two things: a fat source and a binding agent. It provides the necessary oiliness to create a proper emulsion, which is why traditional hummus is so creamy and light. When we ditch the tahini, we have to lean heavily on the second best fat source: high-quality Extra Virgin Olive Oil (EVOO).
We utilize EVOO not just as a garnish but as a foundational ingredient, blending it in slowly and aggressively to coat those chickpea starches and prevent a dry, chalky mess.
A Texture Goal: Achieving the Silken, Whipped Finish
We aren't aiming for thick, grainy hummus that cracks when you try to spread it. We want that airy, fluffy texture that looks like it was whipped for twenty minutes straight. The key to achieving this incredible lightness is combining three specific elements: heat, acid, and ice.
The food processor friction generates a little heat, the lemon juice brightens the flavor, and the ice water provides the shock needed to keep the final product beautifully emulsified and light.
The Recipe at a Glance: Time and Yield
This is designed for speed when hunger strikes. You need minimal active time, but don't skip the chilling step!
| Stage | Time | Notes |
|---|---|---|
| Prep Time | 10 minutes | This includes the optional, but critical, chickpea peeling. |
| Active Blending | 5 minutes | We let the machine do the heavy lifting. |
| Total Time | 45 minutes | Includes 30 minutes for essential chilling. |
The Secret Weapon: The Role of Ice Water
I know it sounds weird to add ice-cold liquid to something you want to be smooth, but trust me, this is crucial. When the food processor runs for an extended period, the friction heats the mixture, which can sometimes break the emulsion and make the hummus thin.
Adding ice water slowly provides moisture for a creamy consistency and keeps the mixture cold enough to incorporate the maximum amount of air, resulting in that incredible fluffiness.
Maximizing the Olive Oil Emulsion
This isn't a dump and blend situation; you must treat the EVOO with respect. The oil must be added very slowly through the feed tube while the machine is running continuously.
This slow introduction allows the oil molecules to bind evenly with the starches and liquids, creating a stable, luscious emulsion that holds together beautifully once chilled.
Why Peeling Chickpeas is Non-Negotiable
If you skip this step, I can almost guarantee you’ll have gritty hummus. The skins are tough and refuse to break down completely in a home food processor, even a powerful one. If you want truly silken, restaurant quality hummus, you must peel the skins off the chickpeas.
It takes maybe five extra minutes, and the reward is absolutely worth that small effort.
Essential Components for the Best Tahini Free Hummus
Measuring the Primary Ingredients (Chickpeas, Oil, Lemon)
We rely on good quality here, since there is nothing else masking the flavor. Use canned chickpeas for convenience, but rinse them really well to remove that metallic taste. For the EVOO, choose the best tasting oil you have; it will be a dominant flavor since it’s replacing the tahini's earthy richness.
Always use fresh lemon juice the bottled stuff tastes flat and dull, and we need that sharp brightness to cut through the fat.
| Ingredient | My Recommendation | Substitution |
|---|---|---|
| Chickpeas | Canned (drained, rinsed) | White beans (Cannellini or Great Northern) |
| Olive Oil (EVOO) | Robust, good quality | 2 Tbsp Cashew butter + 2 Tbsp neutral oil |
| Lemon Juice | Freshly squeezed | Lime juice (use slightly less, it's sharper) |
Beyond the Basics: Flavor Boosters and Enhancements
Garlic, cumin, and salt are the flavor anchors here. I usually use two large cloves of fresh garlic, but if you prefer a milder flavor, try roasting the garlic first; it becomes sweet and mellow. Cumin adds that essential earthy warmth, tying the whole thing together.
Don't be shy with the salt; proper seasoning is the difference between a nice dip and a knock your-socks off experience.
Handling Chickpea Substitutions (Canned vs. Dried)
Canned beans are a busy cook’s dream, obviously. Just make sure you reserve some of that aquafaba (the canning liquid), as it makes an excellent substitute for the ice water, offering a slight binding property.
If you opt for dried chickpeas, which offer a superior, fresher flavor, make sure you boil them until they are ridiculously tender almost falling apart before draining.
Chef’s Note: If you are using dried chickpeas, the traditional trick is to add a pinch of baking soda to the soaking or boiling water. This helps the skins loosen and allows the beans to break down completely, leading to an inherently creamier base.
step-by-step: Crafting Your Luxurious Tahini Free Dip
- Preparation: De-Skinning and Rinsing the Beans: Drain the canned chickpeas, reserving the liquid (aquafaba). Rinse them thoroughly. Now, for the critical step: gently rub the chickpeas between two towels or in your hands until the skins start peeling off. Discard the skins. This is non-negotiable for max smoothness!
- The Initial Whirl: Blending the Dry Ingredients: Place the peeled garlic, lemon juice, cumin, and salt into the food processor bowl. Pulse 5 10 times until the garlic is very finely minced. Next, add the prepared chickpeas and process continuously for 1 minute until the mixture looks like chunky, grainy sand.
- The Slow Drizzle Technique for Emulsification: Scrape down the sides of the bowl really well. Turn the processor back on, and through the top feed tube, very slowly drizzle in the 4 tablespoons of EVOO. Let the machine run for a full 60 seconds after the oil is completely incorporated.
- Adjusting Consistency and Final Flavor Check: While the motor is still running, add the ice-cold water or reserved aquafaba, 1 tablespoon at a time. The mixture will lighten and get fluffier almost immediately. Continue adding liquid until you hit your desired texture usually 2 to 4 tablespoons total.
- Final Polish: Process the hummus for another 2 full minutes without stopping to maximize the air incorporation and smooth out any remaining tiny pieces. Taste the batch. Does it need more salt? More lemon for brightness? Adjust now!
Expert Techniques and Troubleshooting for Perfect Results
Avoiding a Grainy or Chalky Texture
The biggest failure point in homemade hummus is usually texture. If your hummus is grainy, you made one of two mistakes: you didn't peel the chickpeas, or you didn't blend long enough. The fix? Add one more tablespoon of cold liquid and process the mixture for another two minutes straight.
Don't worry about burning out your machine; it's designed for this!
Optimizing Your Food Processor for Whipping
Make sure you are using the sharp metal S-blade. My biggest blunder when I first started making hummus was trying to use a blender; blenders often lack the wide, scraping motion needed to whip air into the beans. Use a spatula to scrape down the sides of the food processor every 60 seconds during the blending phase.
This ensures everything is uniformly incorporated and nothing sticks to the wall un-blended.
Keeping the Color Bright
If you notice your hummus starting to look a little dull or greenish grey, it might be due to oxidized garlic. To avoid this, make sure you add the lemon juice at the exact same time as the raw garlic, as the acid helps stabilize the color.
Storage Solutions: Keeping Your Hummus Without Tahini Fresh
Refrigeration Best Practices
Homemade hummus keeps beautifully in the fridge for 4 to 5 days, easy. Transfer it to an airtight container, press a sheet of plastic wrap directly onto the surface to prevent a skin from forming, and seal the container.
When you're ready to serve, stir it gently, add a final drizzle of EVOO, and maybe a dash of paprika to revive the top layer.
Guide to Freezing and Thawing Homemade Hummus
But does it freeze well? You bet, though the texture changes slightly. Freeze the hummus in small, single serving containers. Leave a little headspace for expansion. It will last up to 3 months. To thaw, transfer it to the fridge overnight. When fully thawed, you will likely notice some separation; that’s normal!
Reviving Hummus That Has Separated
When thawing or after a few days in the fridge, hummus can sometimes "weep" or separate slightly. The fix is simple: put the whole batch back into the food processor, add 1/2 teaspoon of cold water or lemon juice, and process for 30 seconds. This re-emulsifies the fats and moisture, making it creamy again.
The Ultimate Pairing Guide: What to Serve with Sesame Free Hummus
Classic Dippers: Pita and Fresh Vegetables
You can't go wrong with the classics. Serve it with warm, fluffy pita bread it's non-negotiable in my house. For vegetables, choose crunchy items that contrast the creamy texture, like crisp cucumber spears, bright red pepper slices, and substantial carrot sticks.
Elevated Appetizers and Spreads
Use this tahini free hummus as a vibrant spread on a toasted bagel instead of cream cheese. It also makes an incredible base layer for a Mediterranean mezze platter, paired with marinated olives, pickled red onions, and chunks of feta cheese.
Seriously, try spreading a thick layer on toast and topping it with a fried egg and chili flakes. Game changer.
Garnishes that Add Visual Appeal and Flavor
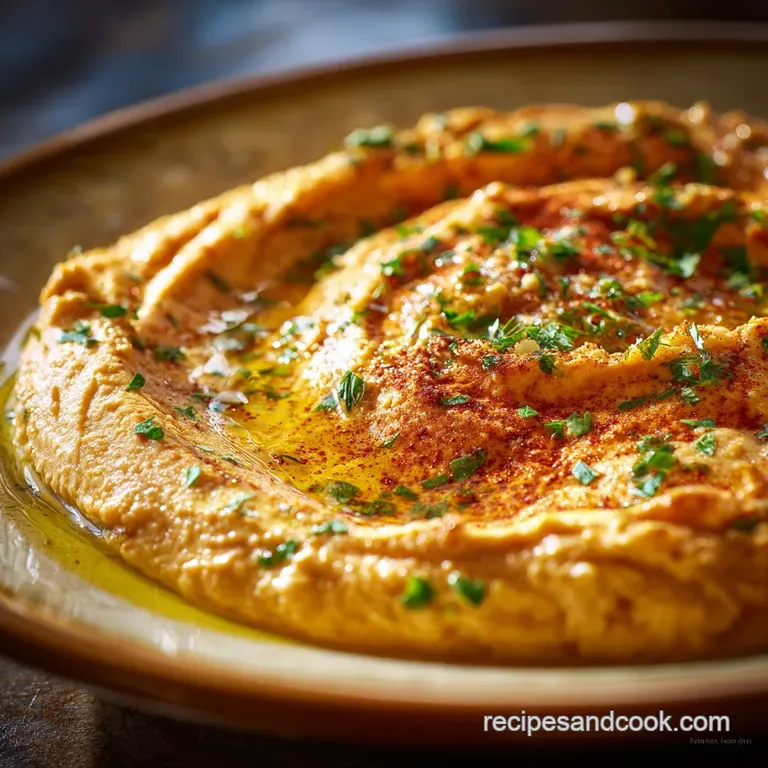
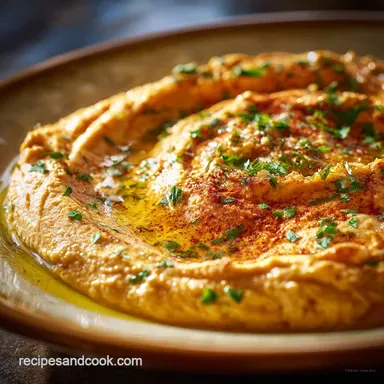
A gorgeous presentation makes all the difference, right? Don't just plop it in a bowl! Spoon the hummus into a shallow dish and use the back of a spoon to create a deep swirl or well in the center.
Drizzle generously with good EVOO the oil should pool nicely in the swirl and finish with a sprinkle of smoked paprika, Za’atar, or finely chopped fresh parsley.

Recipe FAQs
Why is my hummus gritty or dense without tahini?
Achieving silken smoothness relies heavily on completely peeling the chickpeas or boiling them with a touch of baking soda to help the skins detach before blending. If you skipped the peeling, increase the blending time significantly and stream in extra ice-cold water until the mixture fully emulsifies.
What ingredients best replace the nutty flavor and fat that tahini usually provides?
In the absence of tahini, high-quality extra virgin olive oil is essential for richness, providing the necessary fat and mouthfeel; choose a flavorful, robust oil. For an optional nutty depth, you can toast a tablespoon of pine nuts or sunflower seeds and blend them finely into the mixture.
My hummus is too thick/dry. What should I add to thin it out correctly?
If your hummus is too dry, you need to add liquid gradually while the food processor is running to ensure it incorporates properly. The best choice is ice-cold water, as the temperature helps to create a lighter, fluffier dip; avoid adding too much lemon juice, as that can make the hummus overly tart.
Do I need to use dried chickpeas, or can I use canned chickpeas for this recipe?
Canned chickpeas work perfectly well for this recipe and drastically cut down on preparation time. To ensure the smoothest texture possible, drain them, rinse them thoroughly, and simmer them gently for 10 minutes before peeling or blending immediately.
How long can I safely store this tahini free hummus in the refrigerator?
Stored properly in an airtight container, homemade hummus is usually safe to consume for 4 to 7 days. To maximize freshness and prevent drying, drizzle a thin layer of olive oil over the top surface before sealing the container.
Is it possible to freeze hummus made without tahini?
Yes, hummus freezes moderately well, but be aware that freezing and thawing often slightly alters the texture, making it a bit less creamy upon defrosting. Store it in a freezer safe container with a little space for expansion, and stir vigorously after thawing overnight in the refrigerator to re-emulsify the ingredients.
Easy Hummus Without Tahini Recipe
Ingredients:
Instructions:
Nutrition Facts:
| Calories | 329 kcal |
|---|---|
| Protein | 8.9 g |
| Fat | 21.9 g |
| Carbs | 25.1 g |
