Homemade Pumpkin Pie: Silky and Spiced
- Time: Active 30 minutes, Passive 55 minutes, Total 85 minutes
- Flavor/Texture Hook: Flaky, salt kissed pastry paired with a silky, warm spiced pumpkin center.
- Perfect for: Holiday centerpieces, seasonal gatherings, or anyone craving a foolproof classic.
- Secrets to a Perfect Homemade Pumpkin Pie Recipe
- The Secret to a Silky Crack Free Center
- Component Analysis for Better Baking Results
- Precise Specs for Sweet Success
- The Essential Bakery Quality Ingredients
- Tools for Professional Pie Results
- Executing the Perfect Pumpkin Bake
- Mastering the Most Common Obstacles
- Scaling the Recipe for Any Crowd
- Debunking Common Pumpkin Pie Myths
- Safe Storage and Zero Waste Ideas
- Presentation and Color Balance Strategy
- Recipe FAQs
- 📝 Recipe Card
Secrets to a Perfect Homemade Pumpkin Pie Recipe
Have you ever wondered why some pies have that dull, matte finish while others look like burnished copper under the kitchen lights? It is a question that haunted me until I realized that the moisture content in your pumpkin and the temperature of your fat are the only two things standing between you and a masterpiece.
There is a specific magic that happens when the aroma of toasted cinnamon and cloves begins to drift from the oven, signaling that the custard is finally setting into that iconic, wobbly center.
We are not just making a dessert here; we are engineering a texture profile that most people think is only possible in professional bakeries. You'll learn how to handle the dough so it shatters like glass when your fork hits it, and how to treat the pumpkin so it feels like silk on the tongue.
This is the version of the holiday classic that actually tastes like the ingredients you put into it, rather than just sugar and "spice" flavored air.
I am going to walk you through every nuance, from the way the flour feels when it hits the frozen butter to the exact second you need to pull that tin out of the heat. We'll skip the guesswork and focus on the techniques that guarantee success every single time you preheat that oven.
Grab your rolling pin, and let's get to work on the only custard pie you will ever need.
The Secret to a Silky Crack Free Center
Fat Suspension: The sweetened condensed milk provides a stable fat in-water ratio that prevents the pumpkin fiber from clumping. This ensures the mouthfeel remains velvety rather than grainy.
Protein Coagulation: Adding a single extra egg yolk increases the lecithin content, creating a tighter but more tender protein web. This allows the pie to set at a lower internal temperature, which prevents the surface from splitting.
Gluten Inhibition: A single drop of apple cider vinegar interrupts the formation of long gluten strands in the crust. This results in a pastry that is tender and flaky rather than tough and bread like.
Moisture Control: Blind baking the shell creates a moisture barrier that prevents the custard from soaking into the dough. This is what keeps the bottom of the slice firm and crisp instead of soggy.
| Method | Time | Texture | Best For |
|---|---|---|---|
| Oven (Classic) | 55 minutes | Velvety and dense | Traditional holiday presentation |
| Stovetop (Filling Only) | 15 minutes | Light and mousse like | No bake chilled variations |
| Air Fryer (Mini) | 18 minutes | Extra crispy edges | Quick single servings |
The oven method remains the gold standard for this pumpkin pie recipe because the dry heat gently caramelizes the sugars in the pumpkin puree. This slow process develops a depth of flavor that a quick stovetop cook simply cannot replicate.
Component Analysis for Better Baking Results
| Ingredient | Science Role | Pro Secret |
|---|---|---|
| Frozen Butter (113g) | Steam Leavening | Keep chunks pea sized to create pockets of steam for a flaky shatter. |
| Pumpkin Puree (425g) | Structure/Base | Use canned puree for consistent moisture levels compared to fresh squash. |
| Condensed Milk (396g) | Emulsifier | This provides all the sugar and dairy needed for a perfectly smooth set. |
| Egg Yolk (1 extra) | Richness | The extra yolk adds fat that prevents the custard from "weeping" as it cools. |
Using high-quality spices is just as important as the pumpkin itself. I always recommend checking the expiration date on your nutmeg and cloves before starting. If they don't hit you with a sharp, punchy aroma the moment you open the jar, it is time to replace them for the best results in this recipe.
Precise Specs for Sweet Success
When we talk about precision in the kitchen, we are looking at three specific checkpoints that determine the final outcome of your bake. First, your butter must be truly frozen not just cold at 0°C.
Second, the internal temperature of the custard must reach 79°C (175°F) for a safe and stable set. Finally, you must respect the 4 hours of cooling time; cutting into a warm pie is the quickest way to ruin the structural integrity of the custard.
| Servings | Flour | Pumpkin Puree | Pan Size |
|---|---|---|---|
| 9 Servings | 160g | 425g | 23cm (9 inch) |
| 18 Servings | 320g | 850g | Two 23cm pans |
| 4 Servings | 80g | 212g | 15cm (6 inch) |
Adjusting the size of your pie requires careful attention to the depth of the pan. A deeper dish will need an extra 10 minutes of cook time to ensure the center isn't liquid. If you're looking for a different kind of seasonal treat, my Pumpkin Chocolate Chip Cookies are a great way to use up any leftover puree you might have in the fridge.
The Essential Bakery Quality Ingredients
- All purpose flour (160g): This provides the structure for the crust. Why this? Lower protein than bread flour keeps the pastry light and tender.
- Unsalted butter (113g): Must be frozen and cubed. Why this? Control over salt levels allows the spices in the filling to shine.
- Fine sea salt (0.5 tsp + 0.5 tsp): Used in both dough and filling. Why this? Enhances the sweetness and cuts through the richness of the dairy.
- Ice water (4 tbsp): Keeps the butter from melting during mixing. Why this? Cold water prevents the dough from becoming greasy and tough.
- Apple cider vinegar (1 drop): Relaxes the gluten. Why this? Makes the dough easier to roll and much flakier.
- Pumpkin puree (425g): Pure pumpkin, not pie filling. Why this? Allows you to control the spice levels and sweetness yourself.
- Sweetened condensed milk (396g): The primary sweetener. Why this? Creates a dense, creamy texture that granulated sugar can't match.
- Large eggs + 1 yolk: Provides the "set." Why this? The extra yolk adds a luxurious, velvety mouthfeel to every bite.
- Ground spices (Cinnamon, Ginger, Nutmeg, Cloves): The flavor core. Why this? A specific ratio creates that "old-fashioned" nostalgic flavor profile.
| Original Ingredient | Substitute | Why It Works |
|---|---|---|
| Condensed Milk | Coconut Milk + Sugar | Similar fat content. Note: Adds a distinct tropical flavor. |
| AP Flour | gluten-free Blend | Xantham gum in the blend mimics gluten structure for the crust. |
| Butter | Leaf Lard | Higher melting point results in an even flakier, traditional crust. |
If you decide to swap the butter for lard, keep in mind that the flavor will be more savory. This is actually a trick used in many old-fashioned recipes to balance the heavy sweetness of the pumpkin custard. For those who prefer a more traditional cake like dessert, you might enjoy my Vanilla Pound Cake Recipe which uses similar dairy principles.
Tools for Professional Pie Results
You don't need a kitchen full of gadgets, but a few specific items make the process much smoother. A food processor is my preferred tool for the crust because it works the butter into the flour faster than your hands can, which keeps everything cold.
However, a simple pastry cutter or two knives will work just fine if you're patient.
A fine mesh sieve is the "secret weapon" for the filling. Straining the custard removes any tiny bits of egg white or pumpkin fiber that didn't get fully incorporated, ensuring that signature silky finish.
You will also need a 23cm (9 inch) pie plate preferably glass or ceramic as these materials distribute heat more evenly than thin metal pans.
Finally,, an instant read thermometer is the only way to be 100% sure the pie is done. While the "jiggle test" is a classic, the thermometer takes away the anxiety of overbaking or underbaking.
A wire rack for cooling is also non negotiable; it allows air to circulate under the pan, preventing the bottom crust from steaming and becoming soft while the pie sets.
Executing the Perfect Pumpkin Bake
- Prepare dough. Pulse flour, salt, and frozen butter in a food processor until pea sized crumbs form. Note: Tiny chunks of butter are essential for a flaky texture.
- Hydrate flour. Add ice water and vinegar until dough just holds together. Note: Don't overmix or the crust will become tough like bread.
- Shape and chill. Roll out the dough, place in a 9 inch pie plate, crimp edges, and chill for 30 minutes. Wait until the dough feels firm to the touch.
- Blind bake shell. Bake at 190°C (375°F) with weights for 15 minutes. Note: This prevents the crust from shrinking down the sides.
- Finish bottom. Remove weights and bake for 8 more minutes until the bottom is matte and pale gold.
- Mix base. Whisk eggs, egg yolk, and pumpkin puree together in a large bowl. Note: Whisking the eggs first ensures they are fully incorporated.
- Add dairy. Slowly stir in condensed milk and spices until the mixture is smooth and uniform in color.
- Sieve filling. Pour the custard mixture through a fine mesh sieve into a separate bowl. Note: This removes any air bubbles and unmixed bits.
- Begin bake. Pour the strained filling into the warm, pre baked shell. Reduce oven temperature to 160°C (325°F).
- Final cook. Bake for 45-55 minutes until the internal temperature reaches 79°C and the center wobbles slightly.
- Cool completely. Cool on a wire rack for at least 4 hours. Wait until the pan is cold before slicing.
Chef's Note: If you see the edges of the crust browning too quickly during the final bake, wrap them loosely in aluminum foil. This acts as a heat shield, allowing the center to finish cooking without burning the pastry.
Mastering the Most Common Obstacles
Why Your Crust Is Soggy
The most common culprit for a "soggy bottom" is skipping the blind bake or not letting the crust get "matte" before adding the filling. When raw custard hits raw dough, the moisture migrates instantly. You need that par baked barrier to keep the pastry crisp.
Also, make sure your oven is fully preheated; a cold start will melt the butter before the flour can set, leading to a greasy mess.
Why Your Filling Is Grainy
If your pie feels like it has tiny sand particles in it, you've likely overcooked the eggs. When egg proteins are heated too fast or too high, they tighten up and squeeze out moisture, creating a curdled texture. This is why we drop the oven temperature to 160°C for the filling stage.
Using a sieve, as mentioned in the steps, also helps by removing any large pumpkin fibers that could disrupt the smoothness.
| Problem | Root Cause | Solution |
|---|---|---|
| Surface Cracks | Overbaking | Pull pie at 79°C (175°F) internal temp while center still jiggles. |
| Shrinking Crust | Warm Dough | Chill the dough for at least 30 mins before baking to relax gluten. |
| Weeping Filling | Excessive Heat | Use a lower oven temp (160°C) to gently set the custard proteins. |
Common Mistakes Checklist:
- ✓ Use truly frozen butter to ensure the crust shatters into flakes.
- ✓ Sieve the filling to remove air bubbles and achieve a velvety finish.
- ✓ Do not over whisk the filling once the eggs are in; air causes cracks.
- ✓ Let the pie cool for the full 4 hours to allow the starch to gelatinize.
- ✓ Always use pumpkin puree, not "pumpkin pie mix," for flavor control.
Scaling the Recipe for Any Crowd
When you need to double this recipe for a large gathering, the math is simple for the ingredients, but the technique needs a slight tweak. For the crust, I recommend making two separate batches of dough rather than one giant one.
Large mounds of dough are harder to keep cold, and you run the risk of the butter melting while you're trying to roll it all out.
If you are scaling down to a smaller 15cm (6 inch) pan, you should reduce the bake time by about 20%. The internal temperature remains the same — 79°C but the smaller volume of custard will reach that point much faster.
For the spices, when doubling the recipe, only increase the cloves and nutmeg to 1.5 times the original amount. These spices are very potent and can easily overwhelm the dish if doubled linearly.
| Desired Change | Flour/Fat Adjustment | Temp/Time Adjustment |
|---|---|---|
| Double Recipe | Exact double for both | Keep temp same, bake separately |
| Half Recipe | Exact half; use half an egg | Reduce bake time by 15-20% |
| Mini Tartlets | Increase flour by 10% | Increase temp to 175°C, bake 20 mins |
Reducing the liquid content by about 10% when doubling the filling helps it set more firmly in larger pans. This is especially useful if you are using a deep dish pan where the center takes longer to cook through.
Debunking Common Pumpkin Pie Myths
One of the biggest myths is that fresh pumpkin is always superior to canned. In reality, most "fresh" pumpkins sold in grocery stores are watery and stringy. Canned puree is actually made from Dickinson squash, which has a much lower moisture content and a smoother texture that is ideal for a pumpkin pie recipe.
Unless you are roasting a specific heirloom sugar pumpkin, the canned version will actually give you a better result.
Another misconception is that searing the crust at a high temperature for the entire bake makes it crispier. While a high initial heat is good for the blind bake, keeping it at 190°C once the custard is added will almost certainly cause the filling to separate and crack.
The gentle descent to 160°C is what allows the custard to stay creamy and smooth without losing the crispness of the pre baked shell.
Finally, many people believe that you can't freeze a custard pie. You absolutely can! The trick is to let the pie cool completely, then wrap it tightly in several layers of plastic wrap and foil. As long as you thaw it slowly in the refrigerator, the texture remains remarkably close to the fresh version.
Safe Storage and Zero Waste Ideas
To keep your pie fresh, store it in the refrigerator. Because of the high egg and milk content, it shouldn't sit at room temperature for more than 2 hours. It will stay fresh and delicious for up to 4 days in the fridge.
If you find yourself with extra filling that didn't fit in the crust, don't throw it out! You can pour it into small ramekins and bake them alongside the pie for "crustless" pumpkin puddings.
For zero waste with the crust scraps, roll them out, sprinkle with cinnamon sugar, and bake them for 10 minutes. These "pie fries" are a favorite snack in my house while we wait for the main pie to cool.
If you have leftover pumpkin puree in the can, it can be frozen in an airtight container for up to 3 months or stirred into oatmeal for a quick seasonal breakfast.
If you are planning to freeze the whole pie, do it after it has fully cooled and set for 4 hours. When you're ready to eat it, move it to the fridge 24 hours before serving. Avoid thawing it on the counter, as this can cause condensation to form on the surface, making the crust soggy.
Presentation and Color Balance Strategy
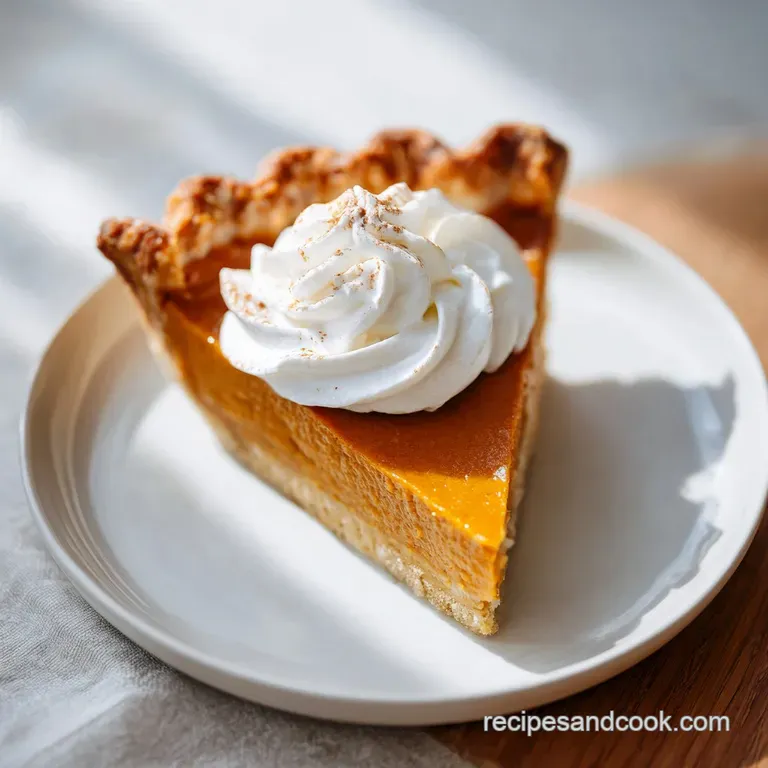
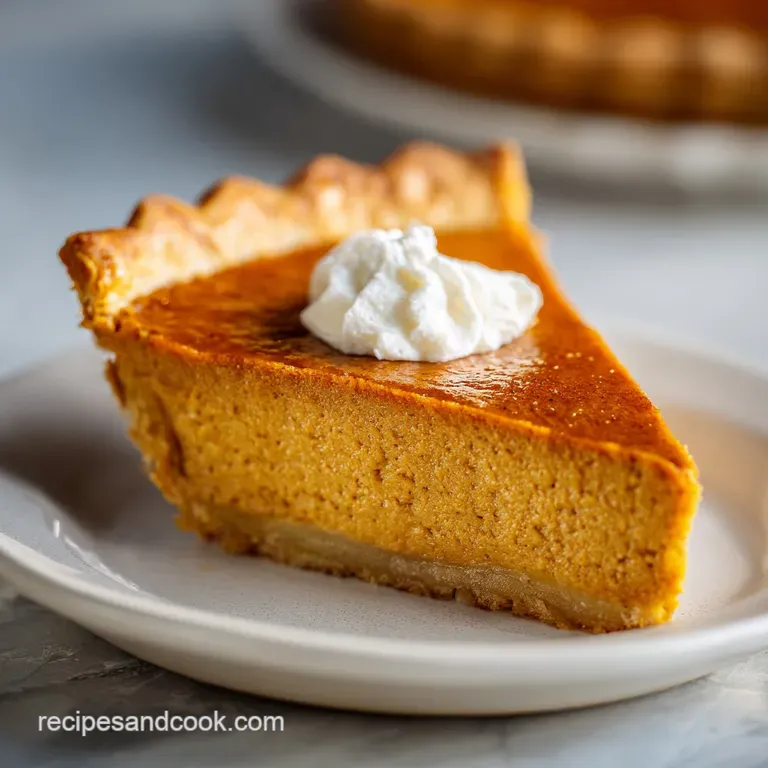
To make this pie a true showstopper, we focus on a specific color balance. The primary color is the burnished orange of the pumpkin filling. To contrast this, we want a stark white accent from fresh whipped cream and a golden brown border from the perfectly baked crust.
Add the whipped cream only when you are ready to serve. If you put it on a warm pie, it will melt into a greasy film. For an extra professional touch, sprinkle a tiny pinch of freshly grated nutmeg over the white cream right before it hits the table.
This brings all three colors together and hints at the warm flavors hidden inside the custard.
You can also experiment with "leaf" cutouts made from leftover dough. Bake these separately on a cookie sheet and place them around the edge of the pie after it has cooled. This adds a beautiful seasonal texture and covers any slight imperfections in the crimping.
It's all about making the dish look as good as it tastes.

Recipe FAQs
What is the secret to a good pumpkin pie?
The secret is straining the filling through a fine mesh sieve. This removes stringy pumpkin fibers, ensuring a perfectly silky texture that feels professional in every bite.
Is it better to use heavy cream or evaporated milk in pumpkin pie?
Use sweetened condensed milk as specified. It provides the necessary sugar and density for a stable set, unlike heavy cream which can lead to a softer, less cohesive custard.
What are common mistakes when making pumpkin pie?
Overbaking is the most frequent error. If you pull the pie when the center is fully firm rather than slightly wobbly at 175°F (79°C), the custard will likely crack as it cools.
What are the ingredients in pumpkin pie?
The filling requires pumpkin puree, sweetened condensed milk, two large eggs, one egg yolk, cinnamon, ginger, nutmeg, cloves, and salt. The crust is built from flour, frozen unsalted butter, sea salt, ice water, and a drop of apple cider vinegar.
How to achieve a flaky pie crust?
Pulse your frozen butter into the flour until only pea-sized crumbs remain. If you enjoyed mastering this emulsification and aeration technique here, you will find similar attention to fat-to-flour ratios essential when making delicate soufflés.
How to prevent the bottom crust from getting soggy?
Blind bake the crust for 15 minutes with weights and 8 minutes without before adding the filling. This ensures the bottom is matte and pale gold, creating a moisture barrier that keeps the pastry crisp.
How to cool the pie properly?
Place the pie on a wire rack for at least 4 hours. Resist the urge to slice it early, as the custard needs this full duration to finish setting and reach its ideal consistency.
Classic Homemade Pumpkin Pie

Ingredients:
Instructions:
Nutrition Facts:
| Calories | 336 kcal |
|---|---|
| Protein | 7.4 g |
| Fat | 16.1 g |
| Carbs | 41.3 g |
| Fiber | 1.8 g |
| Sugar | 25.4 g |
| Sodium | 255 mg |
