Best Chocolate Covered Strawberries Recipe
- Time: Active 15 minutes, Passive 30 minutes, Total 45 minutes
- Flavor/Texture Hook: A velvety dark chocolate snap that gives way to a burst of fresh berry juice.
- Perfect for: Romantic gestures, dinner parties, or a sophisticated afternoon treat.
- Unlocking the Secrets to the BEST Chocolate Covered Strawberries recipe
- Scientific Principles Behind a Shattering Chocolate Shell
- Strategic Component Analysis for Glossy Results
- Essential Components and Smart Substitutions
- Tools Required for Professional Results
- The Step by Step Coating Process
- Fixing Common Dipping Hurdles and Mistakes
- Personalized Flavor and Texture Enhancements
- Proportional Adjustments for Larger Batches
- Myths Regarding Chocolate Enrobing
- Maintaining Freshness and Preventing Condensation
- Mastering the Art of High End Presentation
- Recipe FAQs
- 📝 Recipe Card
Unlocking the Secrets to the BEST Chocolate Covered Strawberries recipe
There is nothing quite like the sound of a chocolate shell shattering between your teeth, followed immediately by the cool, tart juice of a perfectly ripe berry. I used to think this was something only professional chocolatiers could pull off, especially after my first few attempts ended in a puddle of greyish chocolate and weeping fruit.
It was frustrating, but those failures taught me that the difference between a soggy mess and a bakery worthy treat comes down to three things: dry skin, low heat, and the right fat ratio.
Most people struggle with "sweating," where droplets of water form under the chocolate, causing the whole shell to slide right off like a loose coat. We have all been there, standing over the sink with a sticky mess, wondering what went wrong.
The truth is, berries are living things that breathe, and if you trap that moisture without the right prep, you are headed for trouble. I have spent a lot of time testing the best chocolate for dipping strawberries, and I found that a simple addition of refined coconut oil changes everything about the texture.
Today, we are going to walk through how to dip strawberries in chocolate so they look professional every single time. We will tackle the moisture issue head on and use some smart garnish strategies to make these look like a million bucks.
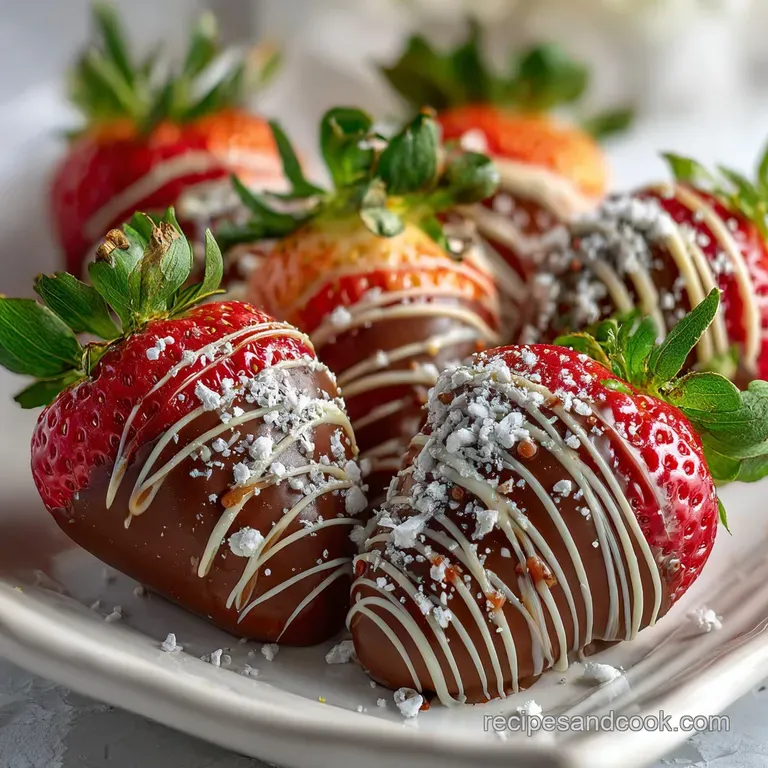
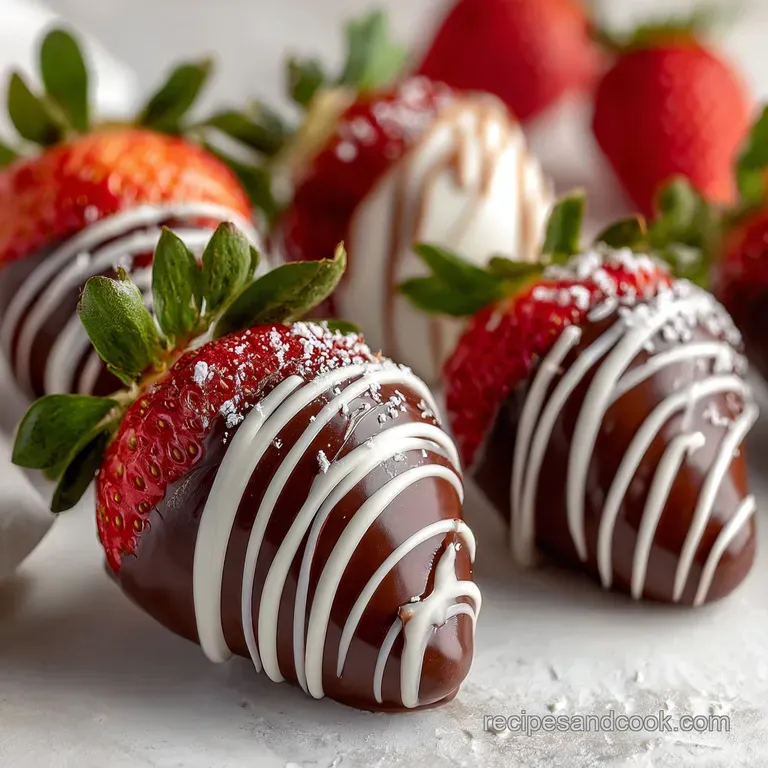
Whether you are following a dark chocolate covered strawberries recipe for a gift or just want to treat yourself, these techniques will guarantee sweet success. Trust me, once you see how that white chocolate drizzle hits the dark base, you will never go back to store-bought.
Scientific Principles Behind a Shattering Chocolate Shell
Crystal Stabilization: Tempering chocolate involves aligning cocoa butter crystals into a stable "Form V" structure, which provides that characteristic snap and high gloss finish.
Surface Tension: Moisture on the berry acts as a repellent to the fats in chocolate, so even a microscopic layer of water will prevent the coating from adhering properly.
Lipid Thinning: Adding a small amount of coconut oil lowers the viscosity of the melted chocolate, allowing for a thinner, more even coating that sets with a smoother mouthfeel.
Hygroscopic Migration: Sugar in the fruit draws moisture outward through osmosis, which is why keeping the berries at a stable room temperature before dipping is vital to prevent condensation.
| Method | Heat Source | Texture Outcome | Best For |
|---|---|---|---|
| Stovetop (Double Boiler) | Gentle Steam | Glossy and silky | Total control and large batches |
| Oven (Warm Setting) | Radiant Heat | Matte and thick | Hands off melting (high burn risk) |
| Microwave (Bursts) | Friction | Variable | Small batches or quick fixes |
Choosing the right heat source is the first step in ensuring your chocolate does not seize. While many modern kitchens rely on the microwave, I find that a stovetop double boiler provides a level of precision that prevents the cocoa solids from graining. If you are curious about other chocolate techniques, you might find my Fudge Recipe helpful for understanding how different fats interact with sugar and cocoa.
Strategic Component Analysis for Glossy Results
| Ingredient | Science Role | Pro Secret |
|---|---|---|
| 8 oz Dark Chocolate | Structural Base | Use a bar with at least 60% cocoa for a firmer set and better snap. |
| 1 tsp Coconut Oil | Viscosity Modifier | Refined oil ensures the chocolate flows smoothly without adding a tropical scent. |
| 1 lb Strawberries | Moisture Carrier | Choose berries with long green stems to act as natural handles during the dip. |
Using the right chocolate is the foundation of this whole project. When people ask what kind of chocolate for chocolate covered strawberries is best, I always point them toward high-quality bars rather than chips.
Chips often contain stabilizers that prevent them from melting into that velvety pool we need for a clean dip.
Essential Components and Smart Substitutions
The beauty of this BEST Chocolate Covered Strawberries recipe lies in its simplicity, but every ingredient must be handled with care. We are using a specific ratio of fats to ensure the coating is neither too brittle nor too soft.
- 1 lb fresh strawberries: Look for firm, bright red fruit without soft spots. Why this? Firm berries hold their shape better when submerged in warm chocolate.
- Substitute: Large blackberries or orange segments (pattied very dry).
- 8 oz dark chocolate, finely chopped: high-quality baking bars work best. Why this? Finely chopping ensures even melting and prevents hot spots that burn the cocoa.
- Substitute: Semi sweet chocolate chips (add an extra 1/2 tsp coconut oil).
- 1 tsp refined coconut oil: This is the secret to that professional sheen. Why this? It thins the chocolate just enough to let excess drip off easily.
- Substitute: Food grade cocoa butter or a tiny sliver of shortening.
- 2 oz white chocolate: For the high contrast decorative drizzle. Why this? White chocolate contains no cocoa solids, making it melt faster and flow easily.
- Substitute: Melted peanut butter or salted caramel sauce.
- 1/4 cup crushed pistachios: Adds a vibrant green color and a salty crunch. Why this? The earthy green provides a stunning color balance against the dark shell.
- Substitute: Toasted almond slivers or crushed freeze dried raspberries.
- 1 tsp flaky sea salt: To cut through the richness of the dark chocolate. Why this? Salt enhances the berry's natural sweetness through flavor contrast.
- Substitute: Granulated sugar mixed with a pinch of cinnamon.
Tools Required for Professional Results
You do not need a professional kitchen to make this BEST Chocolate Covered Strawberries recipe, but a few specific tools will make the process much smoother. First, a small glass or stainless steel bowl that fits snugly over a saucepan is essential for your double boiler.
You want a bowl that is deep rather than wide, as this makes it easier to submerge the berries fully without needing a massive amount of chocolate.
A parchment lined baking sheet is non negotiable for the setting phase. Avoid wax paper if possible, as it can sometimes stick to the chocolate foot. You will also want a small piping bag or even just a plastic sandwich bag with the corner snipped off for the white chocolate drizzle.
Having these ready before you start melting is the key to a stress off experience.
Chef Tip: Freeze your baking sheet for 10 minutes before placing the dipped berries on it. This helps the "chocolate foot" (that little pool at the bottom) set instantly, keeping the shape of the berry round and tidy.
The step-by-step Coating Process
- Wash and dry the berries. Rinse 1 lb strawberries under cold water. Note: Do this at least 2 hours before dipping to ensure they are 100% dry.
- Prep the fruit canvas. Pat each berry with a paper towel, paying close attention to the area under the green leaves. Check that no moisture remains.
- Set up the double boiler. Fill a small pot with 1 inch of water and bring to a simmer. Place a dry bowl on top, ensuring the bottom does not touch the water.
- Master the melt. Add 8 oz dark chocolate and 1 tsp coconut oil to the bowl. Stir constantly with a silicone spatula until the chocolate is velvety and smooth.
- Check the temperature. Remove the bowl from the heat when the chocolate hits approximately 110°F. Note: If it gets too hot, it will lose its shine.
- Execute the dip. Hold a berry by the stem and submerge it into the chocolate. Rotate it slowly until coated almost to the leaves.
- Remove excess. Lift the berry and gently shake it or tap your wrist to let the extra chocolate drip back into the bowl.
- Place on parchment. Lay the berry on your chilled, parchment lined sheet. Wait for it to grip the paper.
- Add the accents. While the dark chocolate is still tacky, sprinkle 1/4 cup crushed pistachios and 1 tsp sea salt over the top.
- Final drizzle. Melt 2 oz white chocolate and drizzle it in a zig zag motion across the berries until they look bakery worthy.
Fixing Common Dipping Hurdles and Mistakes
Making chocolate covered strawberries with coconut oil is usually a breeze, but chocolate can be temperamental. If your chocolate starts to look thick and dull, it has likely started to cool too much. You can simply place it back over the steaming water for 30 seconds to loosen it up. But what about the sogginess?
That usually happens when the berries are taken straight from a cold fridge into a warm room, causing condensation.
Mastering the Moisture Barrier
If you find your berries are "weeping" after they set, it is almost always because the fruit was too cold when dipped. The temperature difference creates a layer of steam inside the shell. Always let your fruit sit on the counter for at least an hour before you start.
This allows the internal temperature to stabilize, ensuring a better bond between the skin and the coating.
Eliminating the Chocolate Foot
That annoying pool of chocolate that collects at the bottom of the berry is called a "foot." To minimize this, once you dip the berry, scrape the bottom very gently against the edge of the bowl before placing it on the parchment. This removes the "tail" of chocolate that usually causes the pooling.
| Problem | Root Cause | Solution |
|---|---|---|
| Chocolate Seizing | Water droplets in bowl | Keep all tools bone dry; even one drop of water ruins the batch. |
| Sweating Berries | Temperature shock | Let berries reach room temperature before dipping. |
| Dull/Grey Shell | Overheating | Never let the chocolate exceed 120°F; use low, indirect heat. |
Common Mistakes Checklist
- ✓ Never cover the berries with plastic wrap while they set (it traps moisture).
- ✓ Avoid using frozen strawberries; they will turn to mush as they thaw inside the shell.
- ✓ Ensure your bowl is completely dry before adding the chopped chocolate.
- ✓ Don't skip the coconut oil; it provides the necessary elasticity for a clean bite.
- ✓ Allow the berries to set at room temperature rather than the fridge if possible.
Personalized Flavor and Texture Enhancements
Once you have mastered the basics of how to keep chocolate covered strawberries from sweating, you can start playing with the aesthetics. For a stunning color balance, I recommend focusing on three specific accents: the creamy white of the drizzle, the earthy green of pistachios, and the crystalline sparkle of sea salt.
These don't just add flavor; they create a visual "pop" that makes the berries look professional.
If you are feeling adventurous, you can try different toppings like toasted coconut or even a dusting of espresso powder for a mocha vibe. If you love that combination, you should definitely check out my Chocolate Chip Cookies recipe which uses similar principles of salt and fat to create a complex dessert profile.
- If you want a matte finish: Skip the coconut oil and use a higher percentage of cocoa solids.
- If you want a thicker shell: Let the chocolate cool slightly until it has a heavy, honey like consistency before dipping.
- If you want a "zebra" look: Dip the berry halfway in dark chocolate, let it set, then dip the other half in white chocolate.
Proportional Adjustments for Larger Batches
Scaling this recipe is fairly straightforward because the ratios are simple. If you are making these for a large party or wedding shower, you can easily double or triple the ingredients. Just keep in mind that the more chocolate you have in the bowl, the longer it will hold its heat, which is actually an advantage.
For a half batch (11 servings), use 4 oz of dark chocolate and 1/2 tsp of coconut oil. You might need to use a much smaller, narrower bowl to ensure you still have enough depth to submerge the fruit. When scaling up to 44 servings (2 lbs of berries), I recommend melting the chocolate in two separate batches.
This prevents the chocolate from sitting over the heat for too long, which can lead to it becoming "over tempered" and thick.
Myths Regarding Chocolate Enrobing
One of the biggest misconceptions is that the chocolate "seals" the juice inside the berry. In reality, the chocolate is just a coating. The berry is still a piece of fresh produce that will continue to ripen and release gas. This is why these are best eaten within 24 hours.
The shell doesn't stop the clock; it just makes the ticking sound much more delicious.
Another myth is that you need a specialized "tempering machine" for a good snap. While those machines are great for pros, a simple thermometer and a bowl over simmering water (the "seeding method" or just careful melting) work perfectly for home cooks.
You don't need fancy tech to get that bakery worthy finish; you just need patience and a gentle touch with the heat.
Maintaining Freshness and Preventing Condensation
Storing your berries correctly is the difference between a crisp treat and a sticky mess. Ideally, you should store them in a cool, dry place in a single layer. If you must refrigerate them because your kitchen is very warm, place them in a container lined with paper towels.
The towels will act as a sponge for any condensation that forms as the air cools.
Storage: Best eaten the same day. Can be kept in the fridge for up to 24 hours, but expect some minor "sweating" on the surface. Zero Waste: If you have leftover melted chocolate, don't throw it away!
Stir in some nuts or dried fruit, spread it on parchment, and let it set to make a quick chocolate bark. You can also save the strawberry scraps (the leafy tops) to infuse into a simple syrup for cocktails or lemonade. Nothing in this kitchen goes to waste if we can help it.
Mastering the Art of High End Presentation
Presentation is all about contrast and intent. When you apply your white chocolate drizzle, don't be afraid of the "mess." Move your hand quickly and confidently across the tray. The most professional looking berries have thin, energetic lines rather than thick, clumpy ones.
Adding the pistachios and salt while the dark chocolate is still "tacky" (meaning it isn't wet but hasn't fully hardened) ensures the toppings stay put without falling off when you take a bite.
Think about the plate you are serving them on. A plain white platter makes the dark chocolate and green pistachios stand out beautifully. For an even more "presentation" focused look, you can place each berry in a small gold or white cupcake liner.
This makes them easy to grab at a party and prevents any stray chocolate from marking up your serving dish. It is these little details that turn a simple fruit snack into a showstopping dessert.
If you have a few extra berries that didn't turn out quite right, you can chop them up and serve them over a scoop of vanilla bean ice cream. The combination of the cold cream and the shards of chocolate covered fruit is basically a deconstructed version of this recipe that tastes just as good.
Whether they are on a fancy platter or in a bowl, the focus should always be on the quality of the chocolate and the freshness of the fruit.

Recipe FAQs
What is the secret to chocolate covered strawberries?
Dryness and proper temperature. Ensure strawberries are completely dry before dipping, as moisture causes chocolate to seize or slide off. Also, avoid drastic temperature changes for the berries.
What kind of chocolate is best for chocolate covered strawberries?
high-quality baking bars. Look for chocolate with at least 60% cocoa content; these melt smoother and provide a better snap than chocolate chips, which often contain stabilizers.
Should strawberries be warm or cold before dipping in chocolate?
Room temperature. Strawberries should be at room temperature, not cold from the fridge, to prevent condensation from forming on their surface, which can ruin the chocolate coating.
How to make the best chocolate coated strawberries?
Prep berries thoroughly and melt chocolate gently. Wash, dry completely, and let strawberries come to room temperature. Melt high-quality chocolate using a double boiler or microwave on low power, stirring until smooth and glossy. Dip berries, let excess drip, and set on parchment paper.
How do I get a smooth, glossy chocolate coating?
Use refined coconut oil and don't overheat the chocolate. Adding about 1 teaspoon of refined coconut oil per 8 ounces of chocolate thins it for a smoother finish. Melt chocolate slowly and avoid exceeding 110°F to maintain its sheen.
Why is my chocolate coating sliding off the strawberries?
The berries were too cold or wet. This happens when condensation forms on cold fruit, creating a barrier. Ensure berries are completely dry and have reached room temperature before dipping.
Can I use chocolate chips instead of baking bars?
Yes, but it's not ideal. Chocolate chips contain stabilizers that can affect melting and texture, potentially leading to a duller finish. If you must use them, you might need slightly more coconut oil and stir constantly to achieve a smooth consistency.
Chocolate Covered Strawberries

Ingredients:
Instructions:
Nutrition Facts:
| Calories | 85 kcal |
|---|---|
| Protein | 1.1 g |
| Fat | 5.0 g |
| Carbs | 9.7 g |
| Fiber | 1.4 g |
| Sugar | 6.8 g |
| Sodium | 48 mg |
