Chicken Enchilada Casserole: Creamy and Layered
- Time: Active 15 minutes, Passive 25 minutes, Total 40 minutes
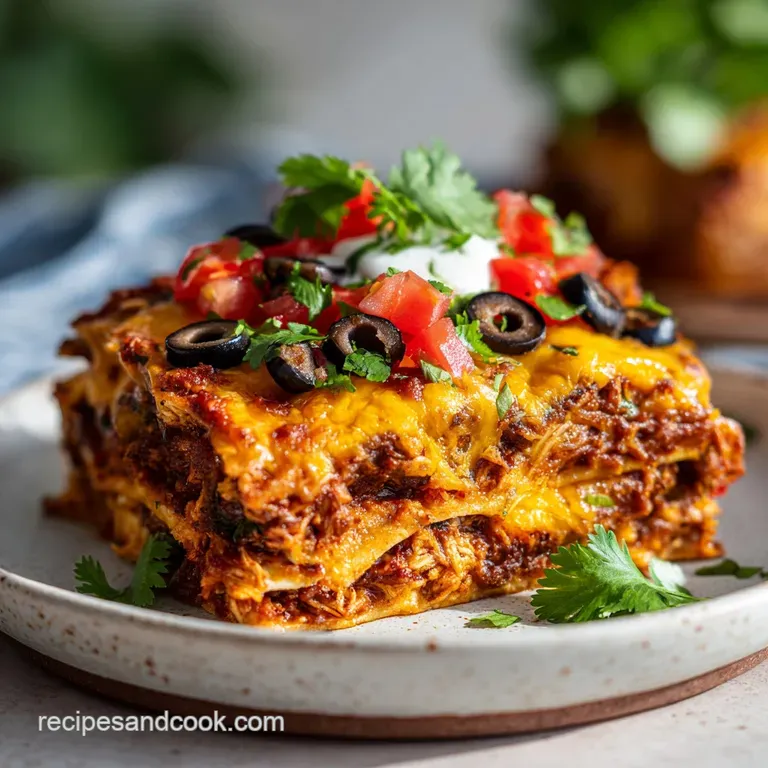
- Flavor/Texture Hook: Silky sour cream sauce meets slightly charred, structural corn tortillas.
- Perfect for: Busy weeknights, family gatherings, or casual potluck dinners.
- Pioneer Woman Chicken Enchilada Casserole Recipe
- Mechanics of a Sturdy Casserole
- Analyzing Key Flavor Components
- Selecting Quality Elements and Substitutes
- Minimal Tools for Success
- Step-by-Step Casserole Construction
- Avoiding Common Cooking Pitfalls
- Scaling for Different Crowds
- Storing and Repurposing Leftovers
- Vibrant Ways to Serve
- Myths About Enchilada Casseroles
- Recipe FAQs
- 📝 Recipe Card
Pioneer Woman Chicken Enchilada Casserole Recipe
Long before this dish became a staple in modern American kitchens, the concept of the enchilada lived in the vibrant street markets of Mexico. The word itself comes from "enchilar," which literally means to season with chili. Traditionally, a corn tortilla was simply dipped in a spicy chili sauce and eaten as a snack.
But as these flavors traveled north and settled into the heart of the American Midwest and Southwest, they underwent a beautiful transformation. The "casserole" version of this dish is a testament to the community driven spirit of home cooking, where feeding a large family with efficiency and comfort became the ultimate goal.
I remember the first time I pulled a tray of this out of the oven. The kitchen filled with that distinct, earthy aroma of toasted cumin and the sharp, bright scent of lime cutting through the heavy dairy. It’s the kind of meal that brings everyone to the table before you even have a chance to call them.
There is something deeply nostalgic about the way the Monterey Jack cheese browns in little patches on the surface, creating those chewy, salty bits that everyone fights over. It’s not just a meal; it’s a shared experience that connects us to generations of cooks who looked at a few simple ingredients and saw a way to bring people together.
This particular version honors that legacy while embracing the practical reality of our busy lives. By using pre cooked chicken and a few smart layering tricks, we can achieve a depth of flavor that usually takes hours.
We are looking for that specific balance where the tortillas still have a bit of a "bite" to them, the sauce is velvety without being greasy, and the seasoning hums in the background without overwhelming the palate.
It is a dish that feels like a warm hug on a cold Tuesday night, and I can't wait to show you how to get it right every single time.
Mechanics of a Sturdy Casserole
Understanding how these ingredients interact is the difference between a soggy mess and a structured bake. Most people think a casserole is just about throwing things in a dish, but there is actually a bit of a logic to the layering.
When we talk about this specific pioneer woman chicken enchilada casserole recipe, we are managing moisture and fat to ensure the texture stays pleasant from the first bite to the last.
- Fat Barrier: Flash frying the tortillas in oil for 5 seconds creates a thin hydrophobic layer that prevents the sour cream sauce from soaking into the corn meal and turning it into a paste.
- Acid Balance: The lime juice isn't just for flavor; it cuts through the heavy fat content of the sour cream and cheese, preventing the dish from feeling cloying or one dimensional.
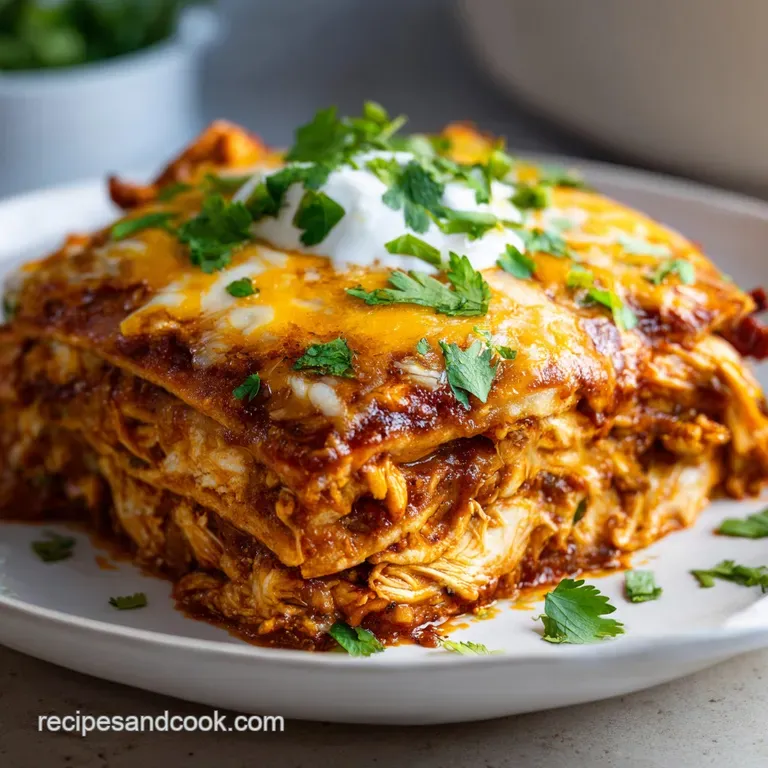
- Protein Density: Using shredded rotisserie chicken provides irregular surface areas that "grab" the sauce better than cubed meat, ensuring every bite is consistently moist.
- Moisture Control: The chicken broth thins the sour cream just enough to let it flow into the layers without making the base of the dish watery.
| Method | Time | Texture | Best For |
|---|---|---|---|
| Quick Casserole | 40 minutes | Layered, soft, and creamy | Busy weeknights and families |
| Traditional Rolled | 1 hour 15 mins | Individual portions, firm | Formal dinners or small groups |
| Slow Cooker | 4 hours | Shredded, very soft, stew like | Meal prep and hands off days |
Choosing the right approach depends on your schedule. The casserole method we are using here is the sweet spot because it gives you the flavor of the traditional version with half the effort of rolling individual tortillas. If you find yourself craving something a bit lighter on the side, this pairs exceptionally well with a Green Bean Casserole recipe to round out the vegetable count on your table.
Analyzing Key Flavor Components
To really understand why this dish hits all the right notes, we have to look at the pillars of the recipe. We aren't just using ingredients; we are using tools to build a flavor profile that lasts.
| Ingredient | Science Role | Pro Secret |
|---|---|---|
| Sour Cream | Primary emulsifier and fat source | Use full fat only to prevent the sauce from breaking under heat |
| Corn Tortillas | Structural foundation and starch | Yellow corn provides a sturdier "backbone" than white corn |
| Monterey Jack | High moisture melting agent | Grate your own from a block for a smoother, non gritty melt |
| Green Chiles | Mild acidity and vegetal heat | Roast them in a dry pan for 2 mins before adding to deepen the flavor |
The interaction between the starch in the corn and the fats in the dairy is what creates that "clingy" sauce we all love. Without the tortillas, the sauce would just puddle at the bottom. With them, it becomes a cohesive unit.
Selecting Quality Elements and Substitutes
When you're gathering your items, remember that the quality of your chicken and cheese will dictate the final result. I always suggest a rotisserie chicken for this because the meat has already been seasoned and slow roasted, which adds a layer of savory depth you just can't get from quickly boiling a breast at home.
- Shredded rotisserie chicken (4 cups): The star of the show. Why this? Pre roasted meat has more depth and saves 30 minutes of prep time.
- Ground cumin (1 tsp): Provides the earthy, warm backbone.
- Chili powder (1 tsp): Adds color and a mild, rounded spice.
- Garlic powder (1/2 tsp): Distributes flavor more evenly than fresh minced garlic in a bake.
- Diced green chiles (8 oz): Provides the "green" flavor profile without extreme heat.
- Sour cream (2 cups): The base of our velvety sauce.
- Chicken broth (1/2 cup): Loosens the sauce so it can penetrate the layers.
- Fresh lime juice (1 tsp): The essential bright note to wake up the dairy.
- Corn tortillas (14 count): Our structural layers.
- Monterey Jack cheese (3 cups): The ultimate melter.
- Vegetable oil (1/4 cup): Necessary for the flash fry barrier.
| Original Ingredient | Substitute | Why It Works |
|---|---|---|
| Monterey Jack | Mild White Cheddar | Similar melting point. Note: Slightly sharper flavor profile than Jack. |
| Sour Cream | Greek Yogurt (full fat) | High protein and tang. Note: May curdle slightly if it boils too hard. |
| Chicken Broth | Vegetable Broth | Same liquid volume. Note: Provides a more earthy, less savory base. |
If you are looking for another way to use up that rotisserie chicken later in the week, you should definitely check out my Chicken Rice Casserole which uses a similar "shortcut" philosophy but with a completely different flavor profile. It's another one of those timeless dishes that saves me when the clock is ticking.
Minimal Tools for Success
You don't need a professional kitchen to make a world class casserole. In fact, keeping the toolset small makes the cleanup much faster, which is half the battle on a weeknight.
- 9x13 inch Casserole Dish: This is the standard size for a reason; it provides the right surface area for three distinct layers.
- Small Skillet: Used for the quick tortilla fry. A 10 inch pan is perfect so the tortillas fit comfortably.
- Tongs: Essential for flipping the tortillas in hot oil without tearing them.
- Large Mixing Bowl: For seasoning the chicken and ensuring every shred is coated.
- Whisk: To get the sour cream and broth completely smooth before layering.
Honestly, don't even bother with a food processor for the cheese if you can help it. A simple box grater works wonders and keeps the cheese from getting too warm before it hits the oven.
If the cheese gets too soft while you're prepping, it can clump together, preventing that even, golden spread across the top of the dish.
step-by-step Casserole Construction
Right then, let's crack on with the actual building. Follow these steps closely, especially the tortilla frying, because that is where the magic happens.
- Heat the oven. Set your temperature to 180°C (350°F) and ensure the rack is in the center.
- Prep the chicken. Shred the rotisserie chicken into bite sized pieces and place in a large mixing bowl.
- Season the meat. Toss the chicken with the cumin, chili powder, and garlic powder. Note: Seasoning the meat directly ensures the flavor is "inside" the dish, not just in the sauce.
- Whisk the sauce. In a medium bowl, combine sour cream, chicken broth, green chiles, and lime juice. Whisk until velvety and smooth.
- Seal the tortillas. Heat oil in a small skillet. Fry each tortilla for 5 seconds per side until they are pliable and coated but not crispy.
- Start the base. Spread a thin layer of sauce in the bottom of the 9x13 dish. Note: This prevents the bottom layer of tortillas from sticking.
- Build layer one. Lay down 1/3 of the fried tortillas, followed by 1/3 of the chicken, 1/3 of the sauce, and 1 cup of cheese.
- Repeat the process. Create two more identical layers, ending with a generous blanket of Monterey Jack on top.
- Bake the casserole. Place in the oven for 25 minutes until the cheese is bubbling and golden on the edges.
- Garnish and rest. Let the dish sit for 5 minutes before topping with cilantro, red onion, and avocado.
One mistake I once made was skipping the resting period. It’s tempting to dive in, but those 5 minutes allow the sauce to set. If you cut into it immediately, the layers might slide apart. Patience here pays off with a much better presentation and a cleaner slice.
Avoiding Common Cooking Pitfalls
Even with a reliable recipe, a few things can go sideways if you aren't paying attention. The most common issue is the "soggy bottom," which usually happens when the tortillas aren't treated properly or the sauce is too thin.
Preventing the "Soggy Bottom"
The moisture barrier is your best friend. If you skip the flash fry step, the corn tortillas will act like a sponge. They absorb the liquid from the sour cream and broth, and instead of having distinct layers, you end up with a texture similar to polenta.
It’s not "bad," but it’s not the experience we are going for.
| Problem | Root Cause | Solution |
|---|---|---|
| Sauce is breaking/oily | low-fat sour cream used | Only use full fat dairy for high temp bakes. |
| Tortillas are mushy | Skipped the flash fry | Always coat tortillas in oil to create a moisture shield. |
| Cheese is oily/not melting | Pre shredded cheese used | Hand grate your cheese to avoid the anti clumping starches. |
Mastering the Cream Balance
If your sauce feels too thick, don't just dump in more broth. Add it one tablespoon at a time. The sauce should be the consistency of a thick pancake batter. If it's too thin, it will wash the seasoning off the chicken and pool at the edges of the dish.
Common Mistakes Checklist:
- ✓ Pat the chicken dry if it seems overly moist before seasoning.
- ✓ Don't over fry the tortillas; they should be soft, not like a chip.
- ✓ Use a whisk for the sauce to ensure the green chiles are evenly distributed.
- ✓ Resist the urge to add extra broth; the chicken will release some moisture as it heats.
- ✓ Let the dish rest for at least 5 minutes to allow the starches to firm up.
Scaling for Different Crowds
If you're cooking for a smaller household or a massive block party, this recipe is incredibly forgiving when it comes to adjustments.
Scaling Down (Making it for 2-4): If you want to cut this in half, use an 8x8 inch square pan. Use half the chicken and sauce ingredients, but I usually recommend using the full amount of spices (cumin/chili powder) because small batches can sometimes taste a bit muted.
You’ll still want to do the full three layers to maintain the structural integrity. Reduce the bake time by about 5 minutes, checking for that "bubble" around the 20 minute mark.
Scaling Up (Making it for 16+): When doubling the recipe, do not try to stack it higher in one dish. Use two separate 9x13 inch pans. If you try to make a "deep dish" version, the center will stay cold while the edges burn.
For spices, use 1.5x the amount instead of a full double to avoid it becoming overwhelming. If you're using two pans in the oven at once, you may need to add 5-10 minutes to the cook time and rotate the pans halfway through to ensure even browning.
| Servings | Chicken Amount | Pan Size | Cook Time |
|---|---|---|---|
| 4 people | 2 cups | 8x8 inch | 20 minutes |
| 8 people | 4 cups | 9x13 inch | 25 minutes |
| 16 people | 8 cups | Two 9x13 inch | 35 minutes |
Storing and Repurposing Leftovers
This is one of those rare dishes that might actually taste better the next day. As it sits in the fridge, the spices have more time to infuse into the chicken, and the sauce thickens into a wonderful, creamy consistency.
- Fridge
- Store in an airtight container for up to 4 days.
- Freezer
- You can freeze the baked casserole for up to 3 months. Wrap it tightly in foil and then plastic wrap to prevent freezer burn.
- Reheating
- The best way to reheat a slice is in the oven at 150°C (300°F) covered with foil. This prevents the cheese from getting rubbery while warming the center. If using a microwave, add a tiny splash of water to the plate to keep the tortillas from drying out.
Zero Waste Tips: If you have leftover filling that didn't fit in the dish, don't throw it out! It makes an incredible topping for a baked potato or a filling for a quick morning omelet.
Any leftover corn tortillas that have gone a bit stale are perfect for making homemade chips; just cut them into triangles and fry them up in the leftover oil from your flash fry step. Even the liquid from the canned chiles can be whisked into a vinaigrette for a side salad to add a subtle, smoky kick.
Vibrant Ways to Serve
Presentation is where you can really let your personality shine. While the casserole is a humble, rustic dish, the toppings can make it look like a restaurant quality meal.
I love the contrast of a hot, bubbling bake with cold, crisp toppings. The red onion provides a necessary "crunch" that offsets the softness of the casserole. The avocado adds a buttery texture that mirrors the sour cream sauce but with a fresh, vegetal twist.
If you want to get fancy, a drizzle of "crema" (a thinner, saltier version of sour cream) in a zigzag pattern across the top makes it look stunning.
- The Fresh Finish
- Heavy on the cilantro and lime wedges on the side for squeezing.
- The Heat Seeker
- Add sliced fresh jalapeños and a dash of hot sauce after baking.
- The Textural Contrast
- Sprinkle crushed tortilla chips over the top in the last 5 minutes of baking for an extra shatter crisp layer.
Myths About Enchilada Casseroles
There are a few misconceptions floating around about this style of cooking that I'd love to clear up.
Myth 1: Flour tortillas are a good substitute. Actually, flour tortillas tend to turn into a gummy, doughy layer when baked with this much sauce. Corn tortillas are traditional for a reason they have the structural fiber to hold up under moisture.
If you must use flour, be prepared for a much softer, almost "lasagna like" texture.
Myth 2: Pre shredded cheese is "just as good." Those bags of shredded cheese are coated in potato starch or cellulose to keep the pieces from sticking together in the bag. While convenient, that coating prevents the cheese from melting into a cohesive, gooey blanket.
It often results in a "greasy" top rather than a "melty" one. Trust me, spending two minutes with a grater is the single best thing you can do for your casserole.
Myth 3: You have to make your own sauce from scratch for it to be "authentic." Authenticity is about flavor and soul, not just labor. Ree Drummond's approach, and this recipe, prove that using high-quality sour cream and canned green chiles creates a profile that is incredibly consistent and delicious.
The "shortcut" isn't a sacrifice; it's a strategic choice to focus on the textures and the balance of the dish.

Recipe FAQs
What are the most common mistakes when making this enchilada casserole?
Skipping the flash fry step is the primary error. Quickly frying your corn tortillas in vegetable oil creates a moisture barrier that prevents them from turning into mush when layered with the creamy sauce.
How to avoid soggy tortillas in the casserole?
Flash fry each tortilla for exactly 5 seconds per side. This simple technique ensures the corn holds its structure while baking, preventing the texture from becoming waterlogged.
Can I make this ahead of time for a quicker dinner?
Yes, you can assemble the dish and refrigerate it before baking. If you enjoyed learning how to layer flavors effectively here, try applying that same structural assembly logic to our Crockpot Italian Chicken for another easy meal.
Is it possible to use flour tortillas instead of corn?
No, corn tortillas are essential for this recipe. Flour tortillas tend to dissolve and become gummy under the weight of the sour cream sauce, whereas corn tortillas maintain their integrity.
Why should I toss the chicken with seasonings before adding the sauce?
Directly seasoning the meat ensures consistent flavor in every bite. By coating the chicken with cumin, chili powder, and garlic powder first, you infuse the protein rather than just flavoring the exterior sauce.
How to achieve the perfect golden cheese topping?
Bake the casserole for the full 25 minutes at 350°F. This timing allows the Monterey Jack cheese to melt thoroughly and develop a bubbly, golden brown edge without burning the cream based sauce underneath.
How to properly store leftover casserole?
Keep leftovers in an airtight container for up to 4 days in the refrigerator. When you are ready to eat again, reheat your portion in the oven at 300°F covered with foil to preserve the moisture in the chicken.
Chicken Enchilada Casserole

Ingredients:
Instructions:
Nutrition Facts:
| Calories | 542 kcal |
|---|---|
| Protein | 33.8 g |
| Fat | 34.2 g |
| Carbs | 24.5 g |
| Fiber | 3.2 g |
| Sugar | 2.1 g |
| Sodium | 685 mg |
