The Best Sugar Cookie Frosting Recipe: Creamy and Firm

- Time: Active 5 minutes, Passive 0 minutes, Total 5 minutes
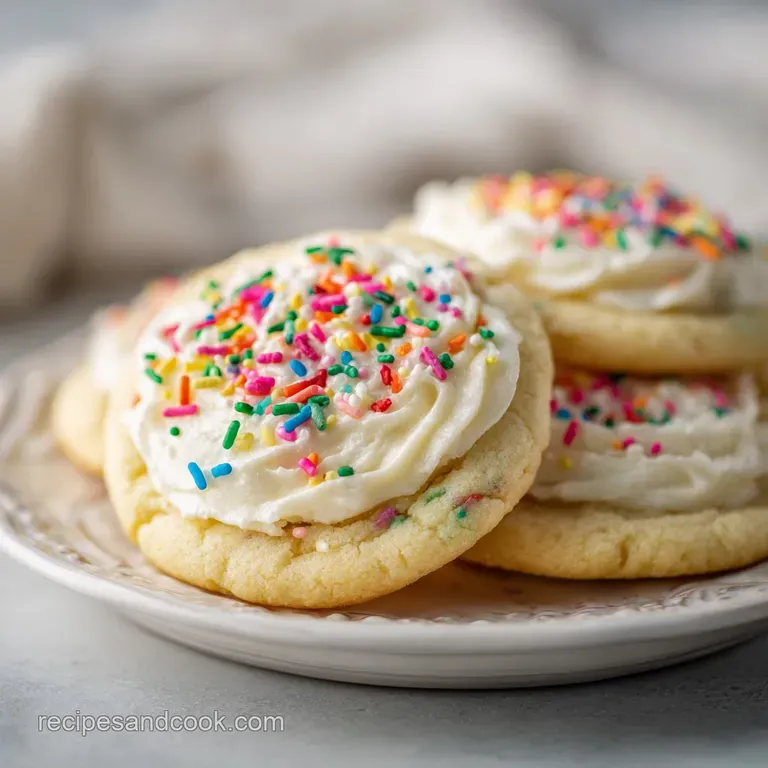
- Flavor/Texture Hook: Velvety smooth with a high shine finish
- Perfect for: Holiday decorating, gift boxes, and intricate designs
- Mastering The Best Sugar Cookie Frosting Recipe
- Why This Works
- The Architecture of the Icing
- Gathering Your Essentials
- Essential Tools for Smooth Icing
- Detailed Step-by-Step Instructions
- Pro Tips for Perfect Finishes
- Preventing Common Baking Errors
- Scaling Your Icing Production
- Creative Flavor and Color Ideas
- Proper Storage and Handling
- Beautiful Ways to Serve Cookies
- Debunking Cookie Frosting Myths
- Recipe FAQs
- 📝 Recipe Card
Mastering The Best Sugar Cookie Frosting Recipe
Forget everything you know about having to choose between a rock hard royal icing or a smudgy, messy buttercream. Most home cooks believe that if you want those beautiful, crisp edges and a surface that doesn't ruin when you stack them in a tin, you have to sacrifice flavor for the sake of structural integrity.
I used to think the same thing until a frantic Christmas Eve bake off where I ran out of egg whites and had to get creative with what was in the fridge.
What I discovered is that you don't need a degree in chemistry to achieve a smudge proof finish that still has a rich, buttery mouthfeel. This specific recipe creates a hybrid texture a protective outer skin that "shatters" slightly when bitten, revealing a soft, vanilla flecked center.
It is quite literally the best sugar cookie frosting recipe for anyone who wants their treats to look professional without tasting like sweet cardboard.
We’re going to walk through the exact techniques that transform a few pantry staples into a showstopping glaze. We aren't just mixing sugar and water here; we are building a stable emulsion that holds its shape and reflects light like a polished stone. By the time you're done, your cookies will have that coveted bakery shine and a flavor profile that actually complements your Sugar Cookie Cutout Recipe instead of just masking it with pure sugar.
Why This Works
- Hybrid Structural Stability: The combination of softened butter and corn syrup creates a flexible lattice that sets firm but doesn't become brittle or chalky.
- Light Reflectivity: Corn syrup acts as a natural humectant that interferes with sugar crystallization, giving the icing its signature high gloss sheen.
- Flavor Depth: A pinch of fine sea salt cuts through the high sugar content, while the heavy cream adds a dairy rich "velvety" finish that milk simply cannot provide.
- Controlled Viscosity: Using a paddle attachment on low speed prevents the incorporation of too many air bubbles, ensuring a smooth, glass like surface.
| Mixing Method | Total Time | Final Texture | Best For |
|---|---|---|---|
| Stand Mixer | 5 minutes | Smooth, dense, professional | Intricate piping and flooding |
| Hand Mixer | 7 minutes | Slightly airier, light | Fast home batches for kids |
| Manual Whisk | 10 minutes | Slightly grainy, rustic | Simple spreading with a knife |
Choosing the right method depends entirely on how much precision you need for your final design. If you are going for those razor sharp lines and a mirror finish, the stand mixer with a paddle attachment is your absolute best friend.
It provides consistent torque that incorporates the butter into the sugar without whipping in the tiny air pockets that cause "pitting" later on.
For those who want a softer, more casual look, a hand mixer works perfectly fine, though you'll need to keep a close eye on the speed to avoid over aerating the base. Honestly, don't even bother with a manual whisk unless you're just looking for a quick glaze to throw on some warm cookies for a snack it's nearly impossible to get the butter fully emulsified by hand.
The Architecture of the Icing
| Ingredient | Science Role | Pro Secret |
|---|---|---|
| Powdered Sugar | Primary Bulk | Sift it twice to ensure a "silk" texture without any lumps. |
| Unsalted Butter | Fat Emulsion | Use "pliable" butter (65°F) so it integrates without melting. |
| Light Corn Syrup | Shine Agent | This is the secret to a smudge proof finish that stays glossy. |
| Heavy Cream | Liquid Medium | Higher fat content stabilizes the frosting better than 2% milk. |
Gathering Your Essentials
- 4 cups powdered sugar (500g): Make sure it is sifted. I cannot stress this enough; even the most expensive brands have clumps that will clog your piping tips.
- 1/2 cup unsalted butter (113g): Softened to room temperature. It should give slightly when pressed but not look greasy. Why this? Provides the creamy mouthfeel that separates this from plain royal icing.
- 2 tablespoons light corn syrup: This is your "insurance policy" for shine and a smooth set. Why this? It prevents the sugar from recrystallizing into a grainy mess.
- 4 tablespoons heavy cream (approx. 60g): You might not use all of it at once, so keep it handy. Why this? The fat creates a more stable, opaque finish.
- 1 teaspoon pure vanilla extract: Always use the real stuff. Clear vanilla is okay if you want a stark white color, but the flavor is never quite the same.
- 1 pinch fine sea salt: To balance the sweetness.
- Gel food coloring: Liquid coloring will change the consistency of your icing too much.
| Original Ingredient | Substitute | Why It Works |
|---|---|---|
| Heavy Cream | Whole Milk | Thinner consistency; use 25% less to avoid a runny mess. |
| Light Corn Syrup | Agave Nectar | Provides shine but adds a slightly golden tint to the white. |
| Unsalted Butter | Vegetable Shortening | Makes the icing pure white and shelf stable, but lacks flavor. |
If you find yourself out of heavy cream, don't panic. You can use milk, but you need to be very careful with your measurements. Milk has a higher water to fat ratio, meaning it will dissolve the sugar much faster, potentially leaving you with a watery glaze rather than a structured frosting.
Another trick I've learned is that if you want a truly professional flavor profile, you can swap half of the vanilla for almond extract. This gives it that "wedding cake" aroma that everyone loves. Just be cautious almond is powerful, so start with just a quarter teaspoon.
Essential Tools for Smooth Icing
To get that bakery worthy result, a stand mixer fitted with a paddle attachment is the gold standard. Unlike a whisk, which incorporates air to make things fluffy, the paddle gently mashes the ingredients together, which is exactly what we want for a dense, pourable consistency.
You'll also want a set of fine mesh sifters; even if your sugar looks fine, it likely has compacted during storage.
For the actual decorating, I highly recommend disposable piping bags and a few standard circular tips (Size 2 and 4 are my favorites). If you aren't ready to invest in tips yet, you can use a high-quality freezer bag with a tiny corner snipped off, but the control won't be as precise.
Finally,, a scribe tool or a simple toothpick is essential for popping those pesky air bubbles that rise to the surface as the icing settles.
Detailed step-by-step Instructions
- Sift sugar. Pour the 4 cups of powdered sugar through a fine mesh sieve into a large mixing bowl until it looks like light, powdery snow. Note: This prevents "plugging" your piping tips later.
- Combine butter. Add the 1/2 cup of softened butter and beat on the lowest speed using the paddle attachment until the mixture looks like fine breadcrumbs.
- Add liquids. Pour in the 2 tablespoons of light corn syrup, 1 teaspoon vanilla extract, sea salt, and exactly 3 tablespoons of heavy cream.
- Whip phase. Increase the mixer speed to medium high and whip for exactly 2 minutes until the frosting is bright white and velvety.
- Check flow. Stop the mixer and lift the paddle; the icing should fall in a thick ribbon that disappears back into the bowl within 5 to 8 seconds.
- Adjust thickness. If it is too stiff, add the remaining 1 tablespoon of heavy cream one teaspoon at a time until it reaches a smooth, flowing consistency.
- Tint colors. Divide the icing into small bowls and add your gel food coloring until the desired vibrancy is reached.
- Eliminate air. Tap the bowls firmly on the counter three or four times to force air bubbles to the surface, then pop them with a toothpick.
- Apply base. Pipe an outline around your cookie and immediately fill the center until the surface is completely flooded and smooth.
- Set time. Allow the cookies to sit undisturbed for at least 4 hours (or overnight) until the surface is matte and firm to the touch.
Pro Tips for Perfect Finishes
For a Smudge Proof Matte Finish
The key to getting that perfect, non sticky finish is patience. While the icing feels dry to the touch within an hour, the internal structure takes much longer to crystallize. If you live in a humid environment, I actually recommend setting the cookies near a small desk fan.
The constant airflow helps the moisture evaporate evenly, preventing that dull, "pitted" look that happens when icing dries too slowly.
To Prevent Color Bleeding
Nothing ruins a beautiful set of cookies faster than red icing bleeding into white. This usually happens because the icing is too thin or the room is too warm. To prevent this, make sure your "outline" icing is slightly thicker than your "flood" icing.
Also, let your base color set for at least 45 minutes before piping a high contrast color on top. This creates a physical barrier that prevents the dyes from migrating.
For Instant Consistency Control
If you find yourself constantly adding sugar or cream to fix the "flow," try the 10 second rule. Drag a knife through the center of your frosting bowl. If the line takes 10 seconds to disappear, it's perfect for flooding. If it disappears instantly, it's too thin add a tablespoon of sugar.
If it stays forever, it's too thick add a drop of cream. This simple test is a total lifesaver during big holiday batches.
Preventing Common Baking Errors
Why Your Frosting Is Runny
If your icing is sliding off the edge of the cookie like a melting glacier, you likely over measured the liquid or didn't sift the sugar properly. Too much liquid breaks the surface tension required to hold the "rim" of the icing. To fix this, simply beat in another 1/4 cup of powdered sugar.
Don't just stir it in; actually beat it for 30 seconds to ensure it fully integrates with the fat from the butter.
Dealing with Air Bubbles
Air bubbles are the enemy of a mirror smooth cookie. These usually happen if you whip the frosting on high speed for too long or if you use a whisk attachment. If you see tiny craters forming as the icing dries, it means the air is escaping.
The best fix is to let the icing sit in the piping bag for 10 minutes before you start. Gravity will naturally pull the bubbles toward the top of the bag where they won't ruin your design.
| Problem | Root Cause | Solution |
|---|---|---|
| Grainy texture | Un sifted sugar or cold butter | Sift sugar and ensure butter is 65°F before mixing. |
| Dull/Matte finish | Missing corn syrup or high humidity | Add 1 tsp extra corn syrup or use a fan to dry. |
| Yellow tint | Vanilla extract or butter color | Use clear vanilla and whip for the full 2 mins to whiten. |
Common Mistakes Checklist
- ✓ Never use cold butter directly from the fridge; it will leave tiny lumps of fat that don't take color well.
- ✓ Don't skip the sifting step, even if the bag says "pre sifted."
- ✓ Avoid liquid food colors; they break down the icing's structure and make it watery.
- ✓ Always cover your icing bowls with a damp paper towel when not in use to prevent a "crust" from forming.
- ✓ Let your cookies cool COMPLETELY (at least 2 hours) before icing, or the heat will melt the butter in the frosting.
Scaling Your Icing Production
When you need to scale this recipe down for a small batch, it's fairly straightforward. Halving the ingredients works perfectly, though you might find the mixer has a hard time reaching such a small amount of butter. In that case, I recommend using a small hand mixer and a narrow bowl to ensure everything gets properly emulsified. If you need just a tiny bit for a single tray, check out my Easy Fruit Pizza Sugar Cookie for a slightly different take on small batch decorating.
Scaling up is where things get interesting. If you are doubling or tripling the recipe for a big event, do not simply triple the salt. Increase the salt by about 50% for every double batch to avoid an overly savory taste.
Also, when working with large volumes of frosting, you'll need to work in batches when it comes to coloring. It is much easier to match the color of two smaller bowls than it is to try and mix a gallon of perfectly "Navy Blue" icing in one go.
Creative Flavor and Color Ideas
- 1. Deep Navy
- This provides a sophisticated contrast to white.
- 2. Gold Dust
- Mix a tiny bit of edible gold luster dust with lemon extract and splatter it over the dried icing.
- 3. Dusty Rose
- Add a tiny drop of brown gel to your pink to create an "antique" look.
You should add your main colors while the icing is wet, but any metallic accents or edible glitters should be added about 20 minutes into the drying process. This allows them to sit on top of the "skin" without sinking into the frosting. If you're feeling adventurous, you can even add a bit of citrus zest to the base. It pairs beautifully with the Soft Pumpkin Chocolate Chip Cookies if you want a tangy contrast to the warm spices.
The Almond Professional Profile
Many high end bakeries use a "secret" blend of extracts. Instead of just vanilla, try a ratio of 2 parts vanilla, 1 part almond, and 1 part lemon extract. This creates a complex, floral aroma that makes the cookies taste much more expensive than they actually are.
It’s a foolproof way to get people asking, "What IS that flavor?"
Proper Storage and Handling
The beauty of a butter based frosting with corn syrup is its stability. This icing will stay fresh at room temperature on the cookies for up to 3 days, provided they are in an airtight container.
If you have leftover frosting in bowls, simply press plastic wrap directly onto the surface of the icing to prevent air from hitting it. It will keep in the fridge for about a week.
When you're ready to use it again, let it come to room temperature and give it a gentle stir don't re whip it, or you'll add air bubbles.
For long term storage, you can actually freeze decorated cookies! Once the icing is completely hard (give it 24 hours), layer them between sheets of parchment paper in a heavy duty freezer bag. They’ll stay perfect for up to 3 months. To thaw, just leave them on the counter in the sealed bag.
This is crucial: don't open the bag until they are at room temperature, or condensation will form on the cookies and melt your beautiful designs.
Zero Waste Tip: If you have small amounts of different colored icing left over, don't toss them! Mix them all together. Usually, this results in a muted "concrete" grey or a dark brown.
You can use this for "shadowing" on future cookies or even use it as a base for a chocolate flavored frosting by adding a bit of cocoa powder.
Beautiful Ways to Serve Cookies
When it comes to presentation, less is often more. Instead of crowding a plate with twenty different designs, try serving them on a clean, white marble slab to highlight the glossy finish of the icing.
If you're giving them as gifts, use clear cellophane bags and tie them with a velvet ribbon that matches one of your secondary icing colors. It’s these small details that guarantee success and make your hard work look truly bakery worthy.
I also love serving these alongside a hot chocolate bar or a sharp espresso. The bitterness of the coffee perfectly offsets the sweetness of the frosting. If you’re hosting a party, you can even set out a few "naked" cookies and small bowls of this frosting so guests can try their hand at decorating.
Just make sure to give them a few toothpicks and show them the "pop the bubble" trick it's surprisingly satisfying and always a hit with both kids and adults!
Chef's Note: If you're planning on stacking these for a cookie swap, wait a full 12 hours. The icing might look dry after 2, but the "core" needs time to stabilize. If you stack too early, you'll end up with "icing glue" that ruins your hard work. Trust the process!
Debunking Cookie Frosting Myths
There is a common misconception that you need egg whites or meringue powder to get a "hard" icing that works for decorating. This simply isn't true. While royal icing is great for building gingerbread houses because it dries like cement, it often lacks the flavor and "give" that people actually want to eat.
This butter and cream based recipe provides the same visual results with a much better eating experience.
Another myth is that you can't use real butter if you want a pure white icing. While butter does have a yellow tint, the secret lies in the 2 minute whip. The mechanical action of the mixer incorporates just enough micro bubbles to refract light differently, turning that yellowish base into a bright, clean white.
If it's still looking a bit ivory for your taste, a microscopic drop of purple gel food coloring will neutralize the yellow tones and leave you with a stark white finish. It’s an old baker’s trick that works every single time!

Recipe FAQs
What frosting is best on sugar cookies?
This hybrid frosting is the superior choice. It provides the structural, stackable finish of royal icing while maintaining the rich, velvety mouthfeel of buttercream.
What kind of icing do professionals use for cookies?
Professionals use stabilized glazes that set firm. This specific recipe mirrors that professional standard by creating a high gloss, protective skin that prevents smudging during transport.
What frosting do professional bakers use?
They often use high fat, whipped emulsions. By whipping the butter and cream for exactly 2 minutes, you achieve the professional grade aeration required for a bright white, stable finish.
Is royal icing or buttercream better for sugar cookies?
Neither is better; a hybrid is best. You gain the best of both worlds with this recipe: a shell that sets hard for stacking and an interior that remains soft and flavorful.
How to achieve the perfect flooding consistency?
Add heavy cream in small increments until the frosting flows smoothly off a spoon. If you enjoyed mastering this precise consistency control here, apply the same observational method to our other glaze recipes.
How to store frosting for later use?
Keep it in an airtight container in the refrigerator. This base remains stable and ready for use for up to 3 days; simply let it come to room temperature before whipping it again to restore its texture.
Is it true that I must use egg whites for a glossy finish?
False, this is a common misconception. You achieve a professional high gloss finish using only powdered sugar, butter, and heavy cream without the need for egg whites.
Best Sugar Cookie Frosting

Ingredients:
Instructions:
Nutrition Facts:
| Calories | 128 kcal |
|---|---|
| Protein | 0.1 g |
| Fat | 4.7 g |
| Carbs | 21.9 g |
| Fiber | 0 g |
| Sugar | 21.5 g |
| Sodium | 6 mg |
