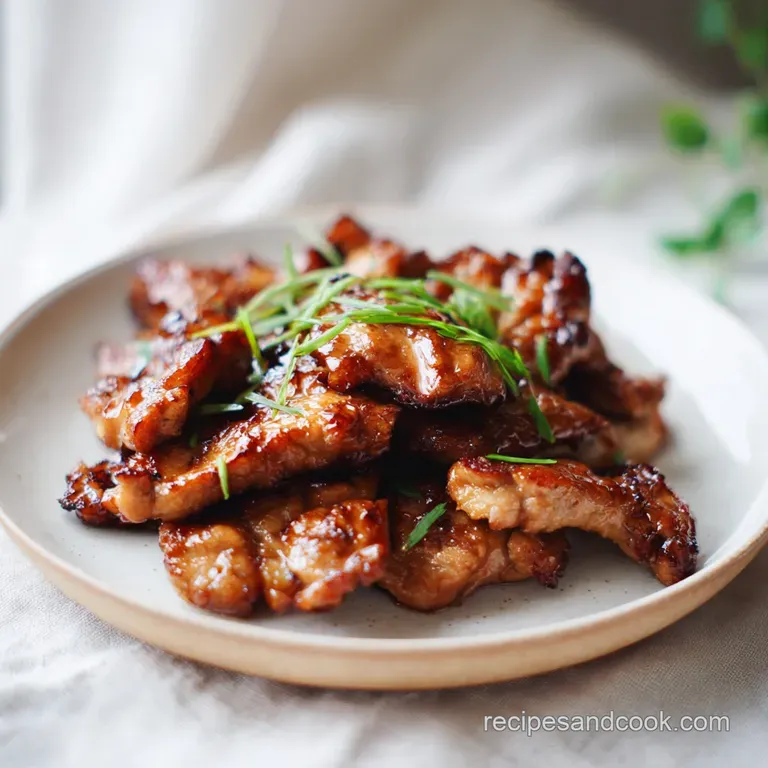
Japanese Teriyaki Chicken Thighs Recipe
- Time: Active 10 minutes, Passive 20 minutes, Total 30 minutes
- Flavor/Texture Hook: Shattering crispy skin with a velvety, mahogany glaze
- Perfect for: Adventurous home cooks craving authentic global flavors
- Master the Ultimate Crispy Teriyaki Chicken Thighs
- The Science Behind Global Glazing
- Essential Timing and Temperature Metrics
- Deep Dive into Authentic Ingredients
- The Gear for Searing Success
- Analyzing the Core Global Ingredients
- Precise Steps from Prep to Plate
- Solving Common Preparation and Cooking Hurdles
- Creative Ways to Adapt This Dish
- Guidelines for Storage and Waste Reduction
- Serving Suggestions for International Flair
- High in Sodium
- Recipe FAQs
- 📝 Recipe Card
Master the Ultimate Crispy Teriyaki Chicken Thighs
The first time I stood in a smoke filled alley in Shinjuku, the scent of caramelizing soy sauce was so thick you could almost taste it. It wasn't the cloying, sugary scent you find in bottled sauces, but something deeper, more complex, and fermented.
Watching the chef flip the chicken, I noticed how the skin didn't just brown it transformed into a lacquered, mahogany shield that crackled under the weight of his knife.
That experience completely changed how I look at Teriyaki Chicken Thighs. Most versions we see are drowned in a thick, cornstarch based syrup, but the real deal relies on the reduction of sugars and amino acids. It is a dance between the salty depth of soy and the floral, bright notes of sake and mirin.
This recipe captures that specific international soul, focusing on the high contrast textures that make Japanese cuisine so captivating.
We are aiming for a specific result here: skin that stays remarkably crisp despite being coated in sauce. It sounds like a contradiction, but with the right technique, it is entirely possible. We've moved past the basic stir fry and into the world of precision searing and reduction.
Let's get into how we make that happen in your own kitchen.
The Science Behind Global Glazing
The Maillard Sugar Synergy: When the proteins in the chicken skin meet the high heat of the pan, the Maillard reaction creates complex savory flavors while the sugars in the mirin simultaneously caramelize for sweetness.
This creates a dual layer flavor profile that single ingredient sauces simply cannot replicate.
Protein Denaturation Control: Searing the skin side down for the majority of the cooking time allows the fat to render out slowly, effectively "frying" the skin in its own lipids. This protects the delicate meat from direct heat, preventing it from becoming stringy or dry.
| Cooking Method | Total Time | Resulting Texture | Best Outcome |
|---|---|---|---|
| Stovetop Skillet | 20 minutes | Maximum skin shatter | Authentic restaurant style |
| oven-roasted | 30 minutes | Even, tender browning | Large batch meal prep |
| Air Fryer | 15 minutes | Extremely dry/crispy skin | Quick, low mess snack |
Choosing the right method depends on your equipment, but for the most vibrant results, the stovetop skillet is the undisputed champion of the Japanese kitchen.
Essential Timing and Temperature Metrics
To get this right every single time, we need to focus on a few non negotiable checkpoints. Precision is the difference between a soggy mess and a professional grade glaze.
- Weight of Chicken: 600g (about 1.3 lbs) is the sweet spot for a standard 30cm skillet. Overcrowding drops the pan temperature and causes the chicken to steam rather than sear.
- Internal Temperature: Aim for 74°C (165°F). Unlike breasts, thighs are forgiving, but pulling them at this exact moment ensures the most succulent bite.
- The Reduction Point: The sauce is ready when the bubbles transition from small and rapid to large, slow popping "lava" bubbles. This indicates the water has evaporated, leaving only concentrated flavor.
Similar to the balance required in my Orange Chicken recipe, managing the moisture in the pan is the secret to maintaining that elusive crispness.
Deep Dive into Authentic Ingredients
| Ingredient | Science Role | Pro Secret |
|---|---|---|
| Hon Mirin | Adds gloss and complex sugar | Look for "Hon" (true) mirin, not "mirin style" seasoning. |
| Sake | Tenderizes and removes odors | Use a dry sake; it breaks down tough fibers in the meat. |
| Soy Sauce | Provides the umami backbone | Use a naturally brewed soy for a cleaner, less metallic finish. |
| Skin on Thighs | Fat source and texture barrier | The skin acts as a heat shield, keeping the meat silky. |
Using high-quality ingredients is essential when the list is this short. There is nowhere for mediocre flavors to hide.
The Gear for Searing Success
You don't need a pantry full of gadgets, but two things will make your life much easier. First, a heavy bottomed skillet cast iron or stainless steel is best. These retain heat much better than thin non stick pans, which is vital for that initial sear.
If you have a cast iron pan like a Lodge, now is the time to pull it out.
Second, a splatter guard is a lifesaver. Since we are searing skin on chicken with a bit of salt and oil, there will be some activity. Keeping the oil in the pan rather than on your countertop makes the process much more enjoyable.
A pair of sturdy tongs is also better than a fork, as you don't want to pierce the skin and let those precious juices escape.
Analyzing the Core Global Ingredients
- 600g boneless, skin on chicken thighs: The star of the show. Why this? The fat in the skin provides the crispy texture and essential flavor.
- 60ml high-quality soy sauce: The salt element. Why this? Provides the deep brown color and fermented umami notes.
- 60ml Hon Mirin: The sweetness and shine. Why this? Real mirin has a complex sugar profile that creates a mirror like glaze.
- 60ml sake: The aroma and tenderizer. Why this? Alcohol helps the sauce penetrate the meat while adding a floral scent.
- 15g granulated sugar: The caramelization booster. Why this? Supplements the mirin to ensure the sauce thickens to a syrupy consistency.
- 15ml neutral oil: For the over high heat sear. Why this? Avoid olive oil; use grapeseed or canola to prevent smoking.
- 1g sea salt: To draw out moisture. Why this? A tiny pinch on the skin side helps it crisp up faster.
| Original Ingredient | Substitute | Why It Works |
|---|---|---|
| Hon Mirin | Dry Sherry + 1 tsp sugar | Similar acidity and sweetness. Note: Lacks the specific sheen of mirin. |
| Sake | Dry White Wine | Provides the necessary acidity and alcohol. |
| Granulated Sugar | Honey | Adds a floral note. Note: Honey burns faster, so watch the heat. |
Precise Steps from Prep to Plate
- Dry the chicken. Pat the 600g of chicken thighs with paper towels until the skin feels completely matte. Note: Moisture is the enemy of a good sear.
- Season the skin. Sprinkle 1g of sea salt specifically on the skin side.
- Mix the glaze. In a small bowl, whisk together 60ml soy sauce, 60ml mirin, 60ml sake, and 15g sugar.
- Heat the pan. Add 15ml neutral oil to the skillet over medium high heat until the oil shimmers and barely smokes.
- Start the sear. Place chicken skin side down in the pan. Press down lightly with tongs until you hear a consistent, high pitched sizzle.
- Render the fat. Cook for 8-10 minutes without moving the chicken until the skin is dark golden and releases easily.
- Flip and finish. Turn the chicken over and cook for 2-3 minutes to seal the bottom.
- Deglaze the pan. Wipe out excess fat with a paper towel, then pour in the sauce mixture.
- Reduce the sauce. Let the liquid bubble rapidly for 3-5 minutes until the sauce coats the back of a spoon.
- Baste the skin. Spoon the glaze over the chicken repeatedly in the last minute until the meat is lacquered and glossy.
Chef's Note: If the sauce thickens too quickly before the chicken hits 74°C, add a splash of water or sake to loosen it back up. This keeps the glaze velvety rather than tacky.
Solving Common Preparation and Cooking Hurdles
Why the Skin Is Rubbery
If your skin didn't get that "shatter" quality, it’s usually because the heat was too low or there was too much moisture in the pan. If the chicken wasn't dried properly, it steams in its own juices instead of frying.
Next time, try leaving the chicken uncovered in the fridge for an hour before cooking to air dry the skin.
Why the Sauce Is Bitter
Burnt sugar is the culprit here. Teriyaki sauce goes from perfect to scorched in about 30 seconds. If your sauce looks like it's turning black rather than a deep mahogany, pull the pan off the heat immediately. You can often save it by whisking in a tablespoon of warm water to stop the cooking process.
| Problem | Root Cause | Solution |
|---|---|---|
| Pale, soft skin | Not enough time skin side down | Increase initial sear time to at least 8 minutes. |
| Thin, watery sauce | Not enough reduction time | Simmer longer until bubbles become large and slow. |
| Dry, tough meat | Overcooking after flipping | Pull chicken at 74°C; carryover heat will finish it. |
Common Mistakes Checklist
- ✓ Never crowd the pan; use two pans or cook in batches if needed.
- ✓ Don't skip wiping out the rendered fat before adding the sauce.
- ✓ Avoid moving the chicken during the first 5 minutes of searing.
- ✓ Use a thermometer to check the thickest part of the thigh.
- ✓ Always let the meat rest for 3 minutes before slicing to keep it juicy.
Creative Ways to Adapt This Dish
If you find yourself making this often, you might want to switch things up. While the traditional version is world class, adding a 2cm piece of grated ginger or two smashed garlic cloves to the sauce adds a punchy, vibrant layer that works incredibly well. This brings it closer to the profile of a Pineapple Teriyaki Chicken recipe, which uses fruit acids to further tenderize the meat.
For those who like a bit of heat, a teaspoon of togarashi or red chili flakes stirred into the glaze at the very end provides a beautiful contrast to the sweet mirin. If you want a lower carb version, you can swap the sugar for a monk fruit sweetener, though you will lose some of that characteristic mirror like shine that real sugar provides.
Guidelines for Storage and Waste Reduction
Storage: Keep leftovers in an airtight container in the fridge for up to 3 days. To reheat, I highly recommend using a toaster oven or air fryer at 180°C for 5 minutes. This helps the skin regain some of its crispness.
Microwaving will make the skin soft, though the flavor will still be excellent.
Freezing: You can freeze the cooked chicken for up to 2 months. Defrost overnight in the fridge before reheating. Interestingly, the sauce acts as a protective barrier against freezer burn.
Zero Waste: Don't throw away any leftover glaze in the pan! It is essentially liquid gold. Pour it over roasted vegetables or use it as a base for a quick fried rice the next day.
If you have trimmed off any excess fat or skin before cooking, render those scraps down in a small pan to make a flavored oil for sautéing greens.
Serving Suggestions for International Flair
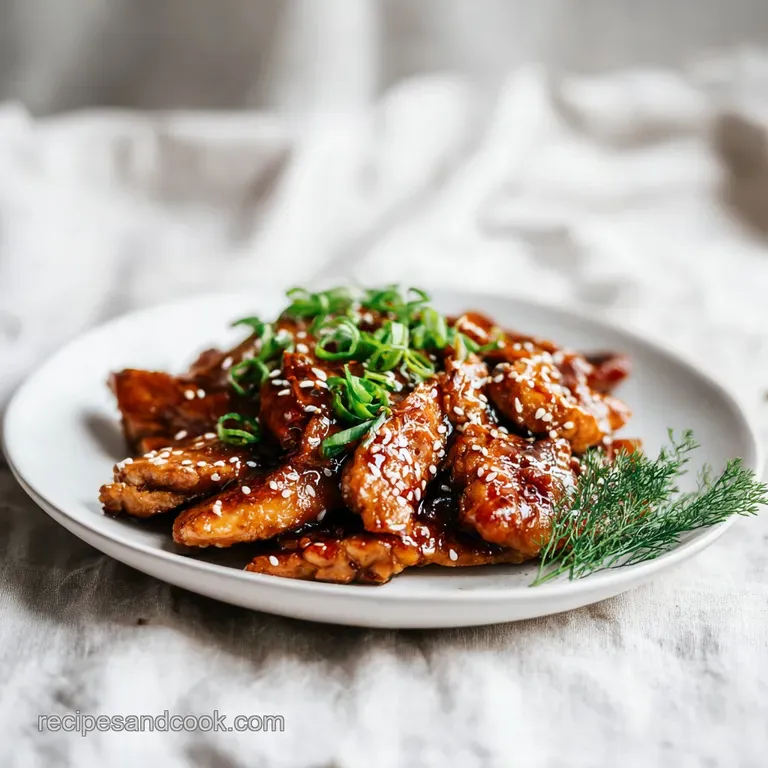
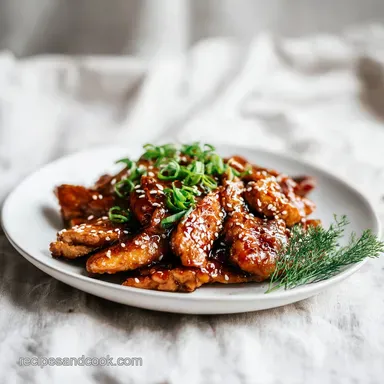
To keep things authentic, serve these Teriyaki Chicken Thighs over a bed of fluffy steamed short grain rice. The rice acts as a sponge for that incredible mahogany glaze. I love adding a side of quick pickled cucumbers or a simple cabbage slaw dressed with rice vinegar and sesame oil to provide a bright, acidic contrast to the rich meat.
If you are feeling adventurous, try serving the chicken alongside some charred scallions or shishito peppers. The smokiness from the peppers elevates the caramelized notes of the sauce perfectly.
For a final touch, a sprinkle of toasted sesame seeds and a handful of finely sliced green onions add both texture and a fresh, herbal finish that brings the whole dish to life. This recipe is a fantastic way to bring the global flavors of a Tokyo night into your own dining room.

High in Sodium
920 mg mg of sodium per serving (40% % of daily value)
The American Heart Association recommends limiting sodium intake to about 2,300mg per day for most adults.
Sodium Reduction Tips for Teriyaki Chicken Thighs
-
Low-Sodium Soy Sauce-30%
Replace regular soy sauce with a low-sodium or reduced sodium version. This swap can significantly cut down on the overall sodium content of the dish.
-
Omit Added Salt-25%
Eliminate the added sea salt entirely. The soy sauce already contributes a substantial amount of sodium, and the dish may be flavorful enough without additional salt.
-
Reduce Soy Sauce-20%
Consider reducing the amount of soy sauce by 25-50% and compensating with a little more mirin and sake to maintain liquid volume and flavor balance. This will lower the overall sodium.
-
Add Rice Vinegar-5%
Add a splash of rice vinegar, which contains no sodium. Vinegar can provide a tang that may help balance the flavor if you are reducing soy sauce.
-
Enhance with Herbs
Experiment with fresh or dried herbs like ginger, garlic, or scallions to boost the flavor profile without adding any sodium. These additions complement Asian dishes well.
Recipe FAQs
Can you use chicken thighs for teriyaki chicken?
Yes, thighs are ideal for teriyaki chicken. Their higher fat content keeps them incredibly moist during the searing and glazing process, leading to a richer flavor than breasts.
Can you use chicken thighs for Japanese curry?
Yes, absolutely. Chicken thighs are traditional in Japanese curry because they remain tender even after simmering in the thick roux. They hold their shape better than breast meat during the extended cooking time, much like the texture control needed for our Kung Pao Chicken recipe.
How long should you marinate chicken thighs in teriyaki?
Marinate for a minimum of 30 minutes, but no more than 4 hours. While the sauce flavors the meat, over marinating in acidic sauces can begin to denature the proteins, leading to a slightly mushy texture on the exterior when cooked.
How to make teriyaki chicken authentically Japanese?
Reduce a simple glaze of soy sauce, mirin, and sake until it coats the meat. Avoid using bottled sauces thickened heavily with cornstarch; the authentic method relies on the natural reduction of the sugars in the mirin for a glossy, thin glaze.
Is it necessary to sear the skin-on thighs before glazing?
Yes, searing is non-negotiable for quality. Searing skin side down for 8-10 minutes renders the fat and achieves the signature crisp skin texture. If you skip this, the skin will steam and become rubbery when the liquid is added.
What internal temperature signals the chicken is perfectly done?
Pull the thighs from the heat when they hit 74°C (165°F). Because thighs have more connective tissue than breasts, they benefit from slightly higher temperatures, but going much past 80°C will start to dry them out.
How do I prevent my teriyaki glaze from burning during reduction?
Watch for the "lava bubble" stage and reduce heat immediately when it appears. Burnt sugar tastes bitter; if the sauce starts to darken too fast, deglaze the pan with a splash of water or sake to halt the caramelization process.
Authentic Teriyaki Chicken Thighs
Ingredients:
Instructions:
Nutrition Facts:
| Calories | 368 calories |
|---|---|
| Protein | 28.1 g |
| Fat | 17.4 g |
| Carbs | 12.2 g |
| Fiber | 0 g |
| Sugar | 10.5 g |
| Sodium | 920 mg |
